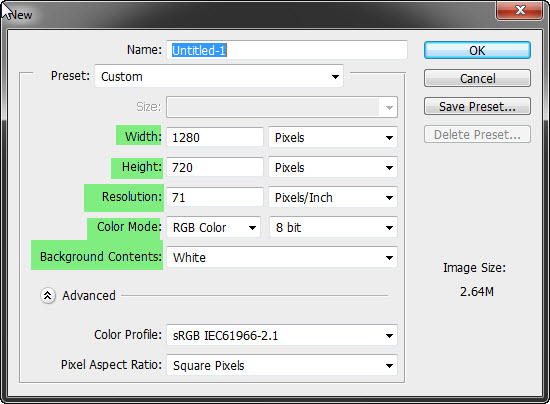
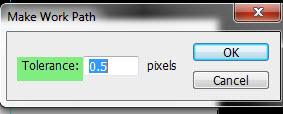
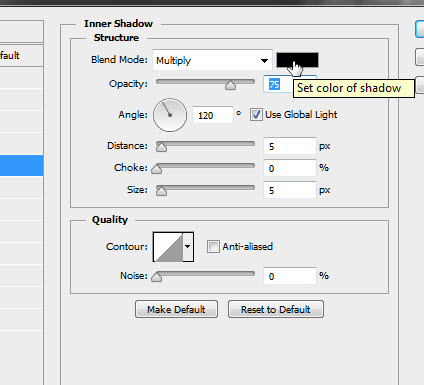
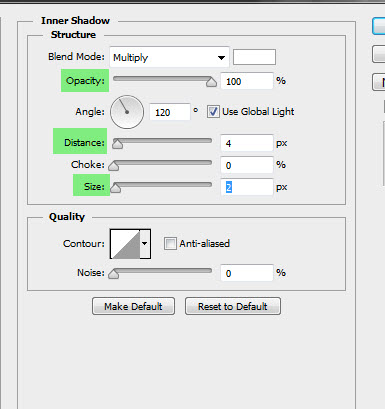
A postage stamp can be created in Photoshop for any image. It is not difficult to make and is a great effect. I will be using Photoshop CS6, but it can be done in other versions too. It takes a bit of practice though. I will show it to you step by step. There is an earlier tutorial here. But you may find it difficult to follow. Therefore I am posting a fresh tutorial.
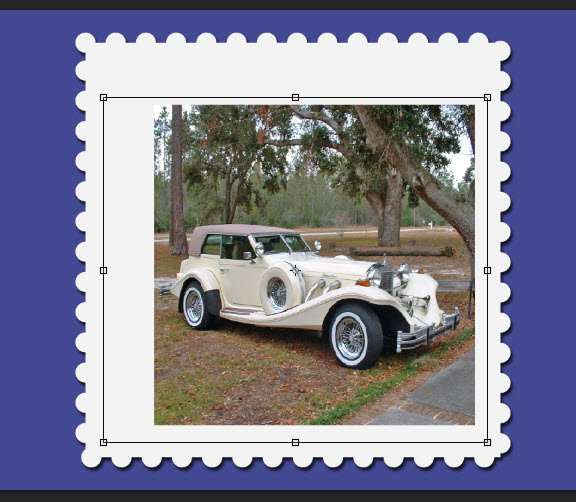
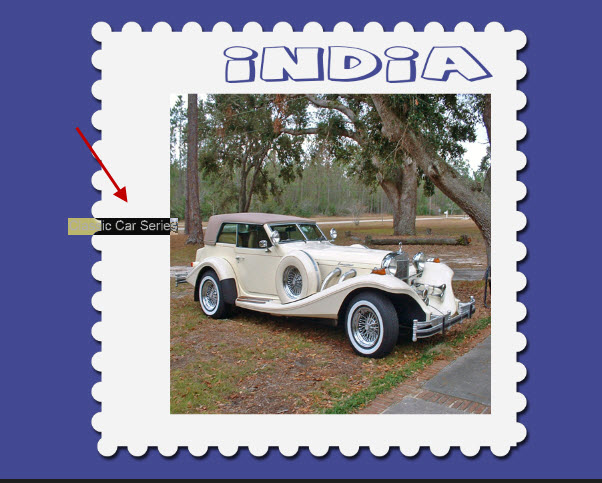
This is what I will create and so will you if you follow along.


Step 45 : Click the Rectangular Marquee Tool.

Step 46 : With the Rectangular Marquee click on the bottom right corner. Keeping SHIFT pressed drag out as shown.
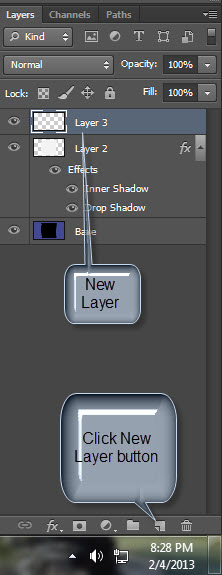
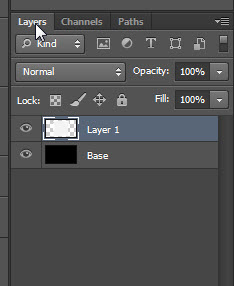
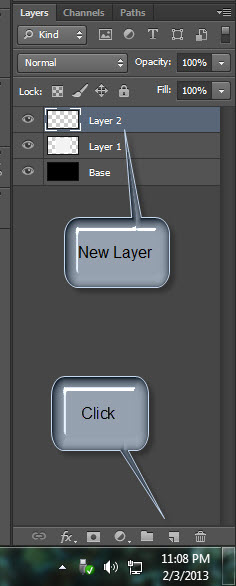
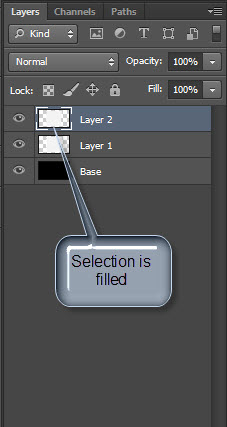
Step 47 : Click the New Layer button. A new Layer 3 forms.

Step 48 : Click the Layer Mask icon. A Layer Mask forms on Layer 3. There is a chain link between the image thumbnail and the Layer Mask.
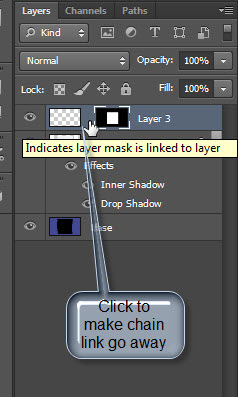
Step 49 : Click the chain link to make it go away.

I will use this stock image for the photo in the stamp. You will finds it here
It belongs to SophStock

Step 50 : Press CTRL+A (Select All), then CTRL+C (Copy).

Step 51 : Go to the Stamp image and press CTRL+V (Paste). The image is pasted into the selection.

Step 52 : Press CTRL+T. A selection appears around the image which will help to resize it.
Step 53 : Press SHIFT+ALT and drag a corner handle to resize. To enable it to fit drag the midpoints of the corner handles. Press Return to apply the transformation.

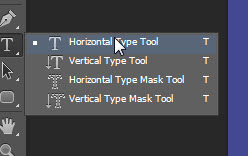
Step 54 : Click on the Type Tool.
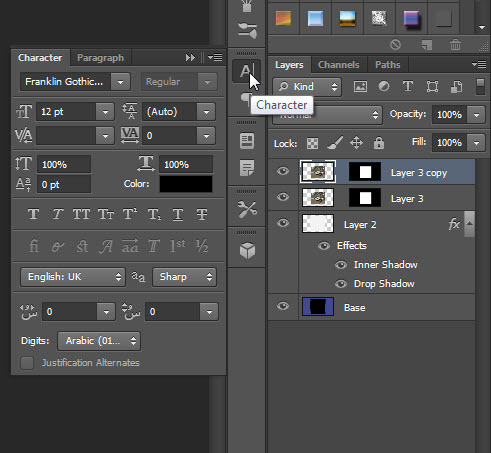
Step 55 : Click on the Character Text Box.

Step 56 : Click on Impact from the drop down of the fonts.
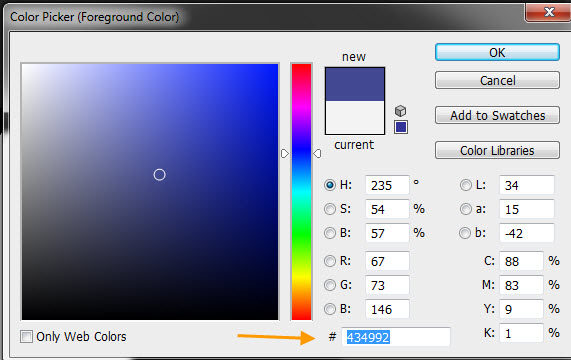
Step 57 : Click on the top panel to change the color of the Font.

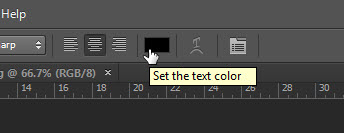
Step 58 : The Color Picker comes up. Click on the Background with the eyedropper Tool to change the color of the font. Click OK in the Color Picker.

The color of the Font has changed.
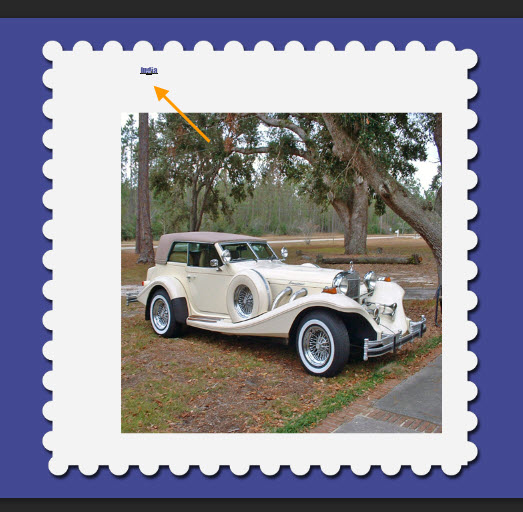
Step 59 : I have typed in India. I left the Font size at 12 which is why it looks so small.

Step 60 : Press CTRL+T for free transform. Drag a corner handle to increase the size of the font. Press ENTER to apply the transformation.
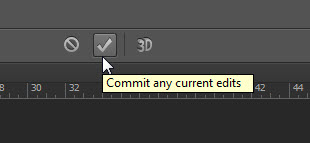
Or click the Tick mark in the top panel.

Step 61 : Press v for the Move Tool and move the Text to where you like.

Step 62 : Double click the Text layer thumbnail should you wish to change the Font.

The Text is highlighted when you double click.

Step 63 : I am clicking on a Font called Agent Orange which I have in my collection. You can download it here

Step 64 : Move the Text into place with the Move Tool and finetune the position with the right and up arrow keys.

Step 65 : Click on the Text Tool again.

Step 66 : Click with the Type Tool as shown.

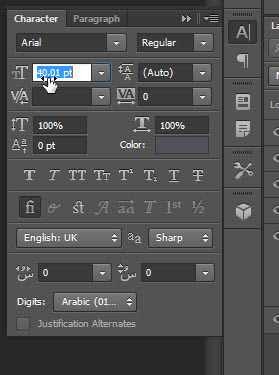
Step 67 : Set the Font to Arial which you will find in Photoshop.
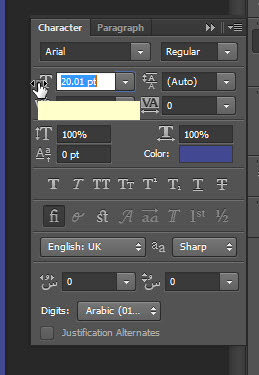
Step 68 : I am increasing the size of the Font by dragging to the right.

Step 69 : Click on the Color. The Color Picker opens. I am clicking on a Dark Grey. If you want the exact shade type in 515258 in the highlighted box. Click OK in the Color Picker.

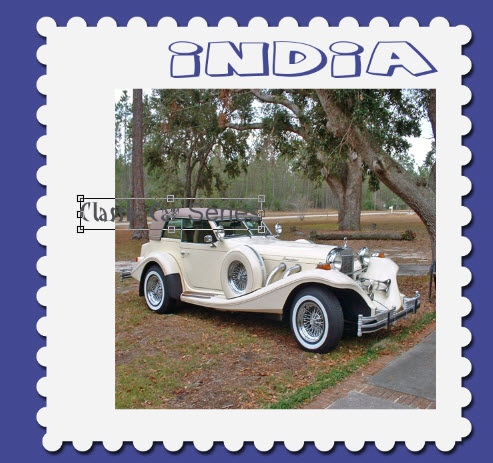
Step 70 : Type in Classic Car Series. Again I have made the Font too small.
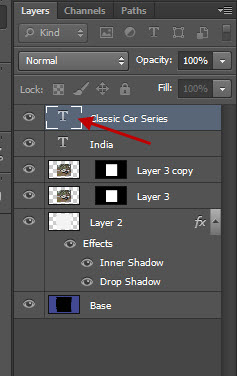
Step 71 : Double click the Text thumbnail.
The Text is highlighted.
Step 72 : Drag to the right to increase the size of the Font.

Step 73 : Click the Tick Mark in the top panel.

Step 74 : Use the Move Tool to move the Text. Then click the Text Tool again.

Step 75 : Highlight ‘Classic Cars’.
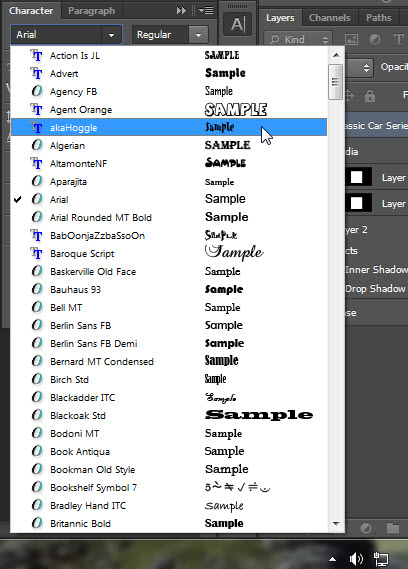
Step 76 : I am changing the Font to AkaHoggle. You will not find it in Photoshop. But you can use this font here
Click the Tick Mark at the top panel.
Step 77 : Press CTRL+T for free transform.
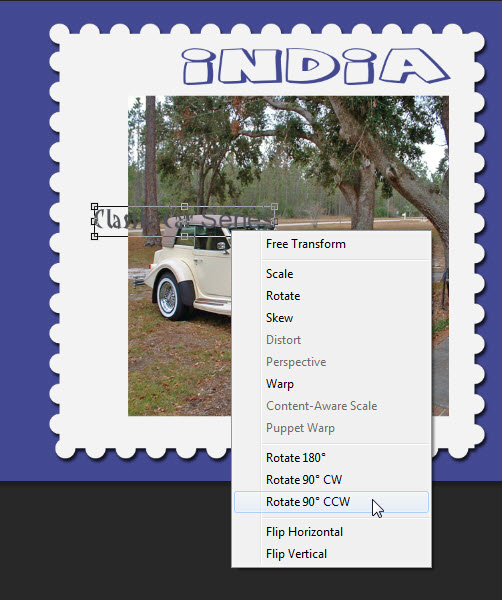
Step 78 : Click inside the selection and right click. Click on Rotate 90 CCW.

The Text is rotated.

Step 79 : Use the Move Tool to move the Text as shown.

Step 80 : Drag out the mid points at the endsas shown to resize the Text. Press Enter.
Step 81 : Click the Text Tool again.

Step 82 : Change the Font Color to White. Click on Color to bring up the Color Picker. Type in ffffff at the bottom in the highlighted box and click OK.

Step 83 : Change thee Font to something else. I have chosen Calibri.

Step 84 : Type in Rs 10. And that is the finished Stamp.
Other Photoshop tutorials are here