Learn how to make this eerie photo manipulation with fairy and dragonflies flying around her. I’ll show you, how to make amazing depth of field on your manipulation by simple steps. You will see, how to use different blurs and blending modes on your work. You will learn, how to make magical glow in Photoshop. Throughout the tutorial, you’ll learn techniques that will help you create better matte paintings and photo manipulations.
What you’ll be creating
You will create magical photo manipulation – Faerie in the woods. I really love playing with the lights in this work. You will learn special lightning techniques and blurring tips. You will need Photoshop CS 5.5 to follow this tutorial.
Tutorial Resources
Step 1
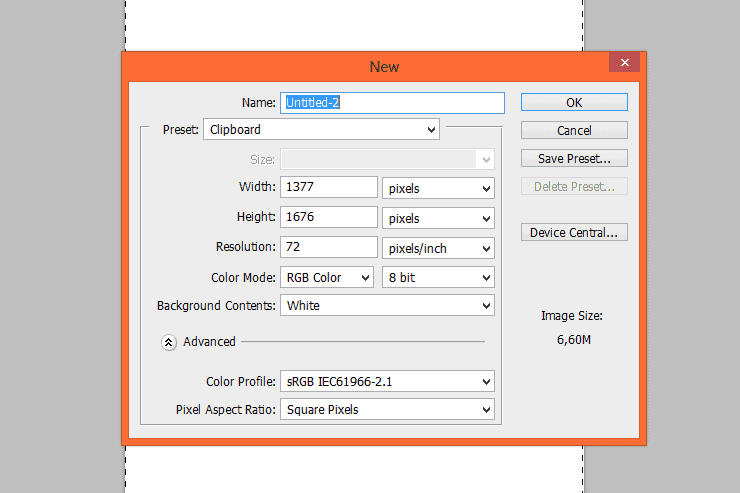
Create new file. Use portrait size.
Step 2
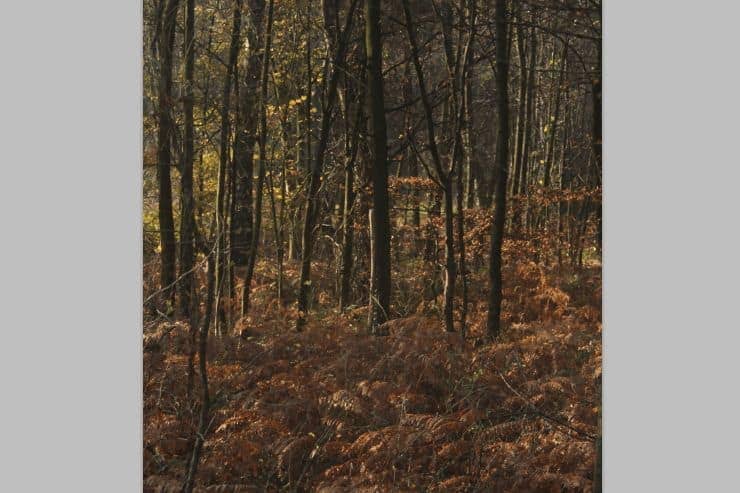
Place “Deep Forest” stock into your file.
Step 3
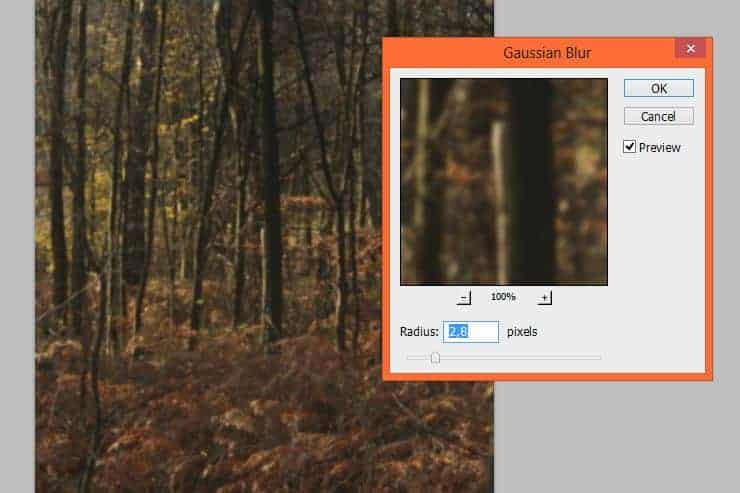
From top menu choose Filter > Blur > Gaussian blur… Set it to 2,8 px.
Step 4
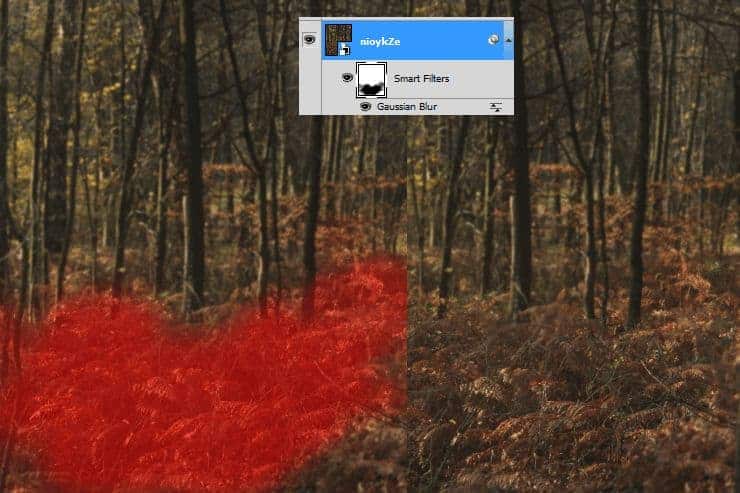
As you can see, you can mask filters on your layer, by clicking white canvas next to Smart Filter Title. With big soft brush mask center of the ground. Don’t be afraid to use brush with smaller opacity. You can obtain true depth on your work! 🙂
Step 5
Duplicate your “Deep Forest” layer. Click RMB on Smart Filter title and choose Clear Smart Filters.
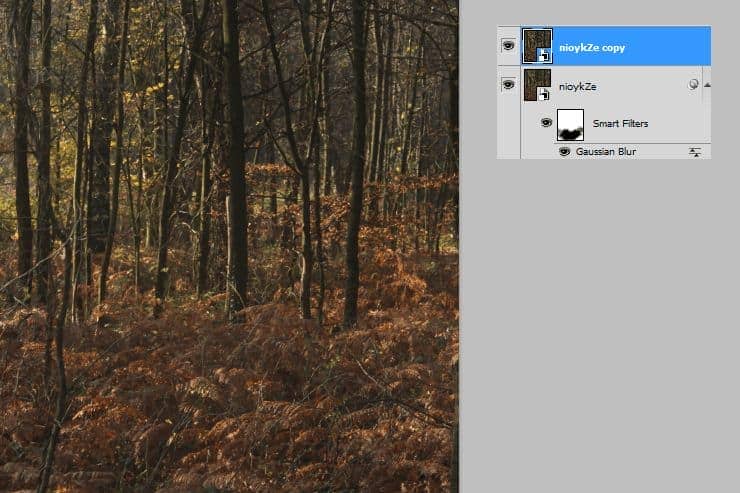
Click with RMB on your layer. Then choose Rasterize layer.
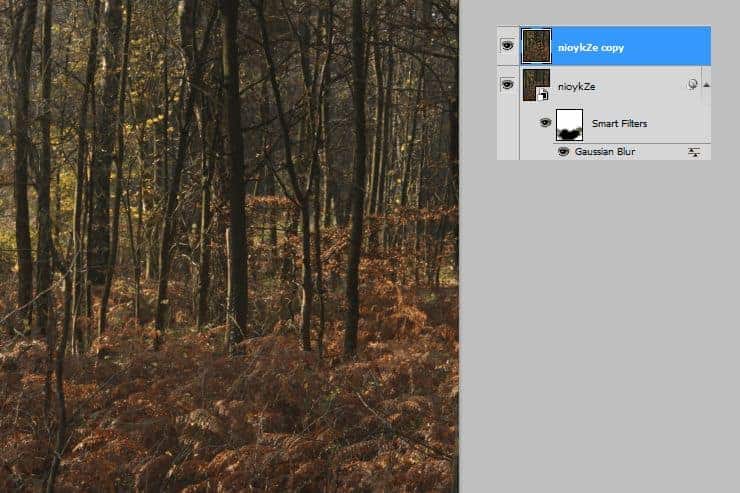
Step 6
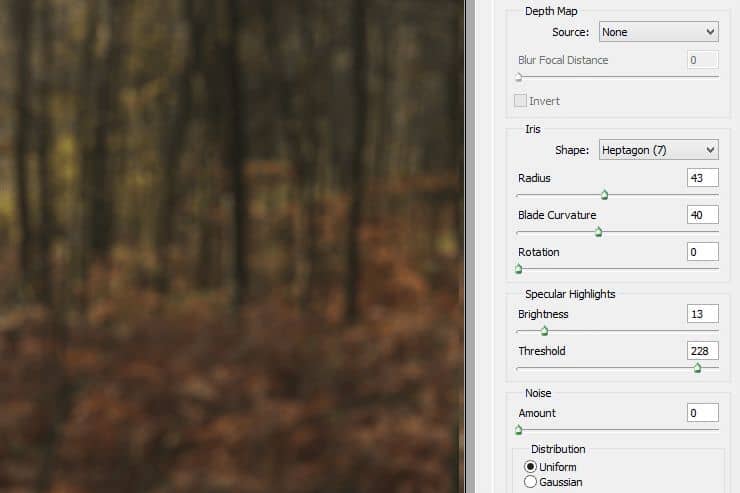
From top menu choose Filter > Blur > Lens blur. I used this settings, but you can play with it, for gain other results :).
Step 7
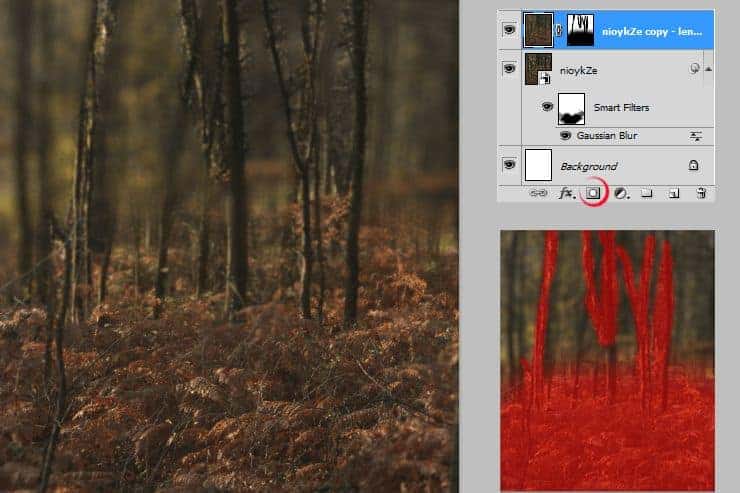
Add mask to created layer (marked shortcut). Erase foreground and some trees on first plan.
Step 8
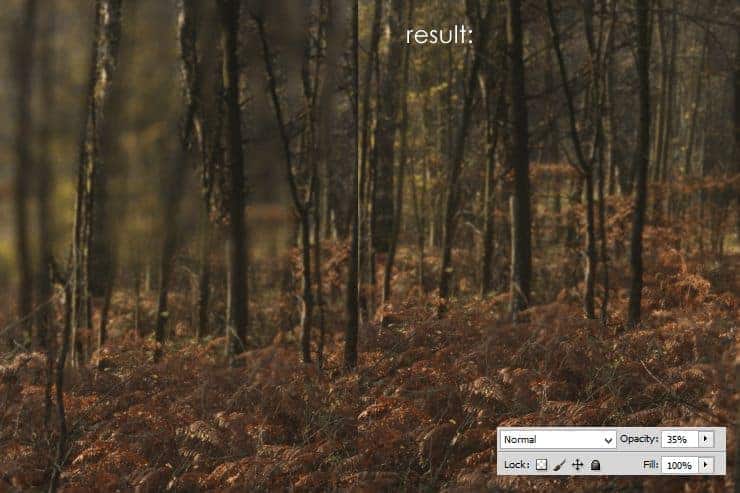
Decrease opacity of this layer to 35%.
Step 9
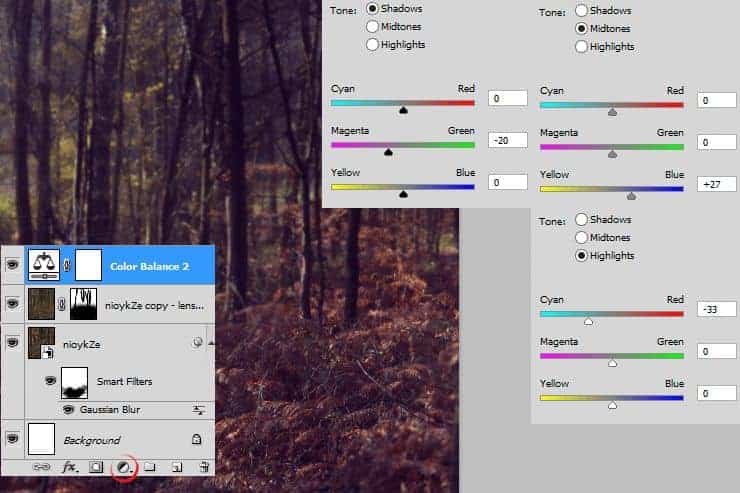
Now you will prepare your background to make night. Add Adjustment layer with Color Balance and set as is shown.
Step 10
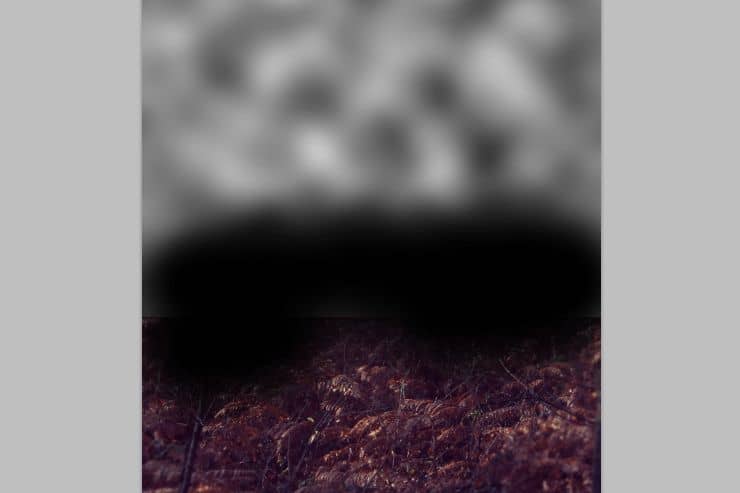
Add new layer (Shift + Ctrl + N). In your color picker set black and white. From top menu choose Filter > Render > Clouds. I also make some black strokes on the bottom of the layer for better blending.
Step 11
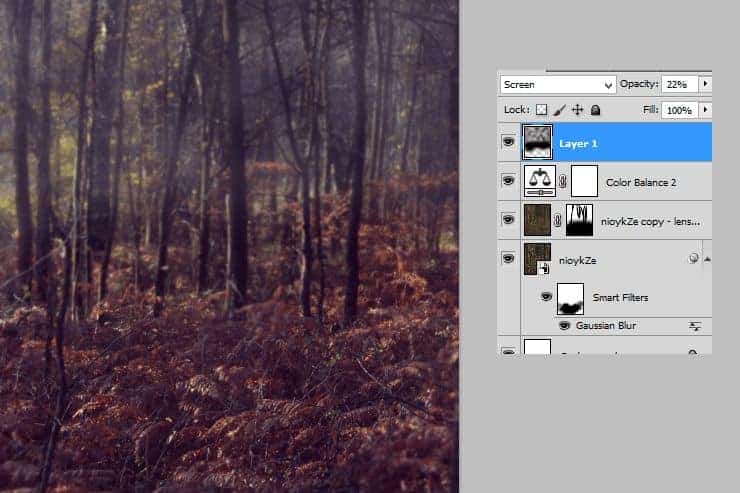
For making foggy effect you should change blending mode to Screen and decrease opacity to 22%.
Step 12
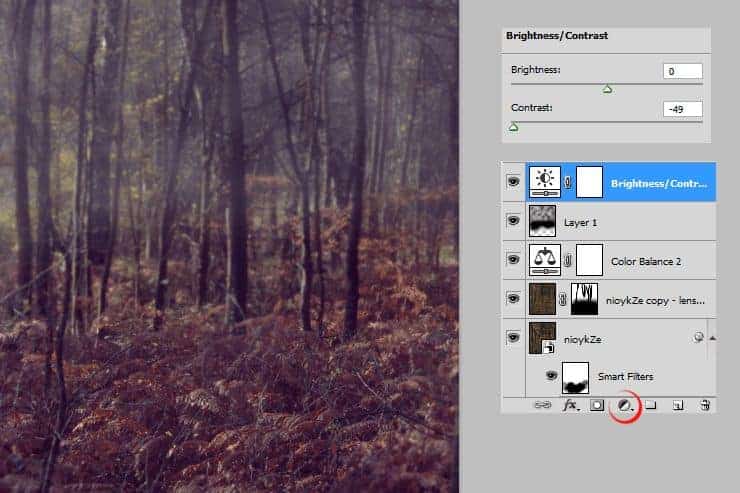
In the night everything have less contrast, than in the day. Add adjustment layer with Brightness/Contrast and decrease contrast.
Step 13
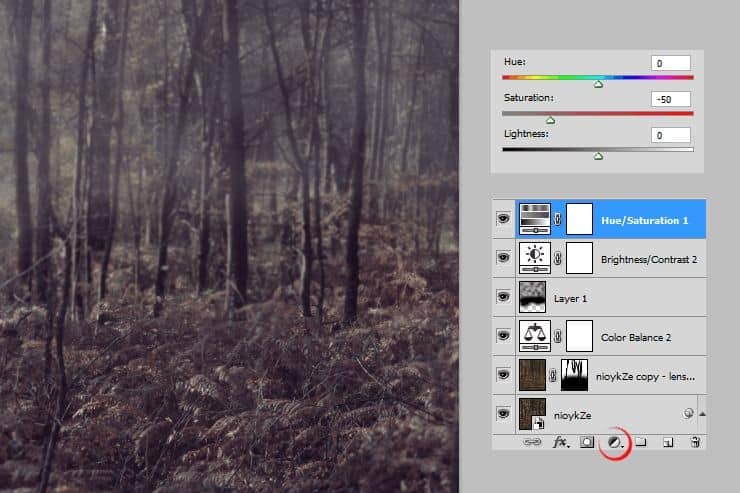
Decrease opacity by making new Adjustment Layer with Hue/Saturation.
Step 14
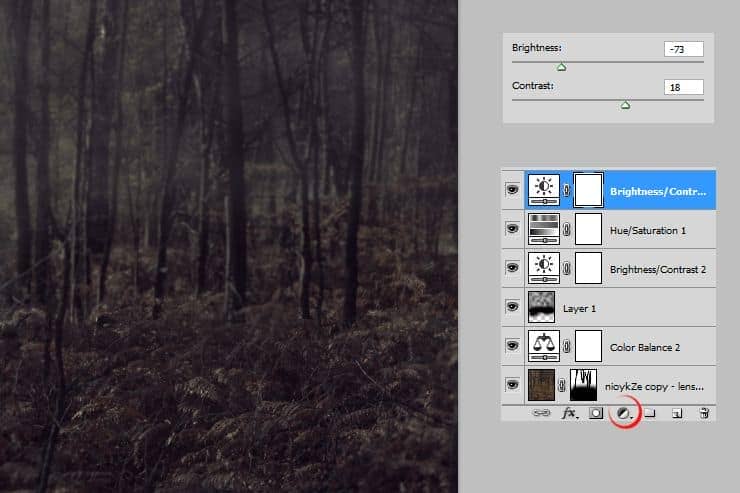
Add Adjustment Layer with Brightness/Contrast.
Step 15
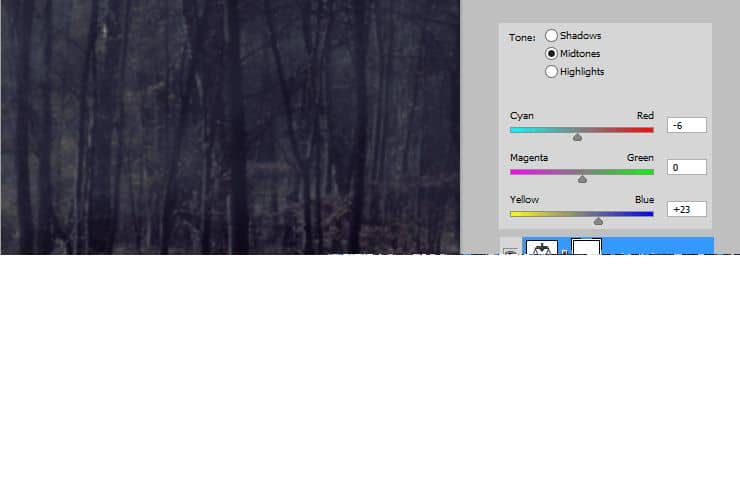
Set midtones with Color Balance.
Step 16
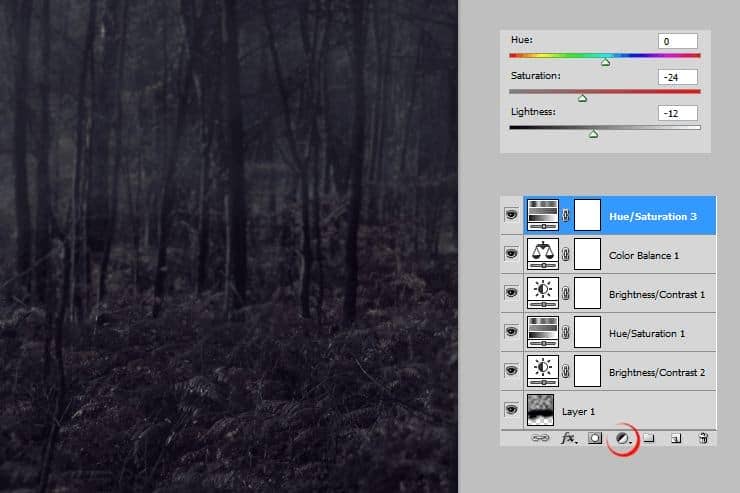
Add Hue/Saturation Adjustment layer.
Step 17
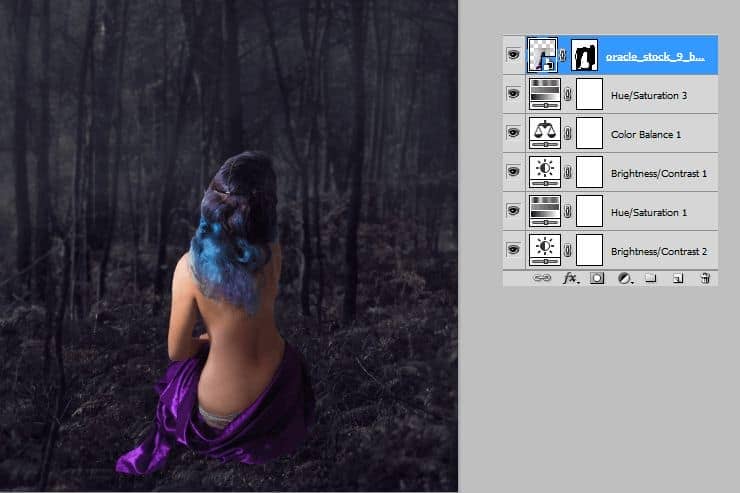
It’s time to add model. Place her into your file and mask.
Step 18
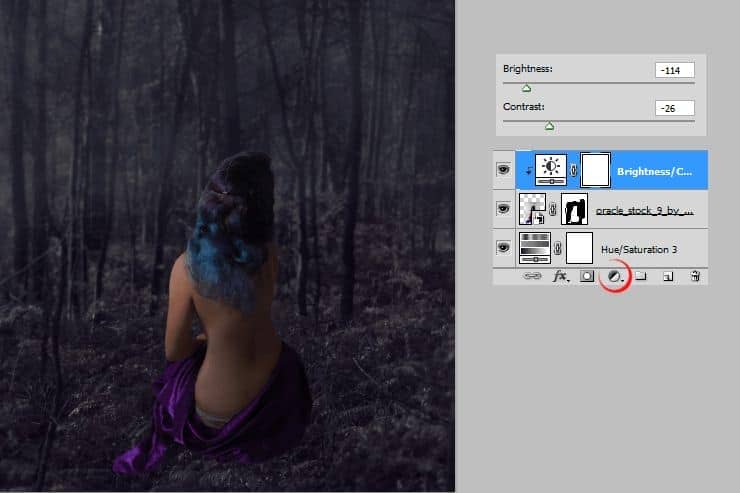
Add adjustment layer with Brightness/Contrast. Then click it by RMB and choose “Create clipping mask”.
Step 19
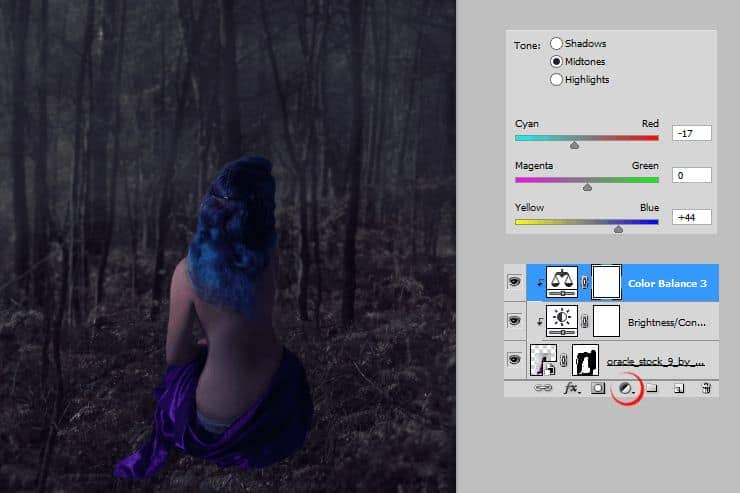
Add Color/Balance layer. Set midtones and also make this layer clipping.
Step 20
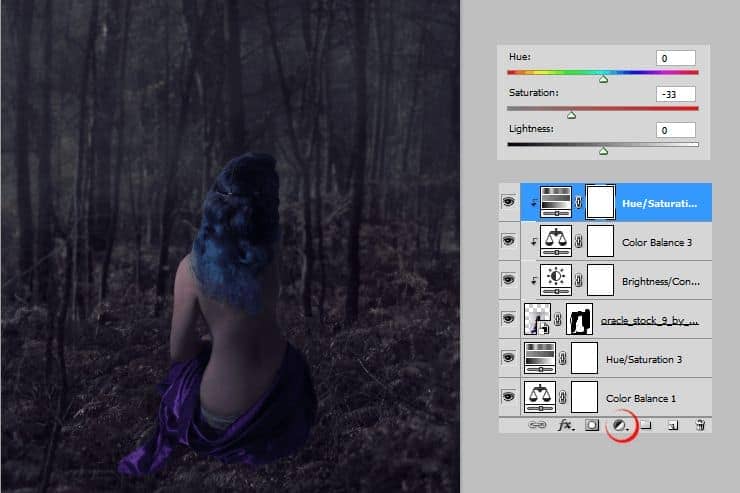
Add last adjustment layer on model. Create Hue/Saturation layer and make it clippy.
Step 21
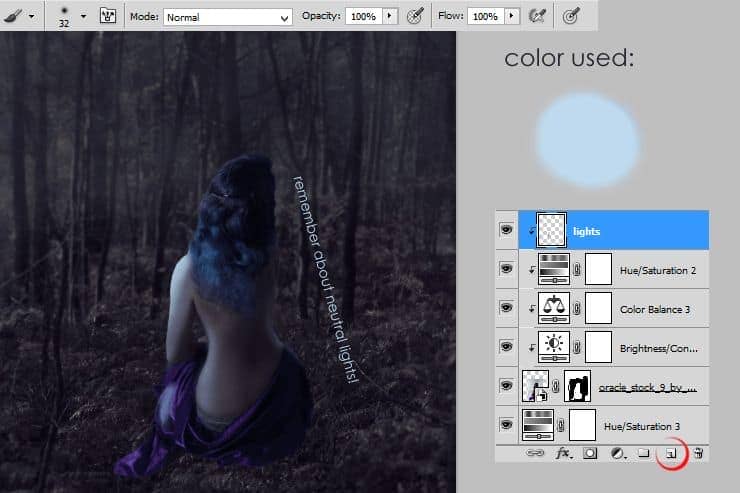
Cool! Now you should add new layer (Shift + ctrl + N). Make it clippy by RMB > Create clipping mask. With soft brush #bfdaef color draw some lights on models arm, dress and on waist. Use brush with dynamic opacity for better results.
Step 22
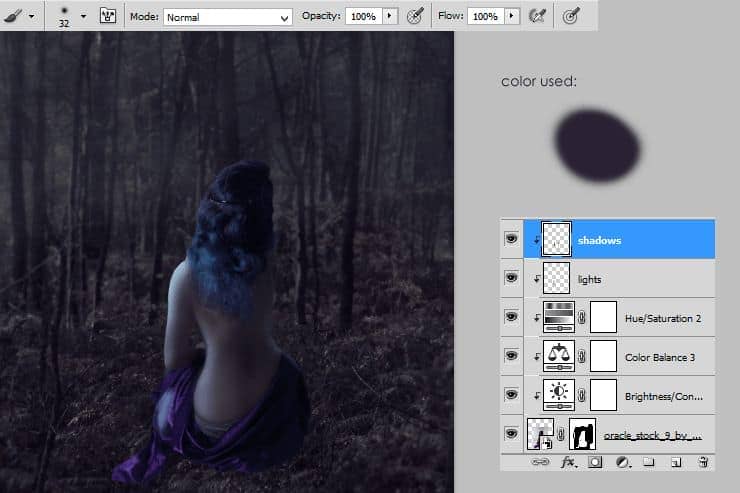
Again add new layer and make it clippy. With soft brush (dark-blue color) draw shadows on arm, dress and on her back.
Step 23
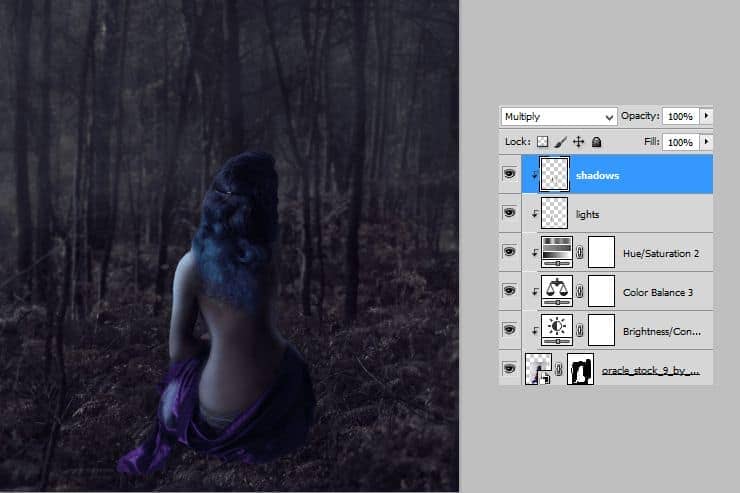
For better results change blending mode of this layer to Multiply.
Step 24
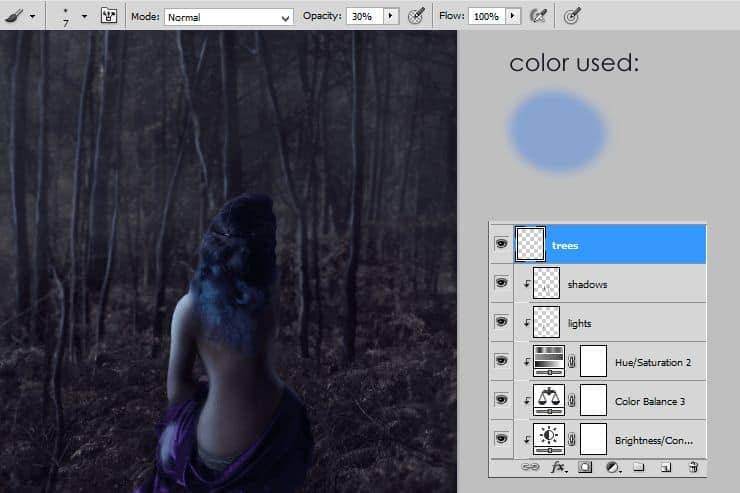
Add new layer. Pick small, soft brush. Draw lights on trees. Use small opacity of brush.
Step 25
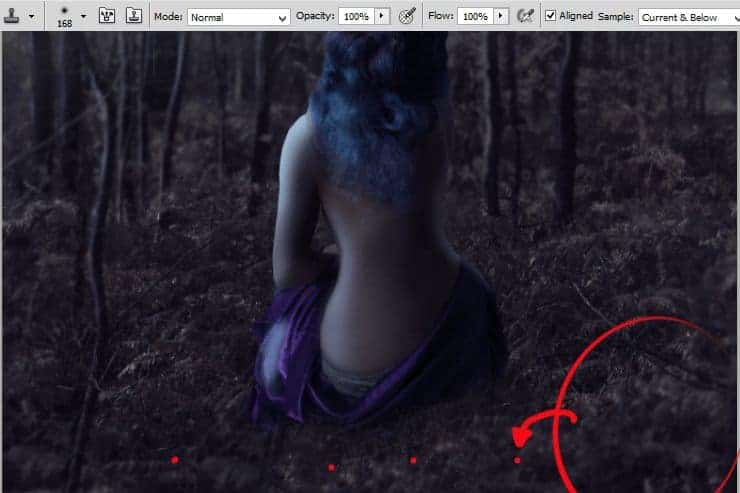
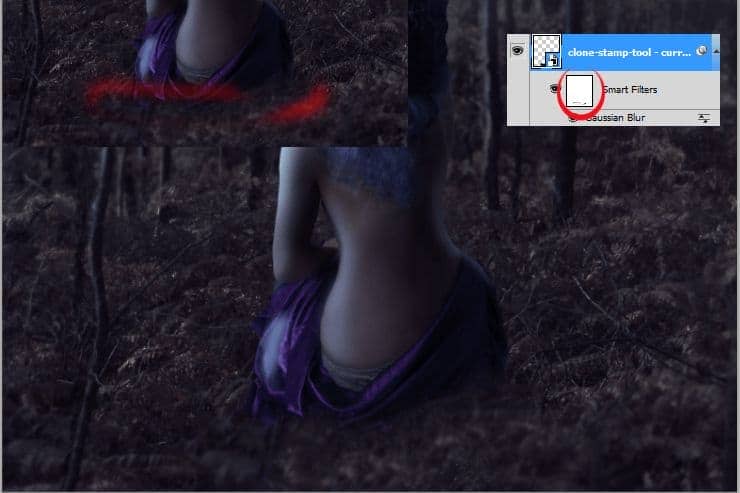
Add new layer. Then pick Clone Stamp Tool. Sample current and below layers. Use big, soft brush and with holding alt choose right side of picture. Click to stamp it on first plan, behind the model.
Step 26
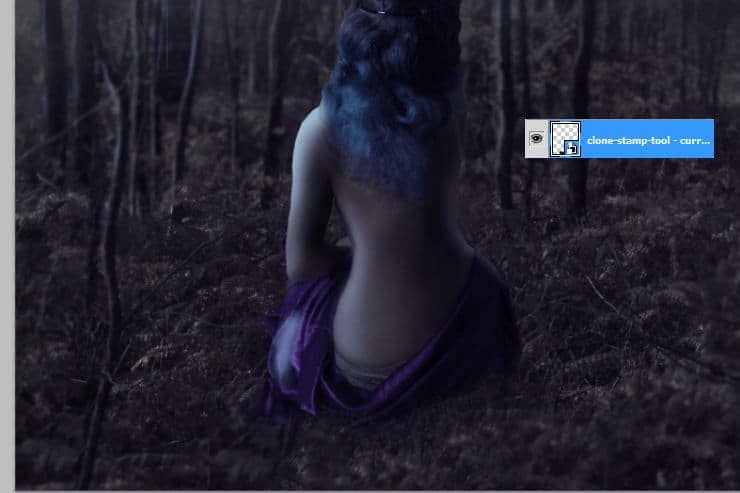
Click on this layer with RMB, pick Convert to Smart object.
Step 27
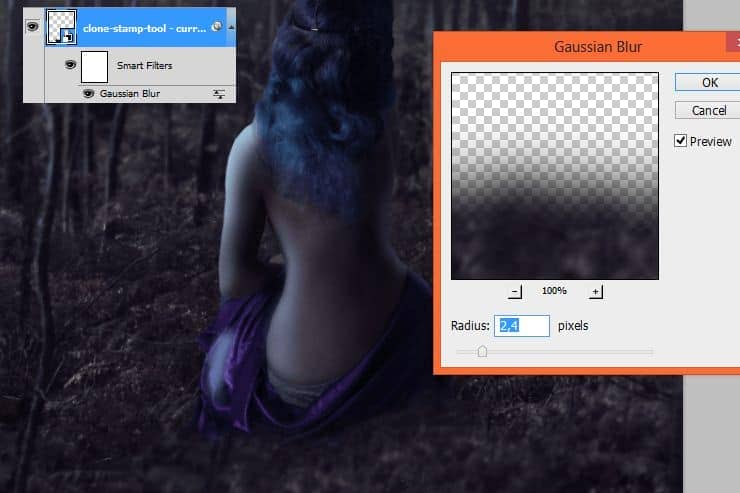
From top menu choose Filter > Blur > Gaussian blur.
Step 28
Click on white canvas next to “Smart filters”. Mask filters.
Step 29
Add new layer. Pick soft, small brush and draw lights on hair.
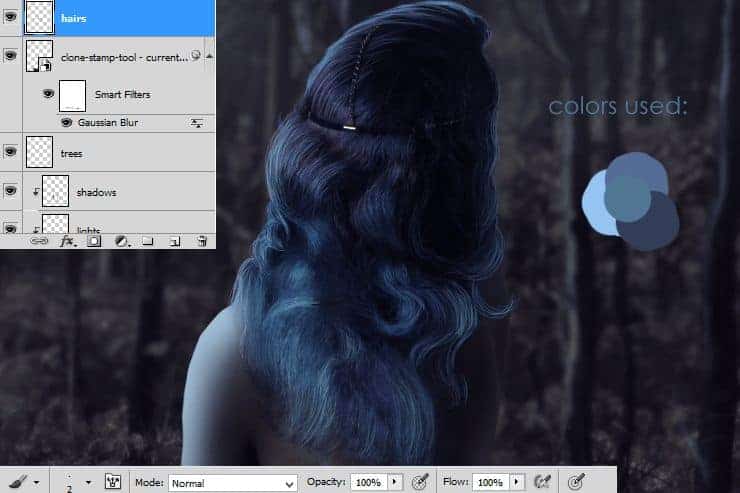
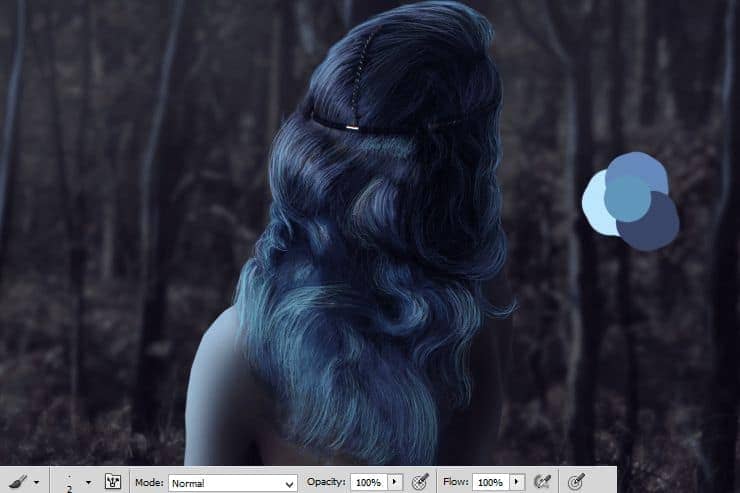
Optional – You can also add more lights on hair. Use the same brush, but lighter colors.
Step 30
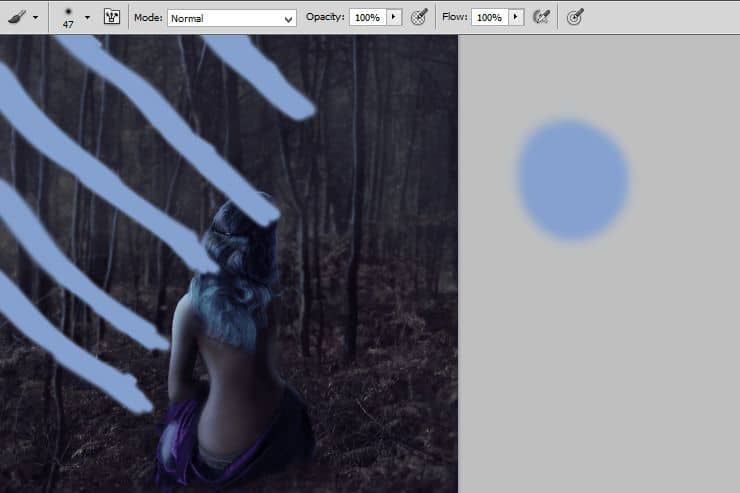
On new layer (Ctrl + Shift + N) draw light source. Use soft, blue brush.
Step 31
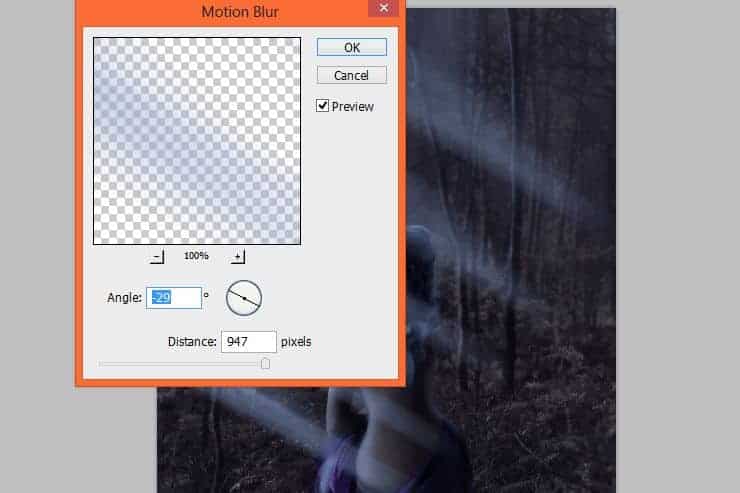
From top menu choose Filter > Blur > Motion blur. It gives flow to your light. Set it as shown.
Step 32
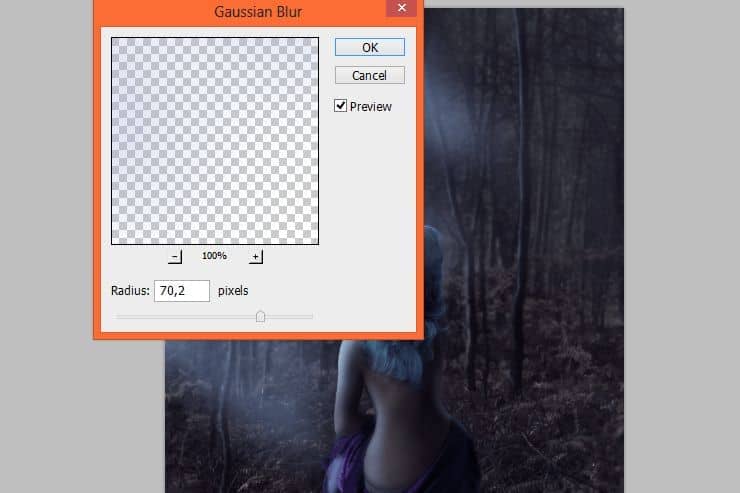
Add on this layer Gaussian blur. Filter > Blur > Gaussian blur.
Step 33
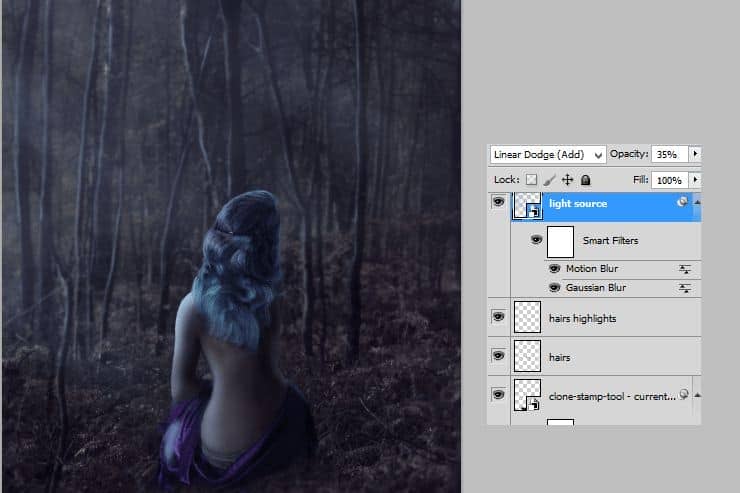
After those transforms change blending mode to Linear Dodge (Add) and decrease opacity of this layer to 35%.
Step 34
Place drappery stock and transform it as is shown.
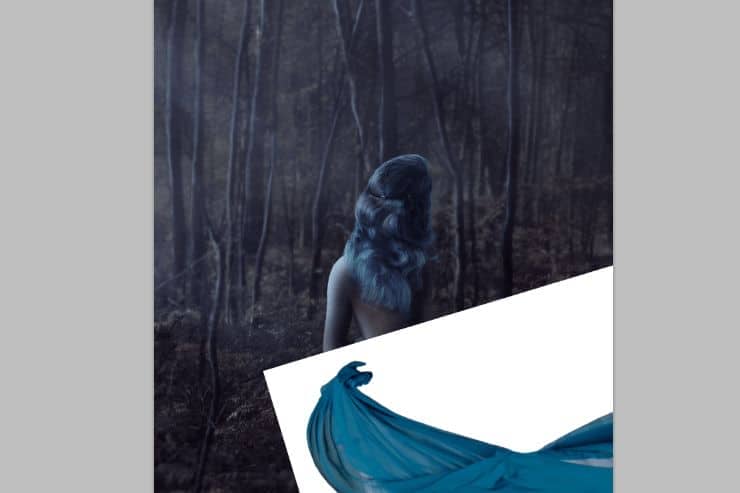
Then mask it. Use brush with smaller opacity for make semi-transparent drappery fragments.
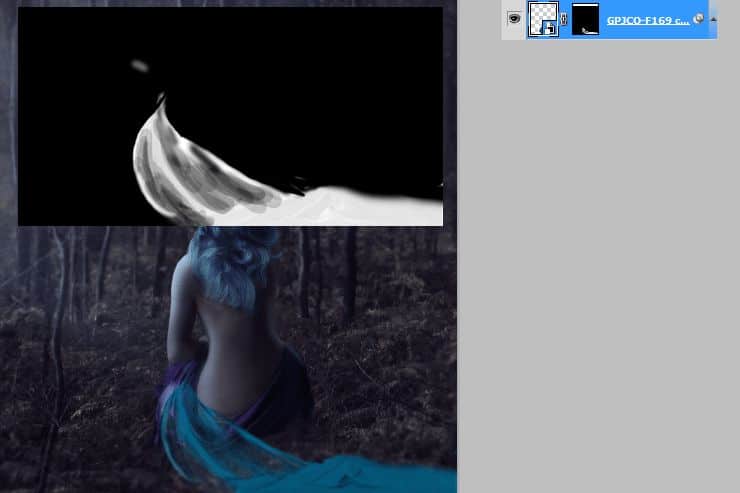
Step 35
From top menu choose Filter > Gaussian blur.
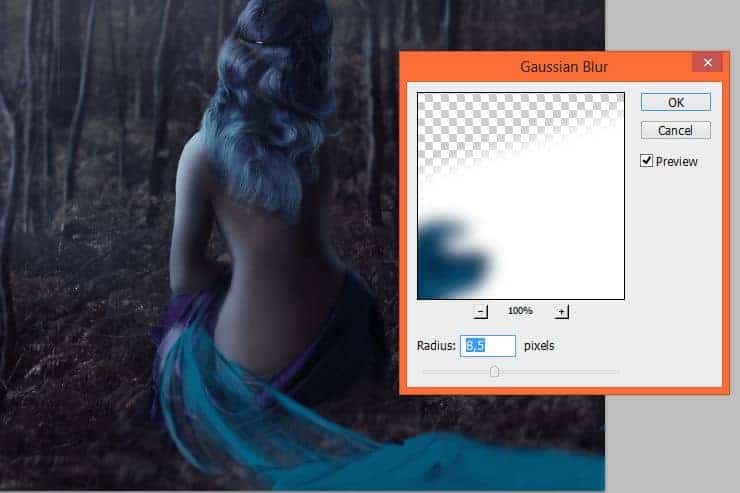
Step 36
Mask Smart Filters. I masked farthest fragments of drappery.
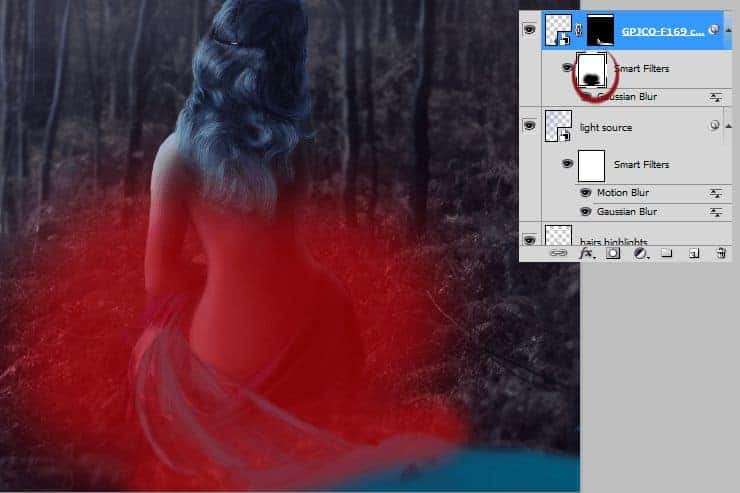
Step 37
Add adjustment layer with Color/Balance. Make it clippy to drappery layer.
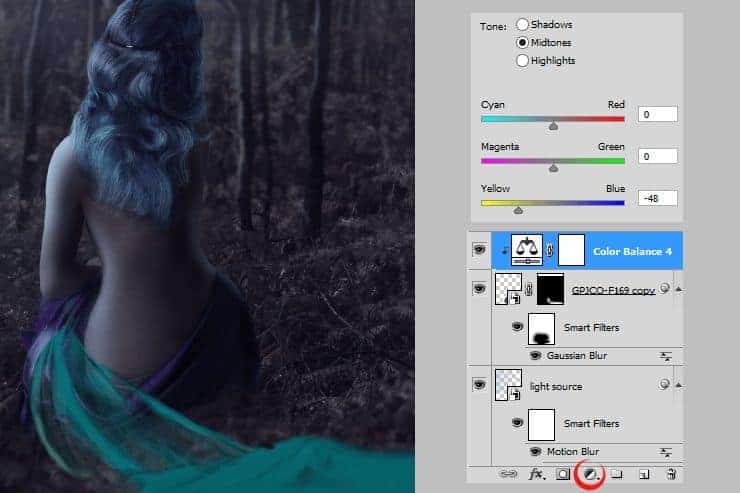
Step 38
Now you will absolutely change drappery color. Add clipping Hue/Saturation layer.
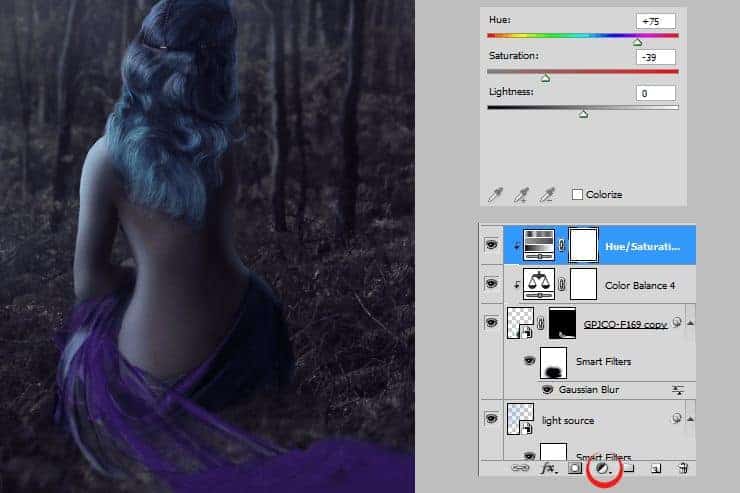
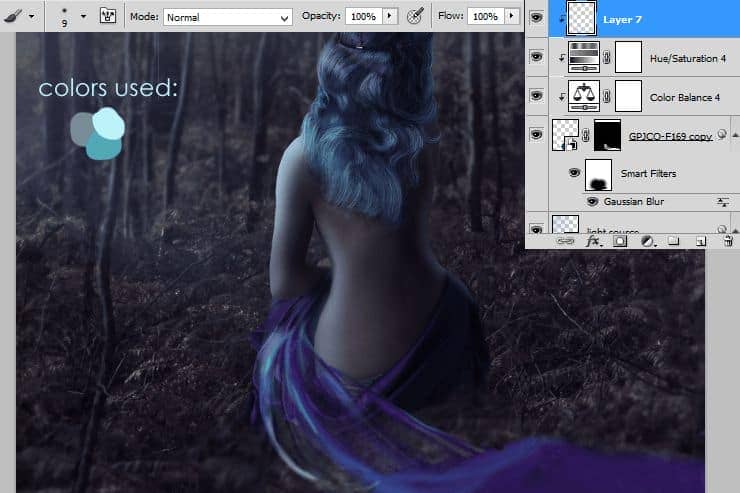
Step 39
Add new, blank, clipping layer. With soft brush draw lights on drappery. Remember about using dynamic opacity brush.
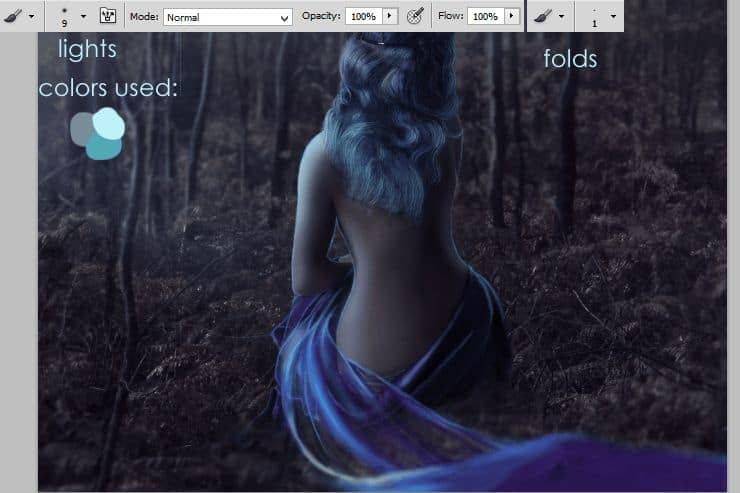
Step 40
Add new layer. Pick small, soft brush and draw light contour on model and drappery. With bigger soft brush you can also add lights on folds.
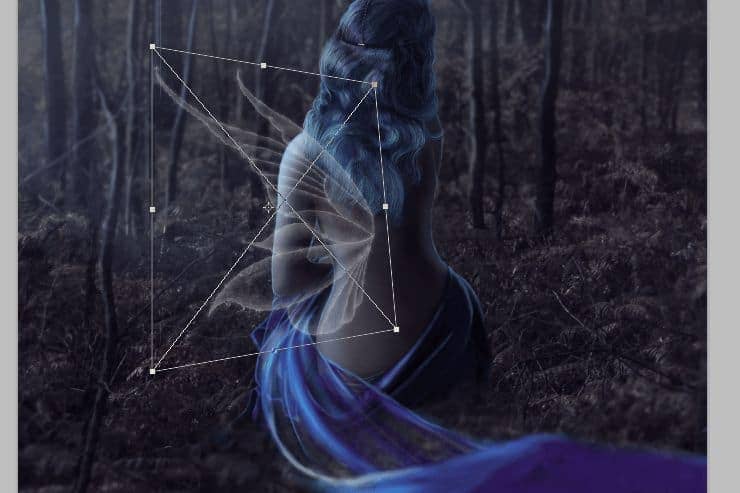
Step 41
It’s time to make wings. Place fae wings to your picture. Transform it.
Step 42
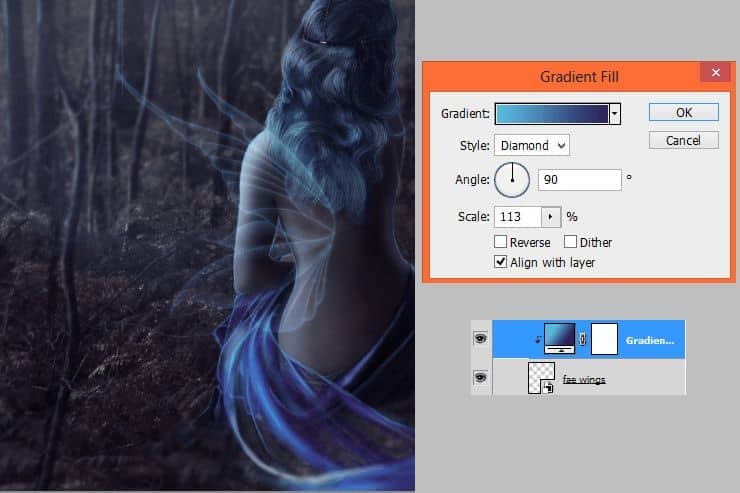
In color picker set colors #5ab9df and #2d265b. Add adjustment layer with gradient fill. Set it as shown. Then make it clippy by clicking with RMB on gradient layer and choosing Create clipping mask.
Step 43
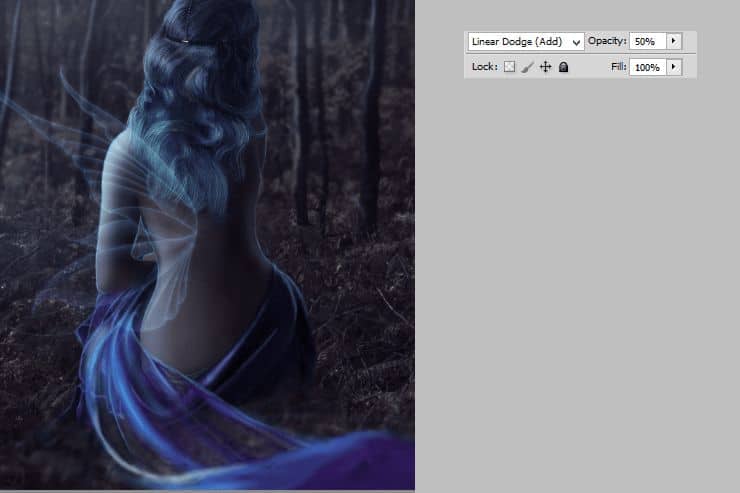
Change wings layer (not gradient!) blending mode to Linear Dodge (Add) and decrease opacity to 50%.
Step 44
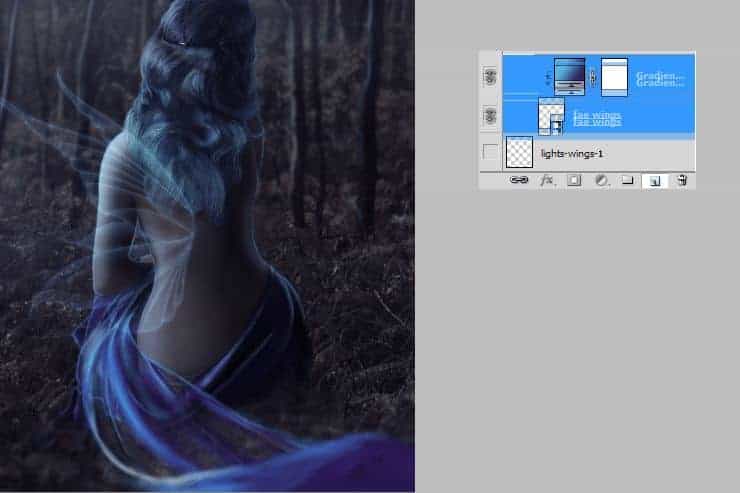
By holding ctrl pick two layers – wings and gradient. Drag and drop to symbol of new layer – it should duplicate those layers.
Step 45
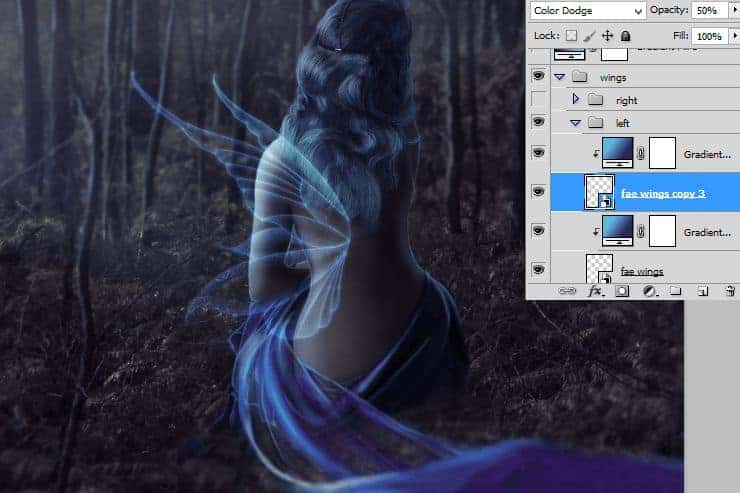
Change blending mode of duplicated layer to Color dodge (wings, not gradient!). As you can see I placed layers to folder – left and right wings.
Step 46
Duplicate layers with first wing (four) – or whole folder (if you placed wing to folder). Then transform it.
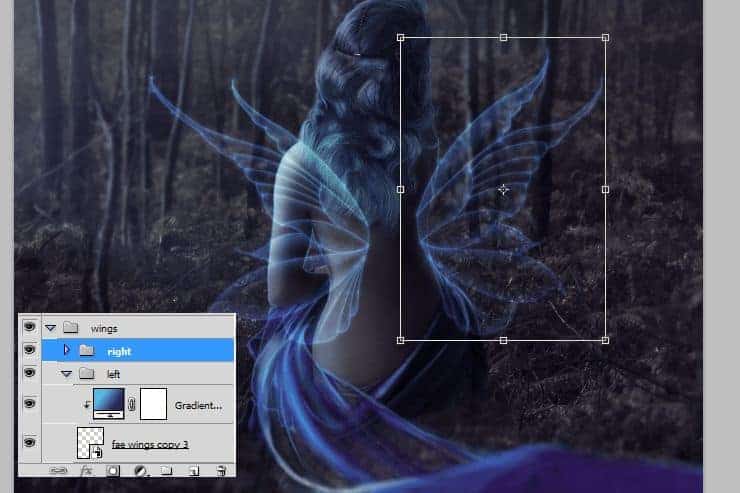
Step 47
Add Adjustment layer with gradient. Use black and light blue color.
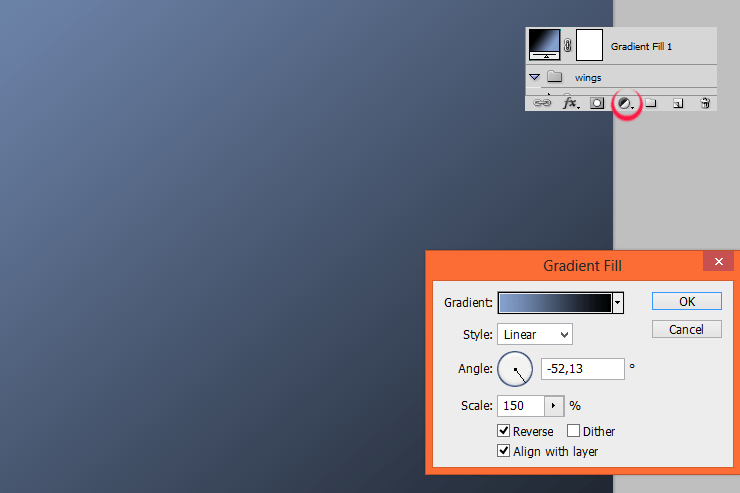
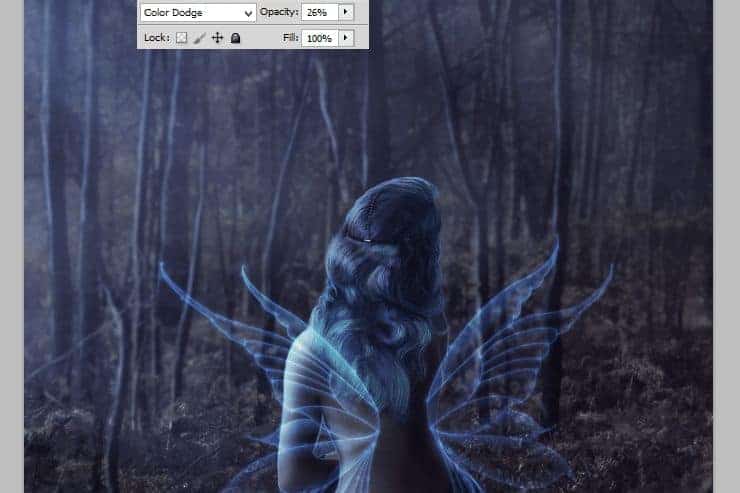
Step 48
Keep doing good job! Change blending mode to Color dodge. Decrease opacity to 26%.
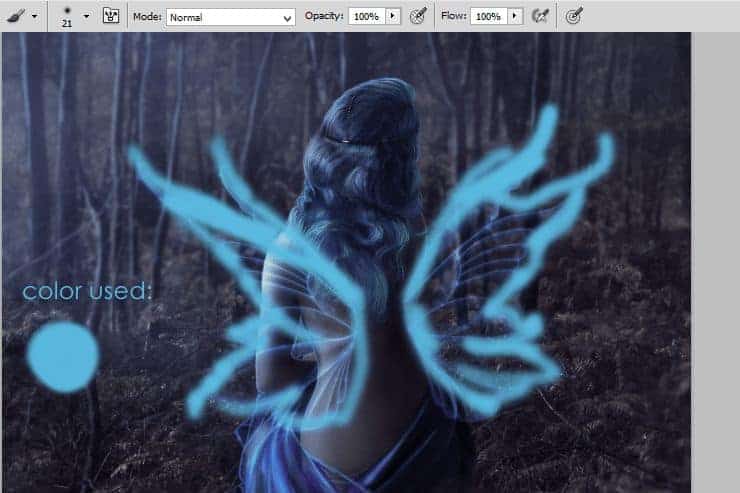
Step 49
Add new layer. Pick soft, 20px brush #59b6dc color. Draw strong outline of wings.
Step 50
On this layer choose from top menu Filter > Blur > Gaussian blur.
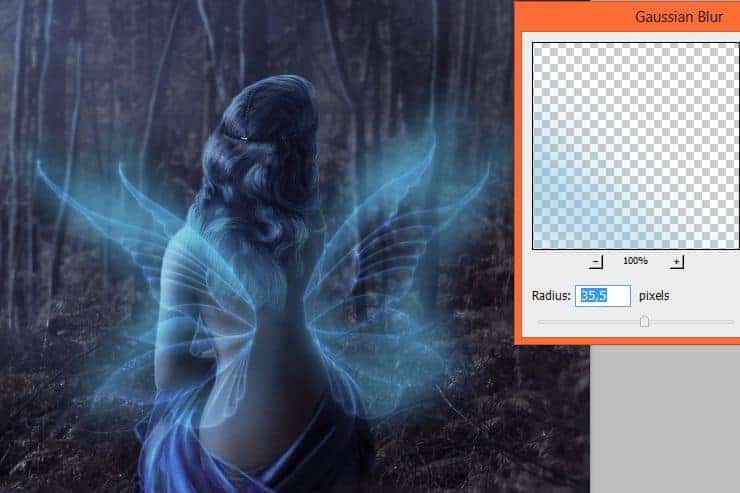
Step 51
Now change this layer blending mode to Color dodge and decrease opacity to 27%. It makes more magical look.
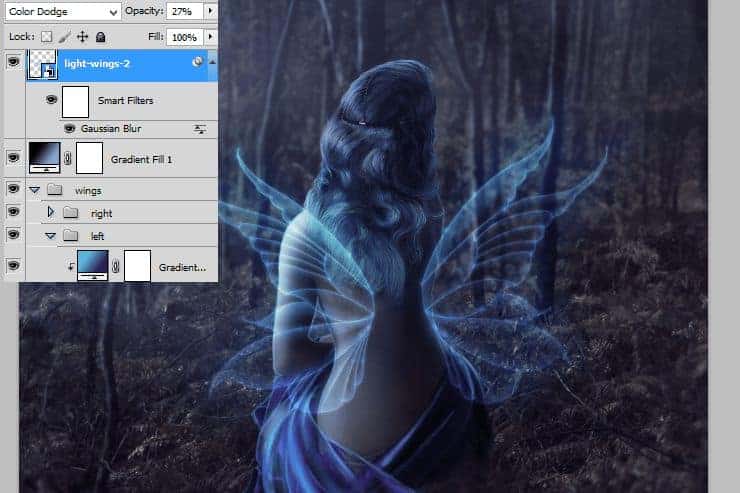
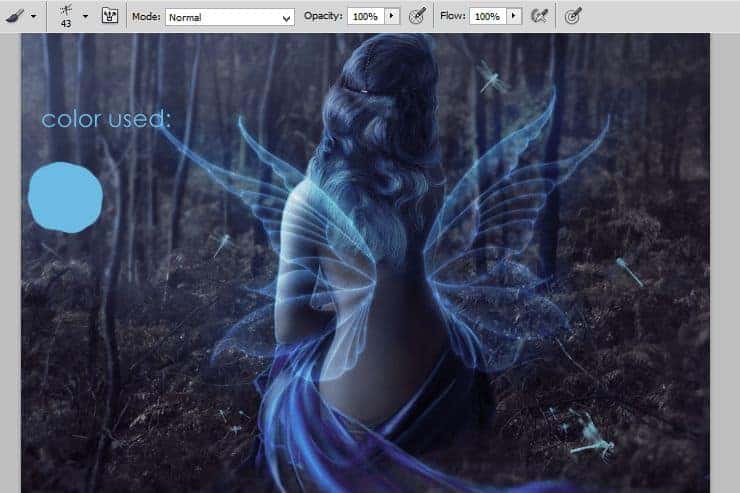
Step 52
Add new layer. Choose dragonflies brushes. Then use it somewhere. Pick #76cceb color.
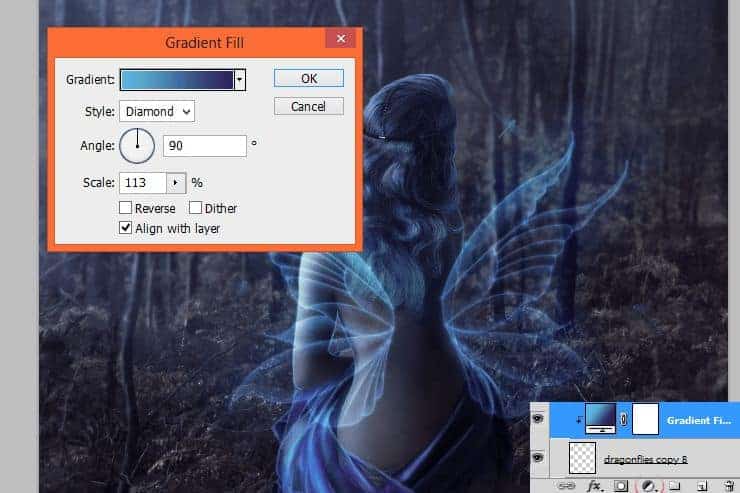
Step 53
In your color picker choose #5ab8de and #2e295e. Add gradient Adjustment layer. Set it as shown and make it clippy by RMB > Create clipping mask.
Step 54
Cool! Now change dragonflies layer blending mode to Color Dodge. (Not gradient!)
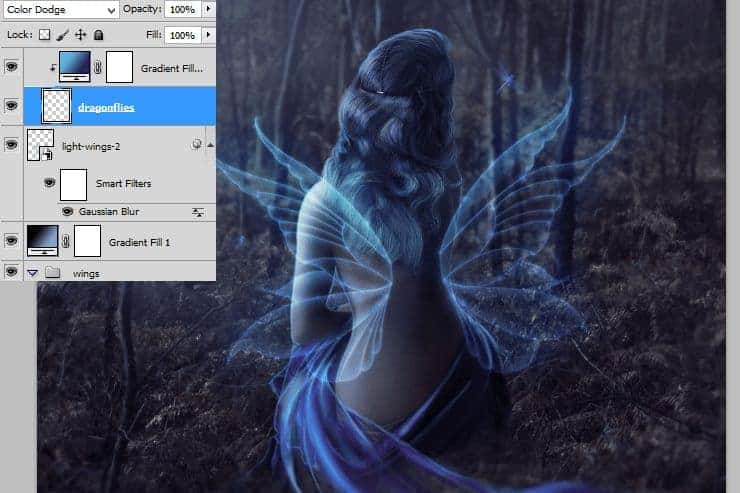
Step 55
By holding ctrl pick layers with dragonflies and gradient. Then drag and drop it on new layer symbol – it will duplicate layers.
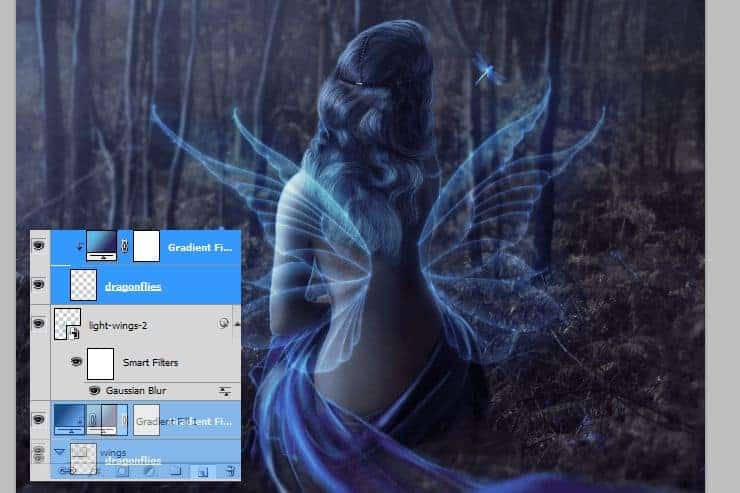
Step 56
Change blending mode of duplicated layer with dragonflies (not gradient!) to Linear Dodge (Add).
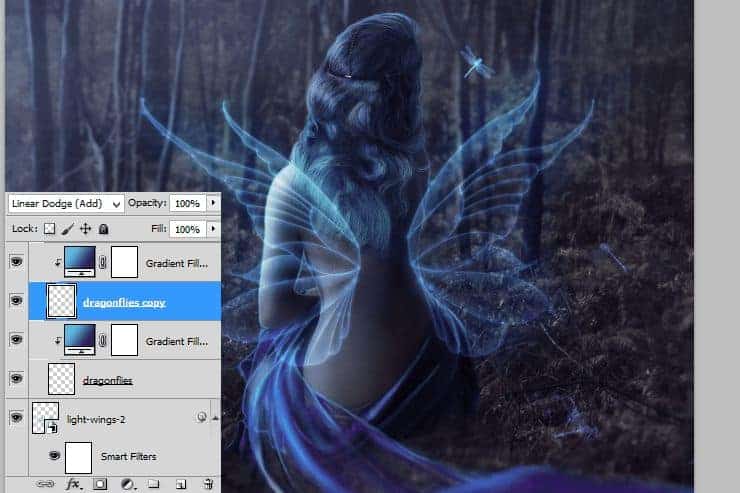
Step 57
Add new layer. With soft, big brush draw dots on darker dragonflies. I used #352c5f color.
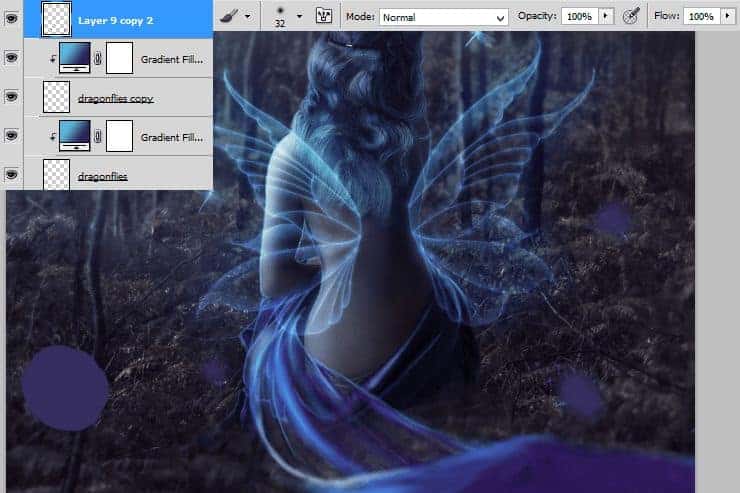
Step 58
Now change blending mode of this layer to Color Dodge.
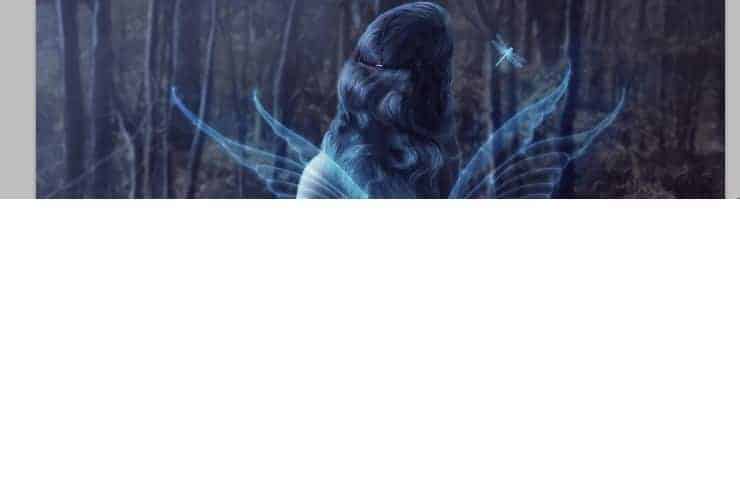
Step 59
Duplicate this layer.
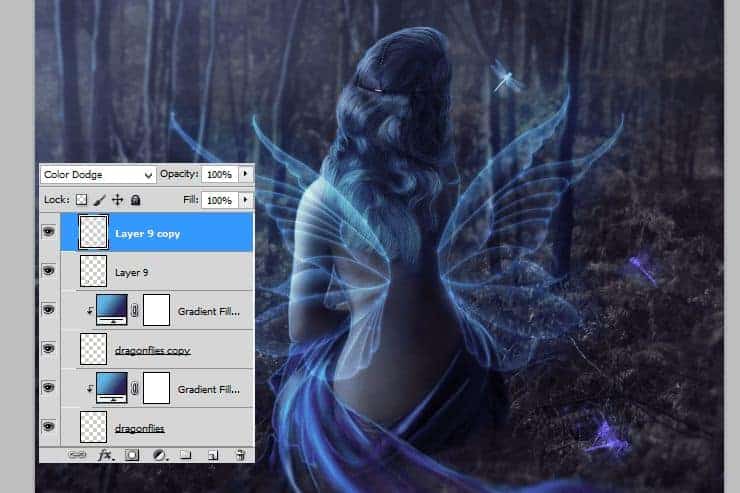
Step 60
Add new folder. By holding ctrl, drag and drop layers to this folder.
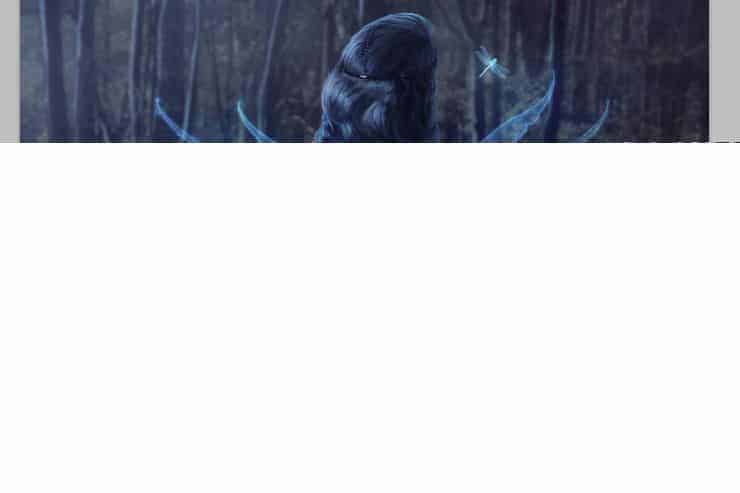
Step 61
Duplicate whole folder. Decrease opacity to 71%.
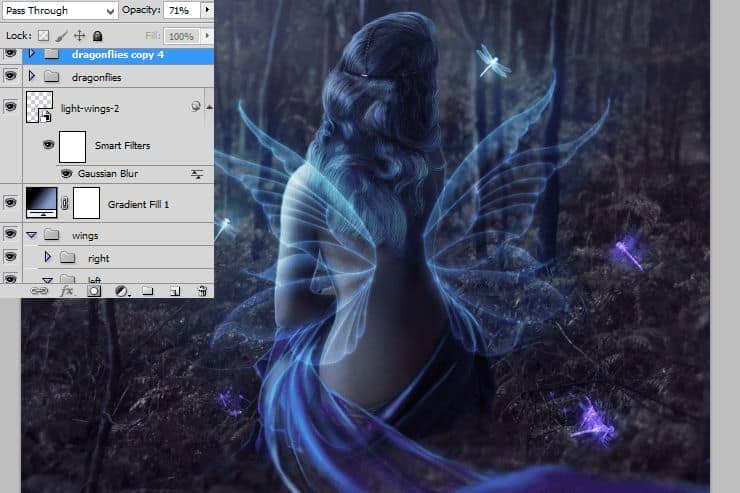
Step 62
Again duplicate first folder with dragonflies. Transform it as shown. Of course you can play with it! 🙂
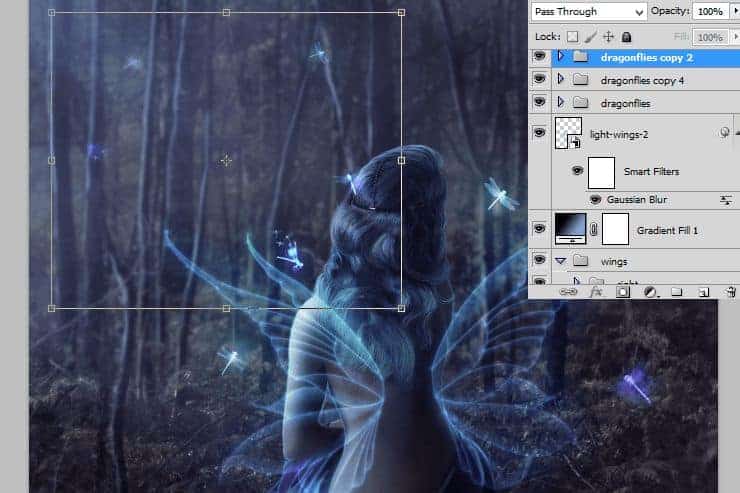
Step 63
Repeat this step.
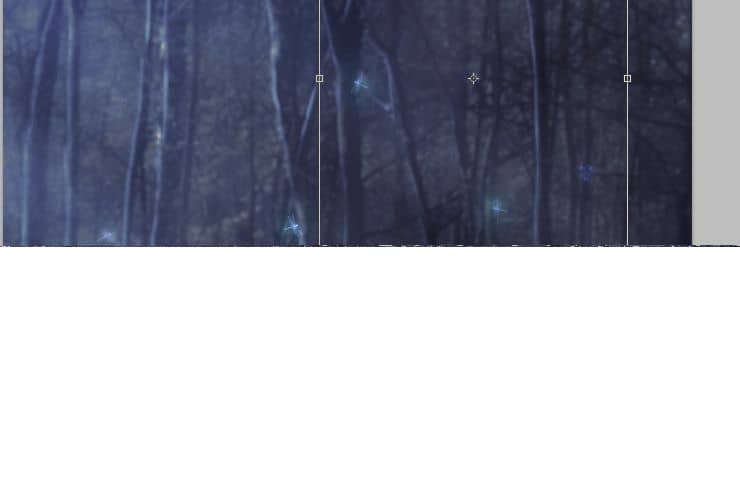
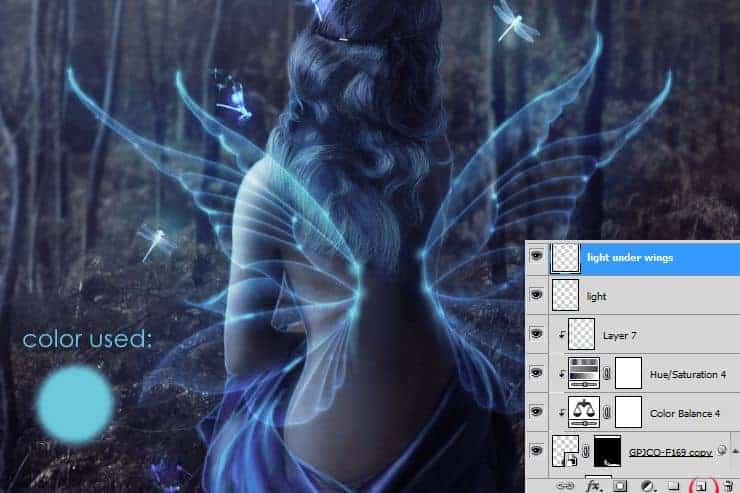
Step 64
Back below wings layers. Add new layer and with gently dots draw lights below wings with blue (#6cc9d9), small, brush.
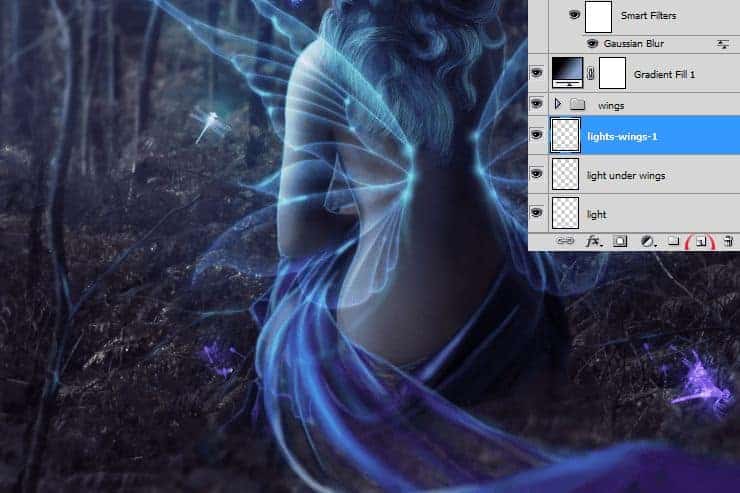
Step 65
On new layer pick smaller brush. Draw lights on back of model and on branches.
Step 66
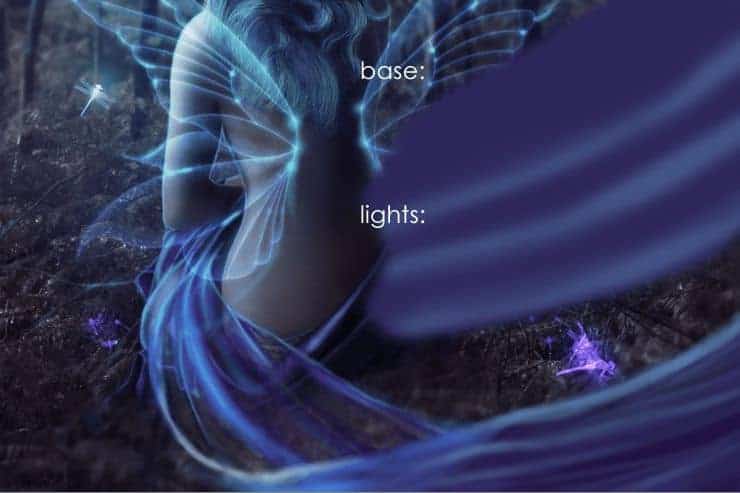
Back to top of the layers. Use #231549 color for drawing base of drappery. Choose #4e6b99 color and smaller, lighter brush to make lights. Don’t be afraid. It’s only shapes and simple strokes! :).
Step 67
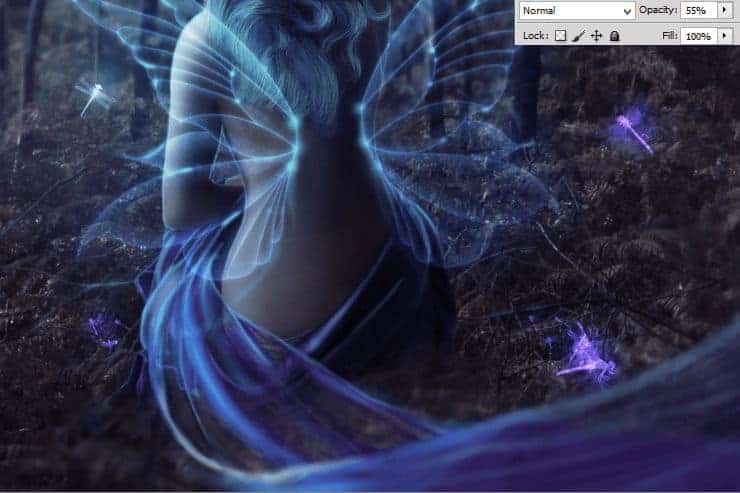
I decreased opacity of this layer to 55% – drappery is semi transparent.
Step 68
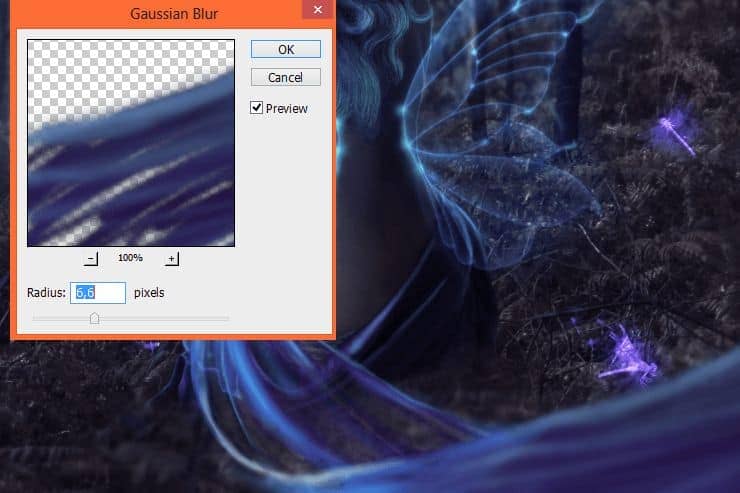
Duplicate drawn layer. Then choose from top menu Filter > Blur > Gaussian blur.
Step 69
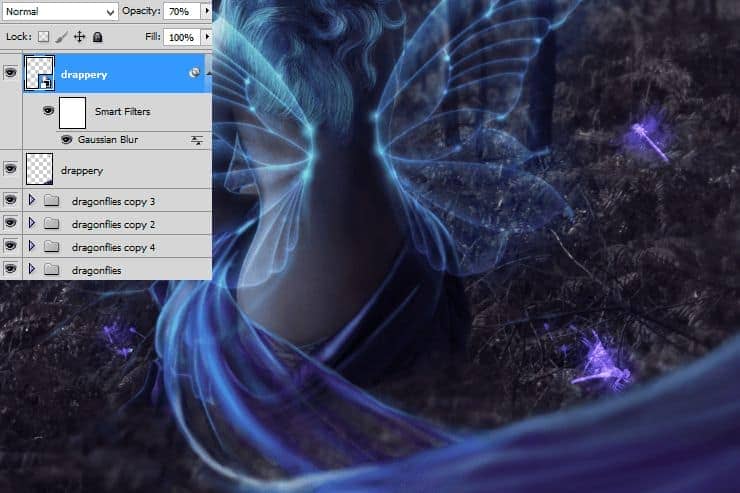
Decrease opacity of duplicated layer to 70%.
Step 70
Optional: Place “Burst of light” to your image. Mask it as is shown.
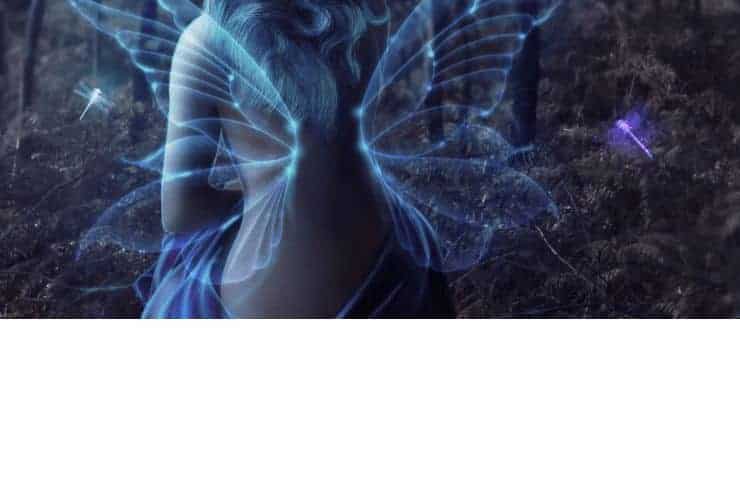
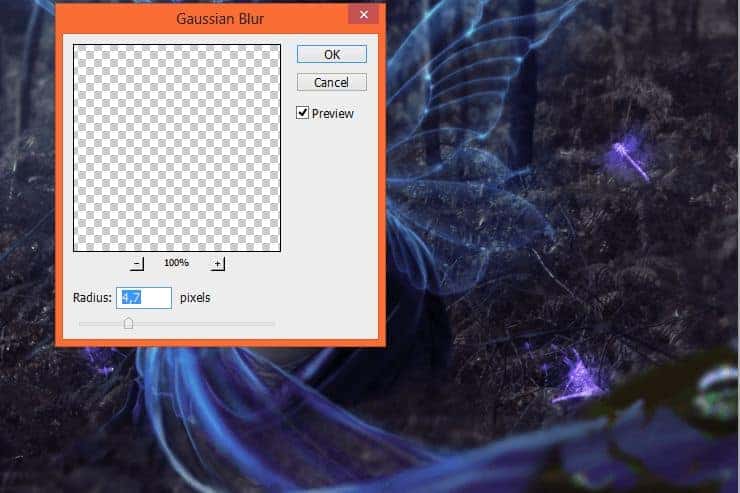
From top menu choose Filter > Blur > Gaussian Blur – drop will be on first, blurred plan.
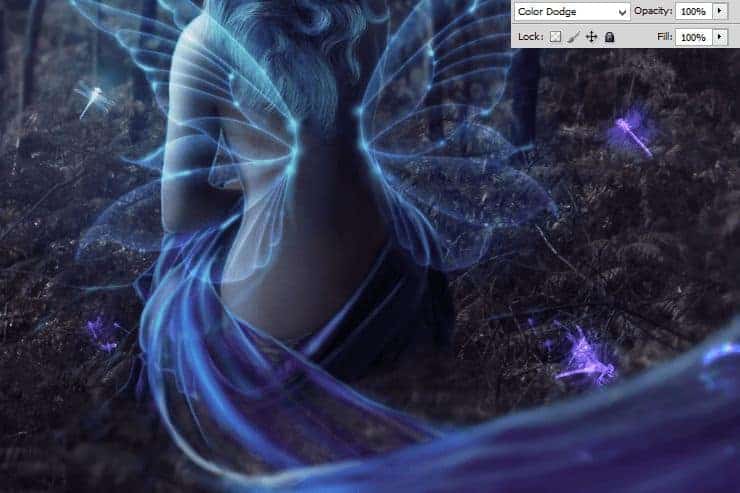
Change Blending mode of created layer to Color Dodge.
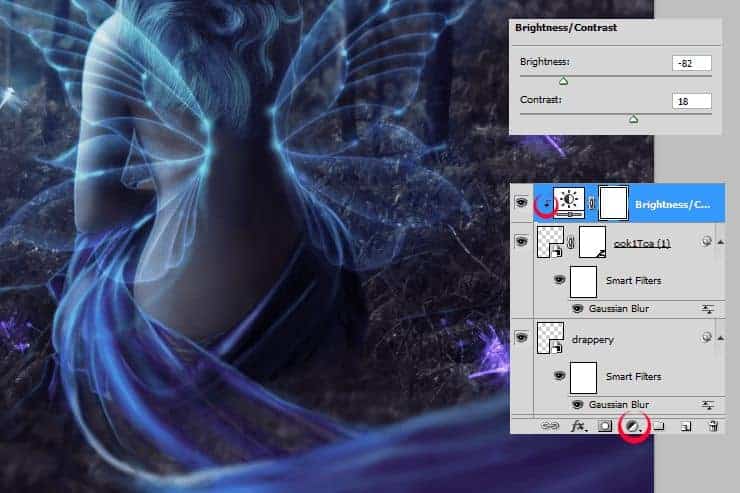
Add Brightness/Contrast adjustment layer. Then make it clippy, by RMB > Create clipping mask.
Next, add clipping layer with Hue/Saturation.
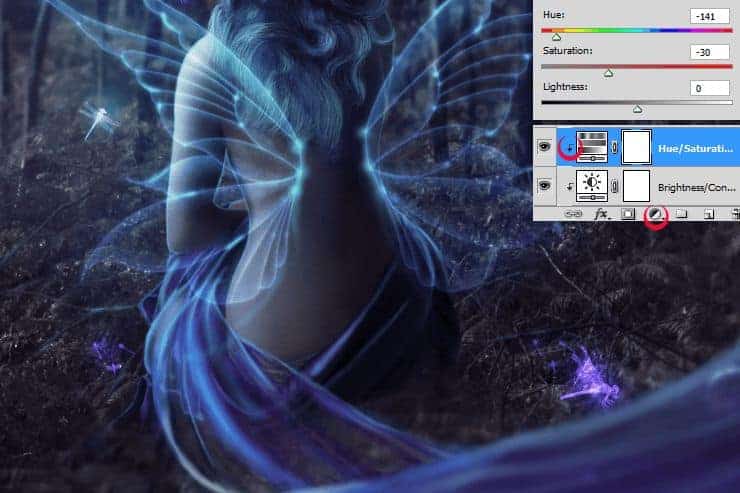
At the end, add Color/Balance layer – make it clippy.
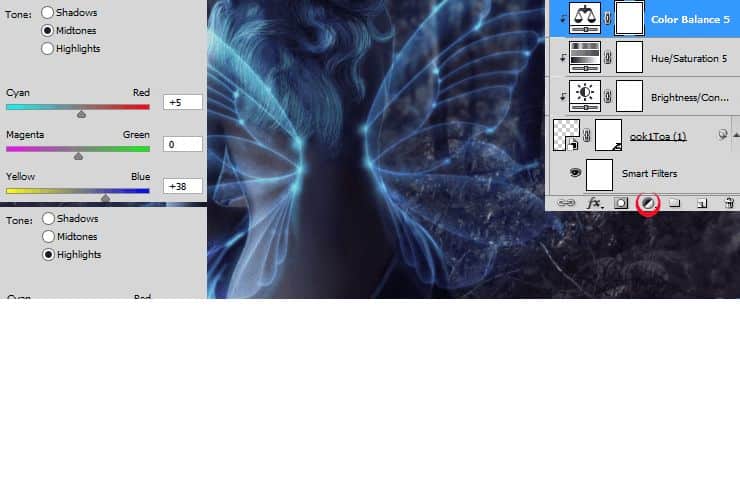
Step 71
Place Dead tree stock in left-bottom corner into your file. Then from top menu pick Filter > Blur > Gaussian blur…
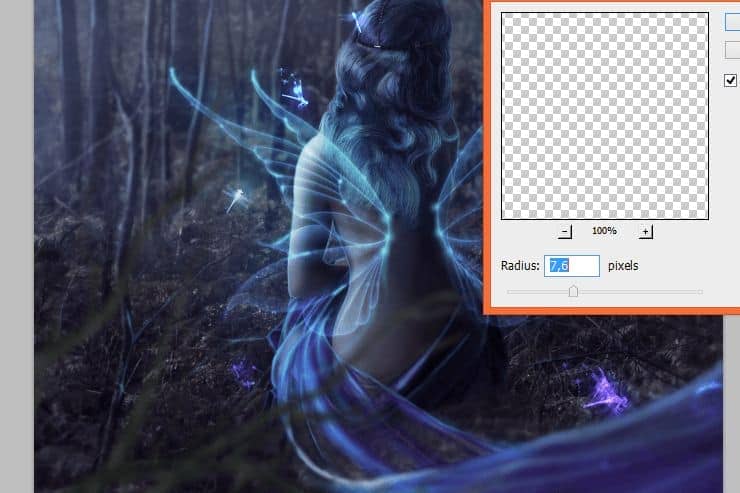
Step 72
Add adjustments layer with Brightness/Contrast. Set it as is shown. Then make it clippy (RMB > Create clipping mask).
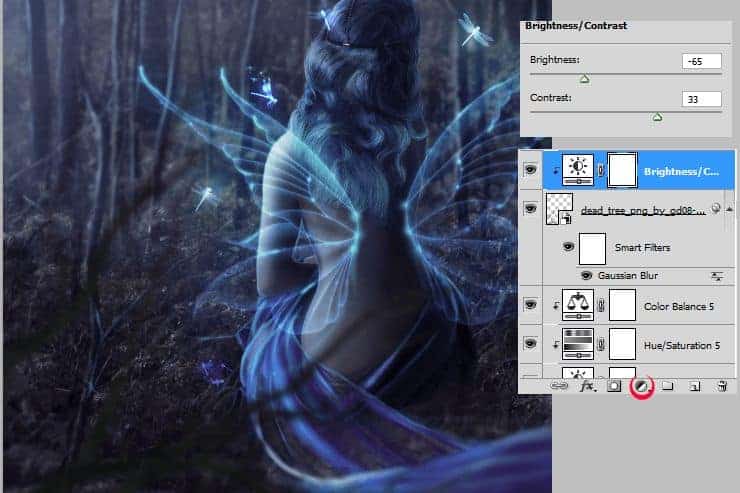
Step 73
Next, add clipping adjustment layer with Color/Balance. Decrease opacity of this layer to 50%.
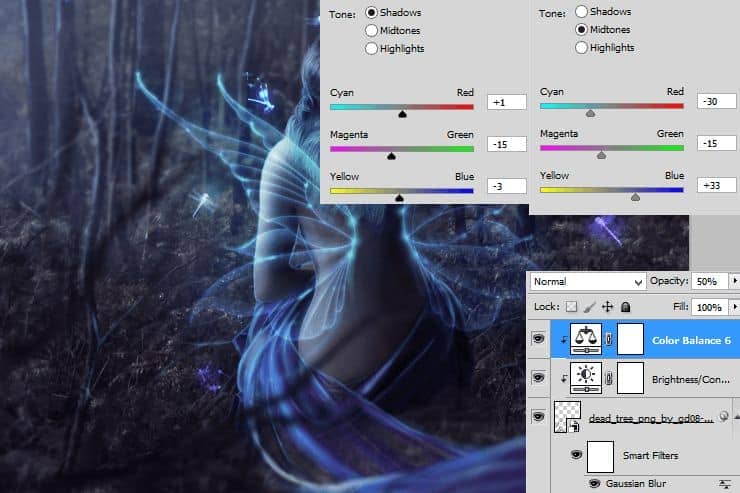
Step 74
Add New clipping layer. Pick soft brush and draw lights on branches. Don’t be afraid, your strokes don’t have to be precise. Decrease opacity of this layer to 50%.
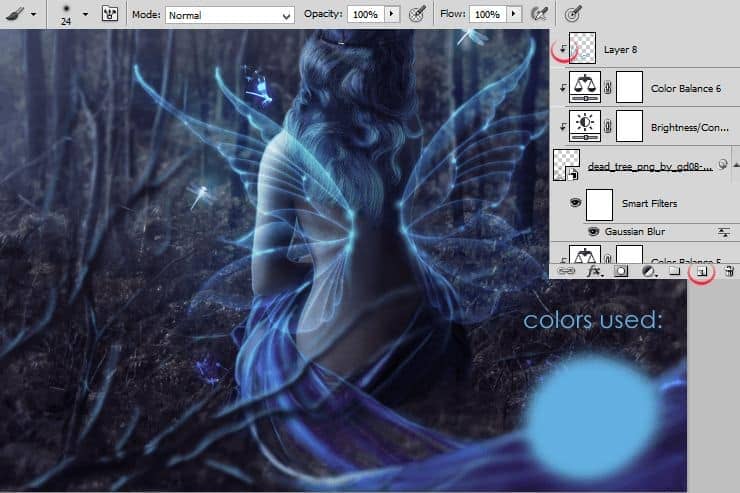
Step 75
By holding ctrl, marquee “Dead tree” layer and above. Then duplicate it, by drag and drop on “New layer” symbol.
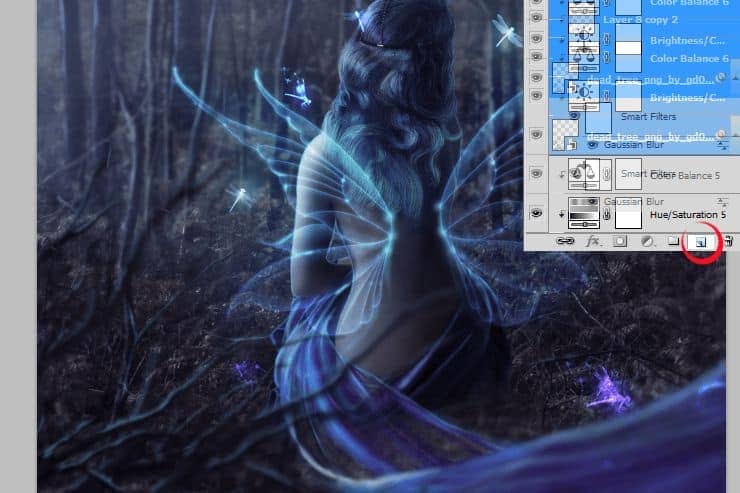
Step 76
Transform duplicated layers.
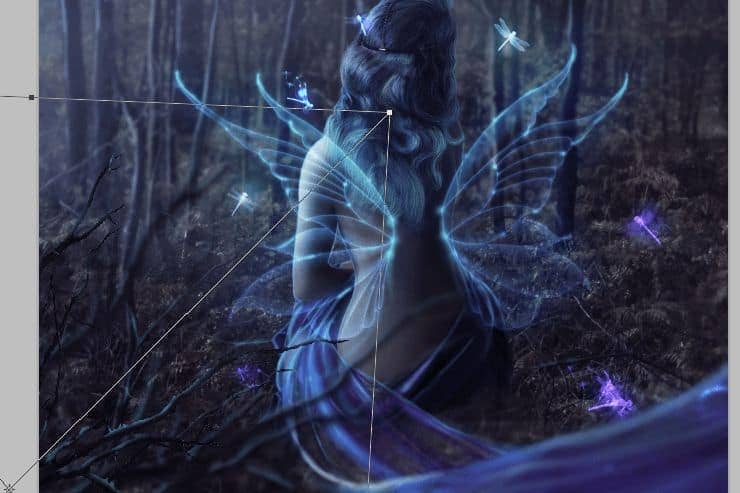
Step 77
Double click on Smart Filters in duplicated “Dead tree” layer. Edit it as shown.
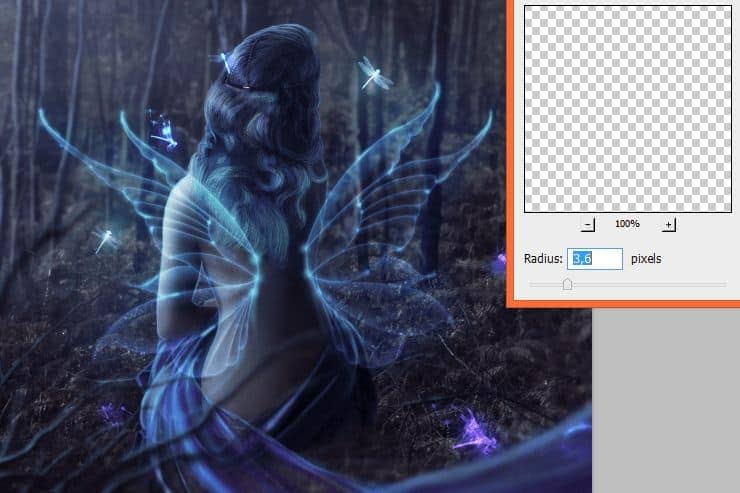
Step 78
Cool! Now on duplicated group of layers click drawn “Lights” layer. Increase opacity of this layer to 63%.
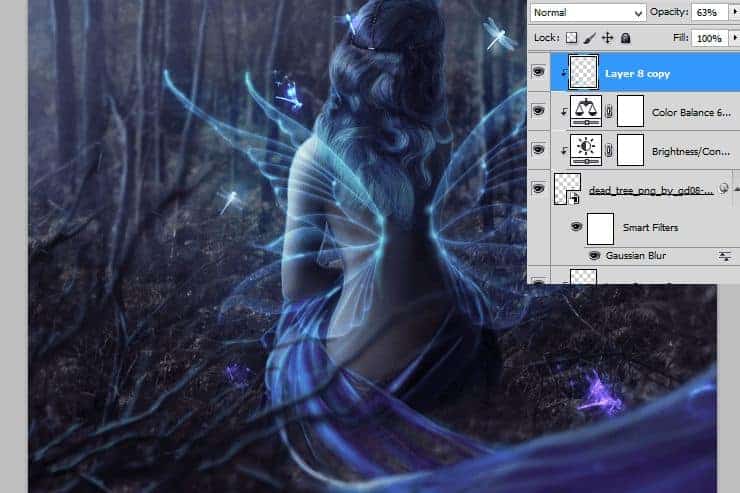
Step 79
Back to the dragonflies layer. Duplicate folder. Drag it above all layers. By clicking ctrl + T, transform layer as you wish.
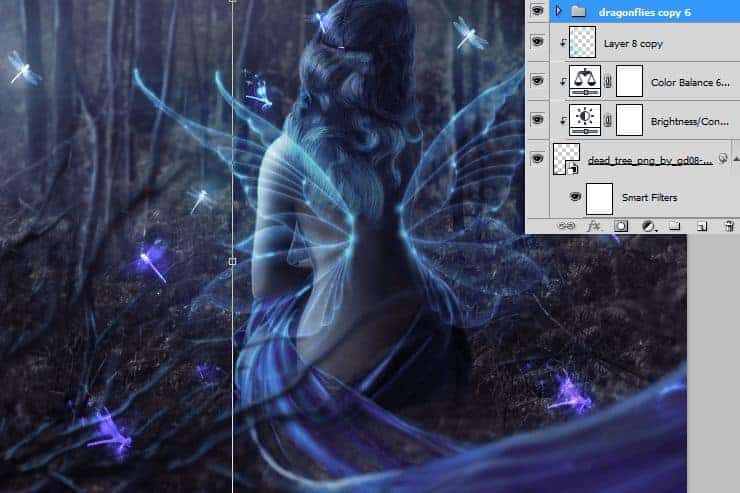
Step 80
Click on this folder with RMB. Choose “Convert to Smart Object”.
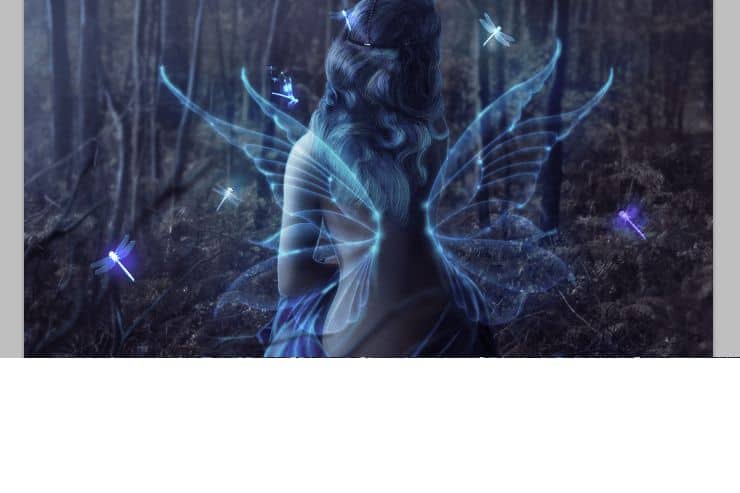
Step 81
Now pick created layer. From top menu choose Filter > Blur > Gaussian blur.
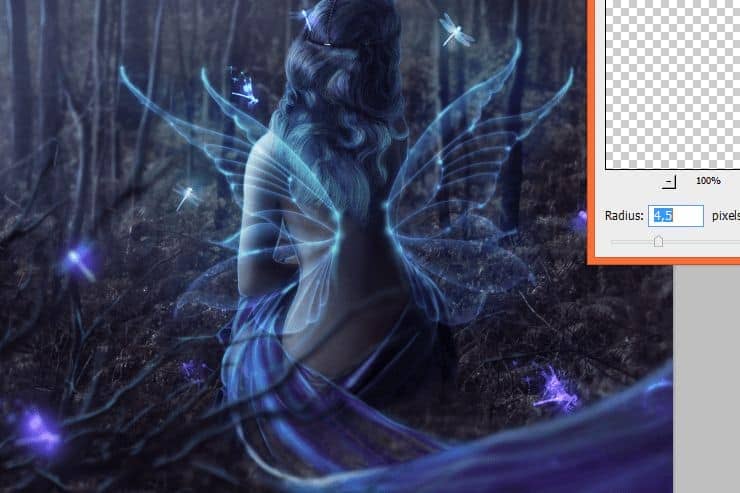
Step 82
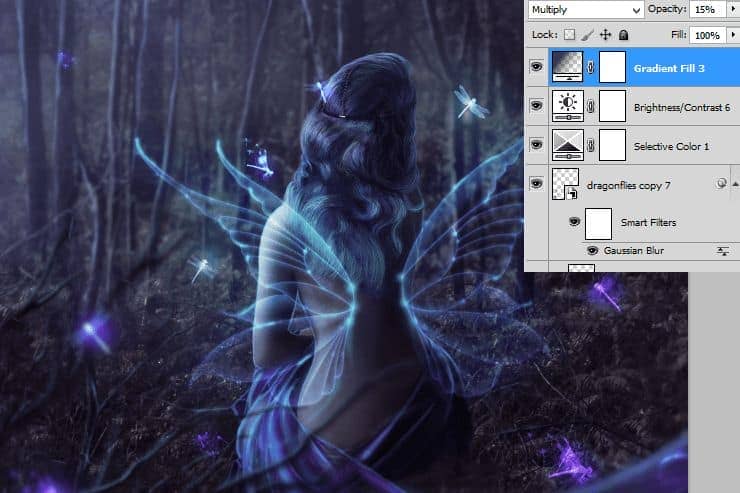
Add new adjustment layer. Click Selective color.
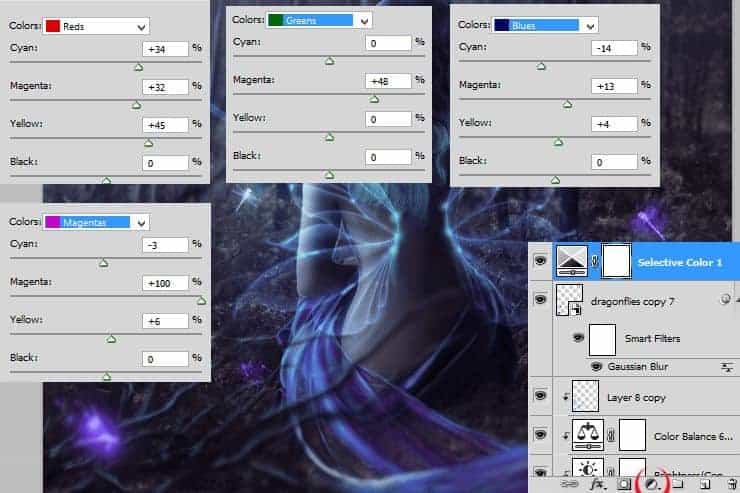
Step 83
So far, so good! :). Add Brightness/Contrast adjustment layer.
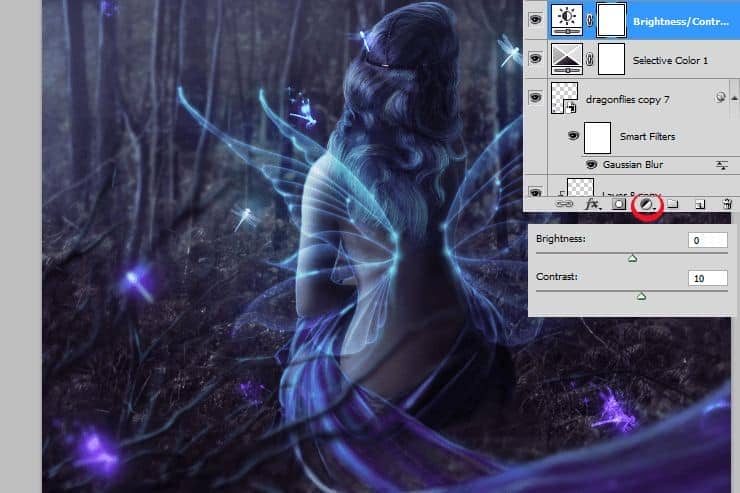
Step 84
For good taste – Add adjustment layer with gradient fill. Set it as is shown.
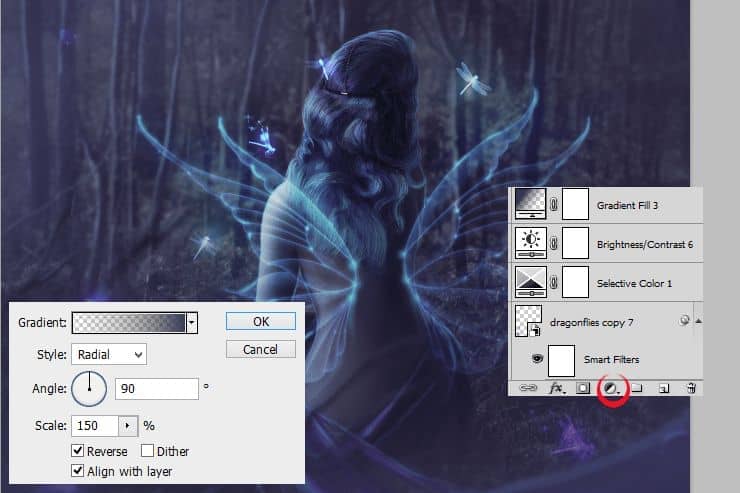
Step 85
Awesome! Now change gradient fill layer blending mode to Multiply, decrease opacity to 15%.
Final Results
![final-results[1] final-results[1]](https://cdn.photoshoptutorials.ws/wp-content/uploads/2014/07/finalresults1-1.jpg?strip=all&lossy=1&quality=70&webp=70&avif=70&w=1920&ssl=1)