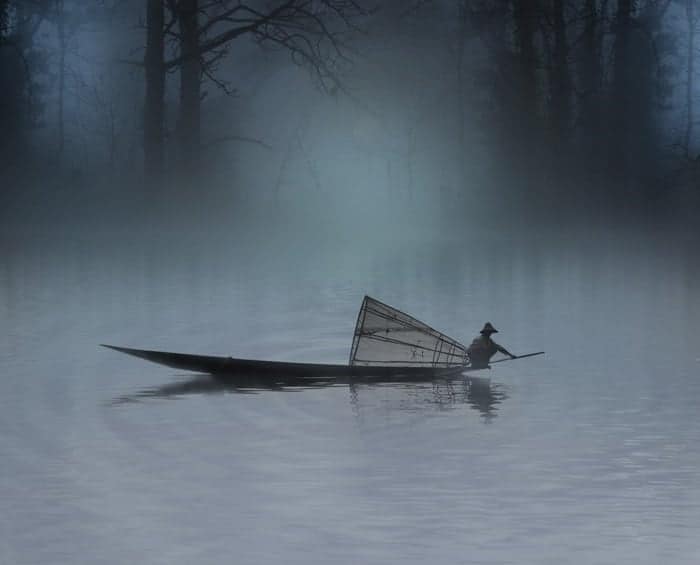
Learn how to create this photo manipulation of a fisherman in a scenic lake dreamscape with Photoshop. In this tutorial, you’ll learn how to create your own dreamy landscape of a lake using water texture, add water ripples in the landscape, enhance the original image with lightning and some more. Throughout the tutorial, you’ll learn techniques that will help you create better matte paintings and photo manipulations.
What you’ll be creating
In this tutorial, we will create a dreamscape of a fisherman in a panoramic lake using some image stocks. We will use some essential techniques for doing matte painting and photo manipulation. You will be amazed at how easy it is to combine several different images and match their color. We will use masking, brush tool, some filter, color adjustments all through the steps in this tutorial. Use Adobe Photoshop CS3 or higher, don’t forget a glass or more glasses of coffee and optionally a pack of cigarette for your companion;-) Ready..?
Tutorial Resources
Step 1 (A new Document)
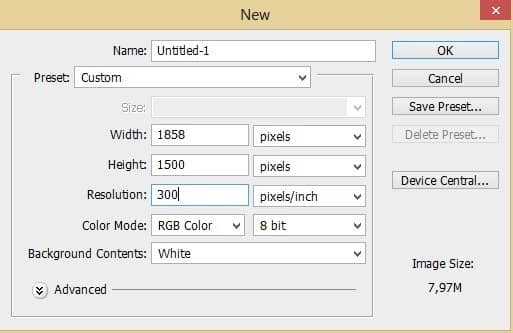
Let’s start by creating a new document (Ctrl+N) in photoshop with size of 1858 pixel wide and 1500 pixel high.
Step 2 (Filling The document)
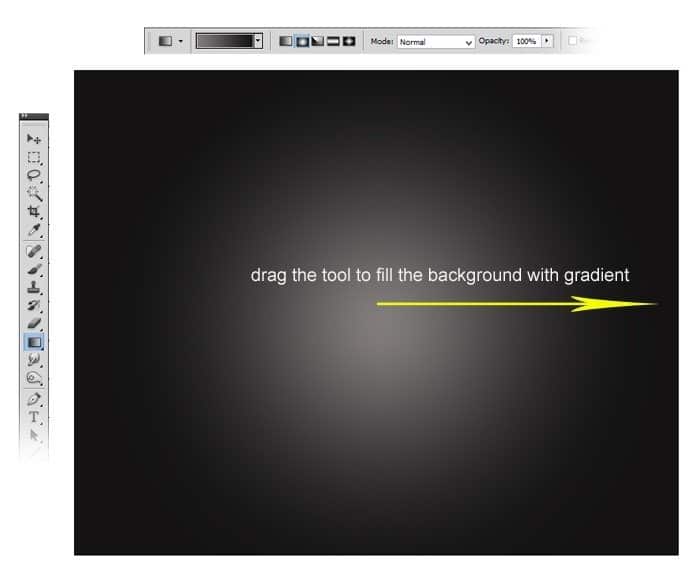
Next, we fill the document with a radial gradient. To do this, firstly activate the gradient tool in the tool panel. Make sure to choose radial gradient in the options bar. Set the foreground color to #e5e4e4 and the background to #141313. Fill the document by hold-clicking the mouse right in the center of the document and drag to the direction indicated by the yellow arrow in the screenshot.
Step 3 (Adding Water Texture)
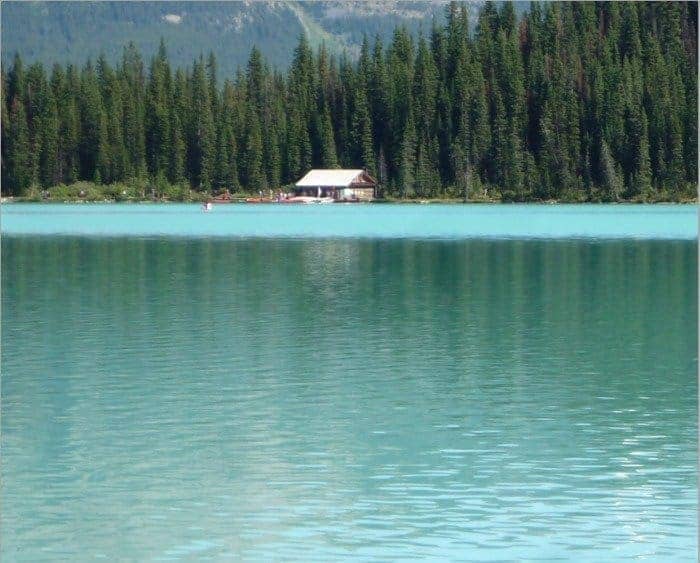
Now we are going to begin adding some pictures to the canvas (document) to create our own landscape. Start by placing the lake picture in the canvas. We will need the water of this image used as texture to create our own lake composition.
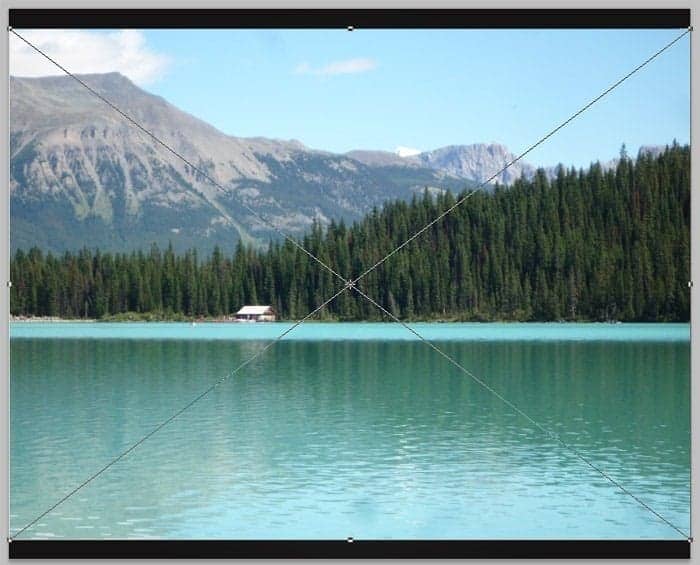
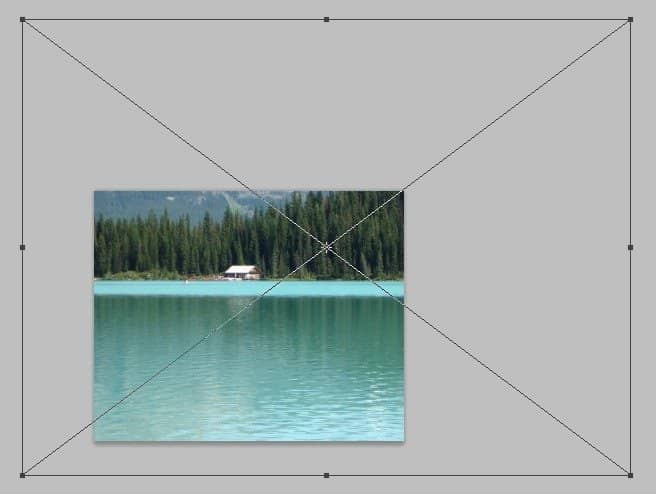
After the image is in the document, we need to scale it up to get the desired composition of the water texture used to create the lake. To do this, hit Ctrl+T to activate the free transform tool, start scaling up the image to get the water texture needed. Here is the one I created for your inspiration.
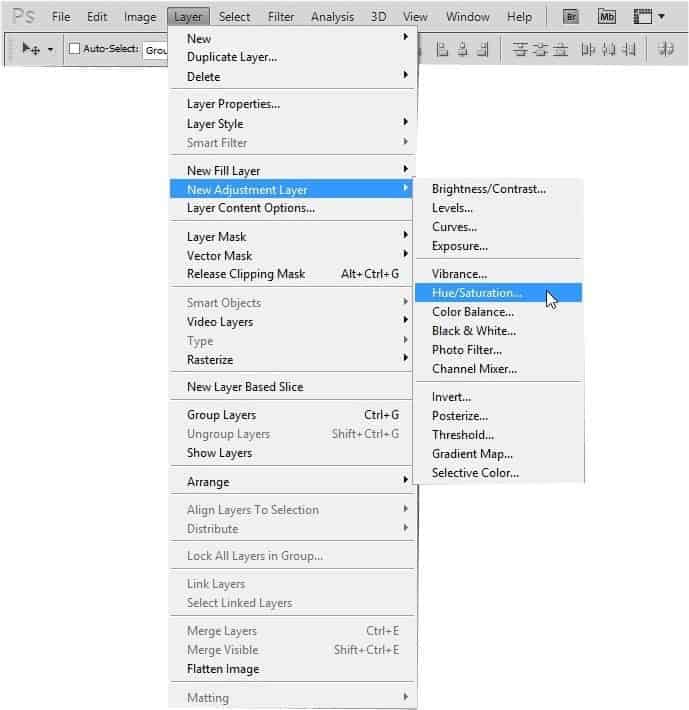
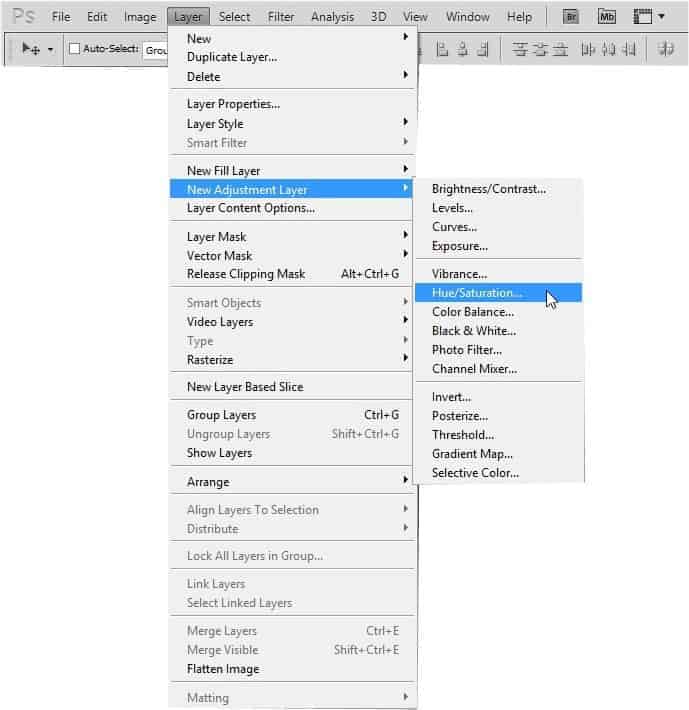
Proceed to alter the color of the texture by giving it a new adjustment layer is that hue/saturation. Go to layer > new adjustment layers > hue/saturation to open the hue/saturation’s setting window.
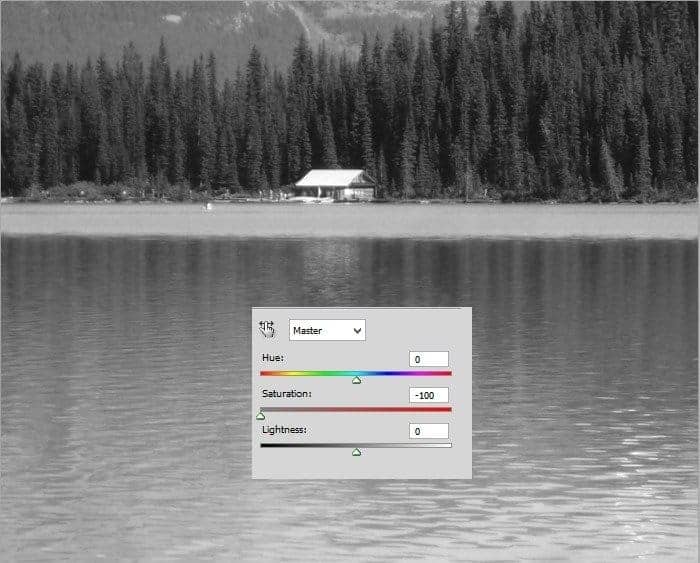
Here is the value of the hue/saturation and the result of the effected image.
Step 4 (Hiding unneeded part)
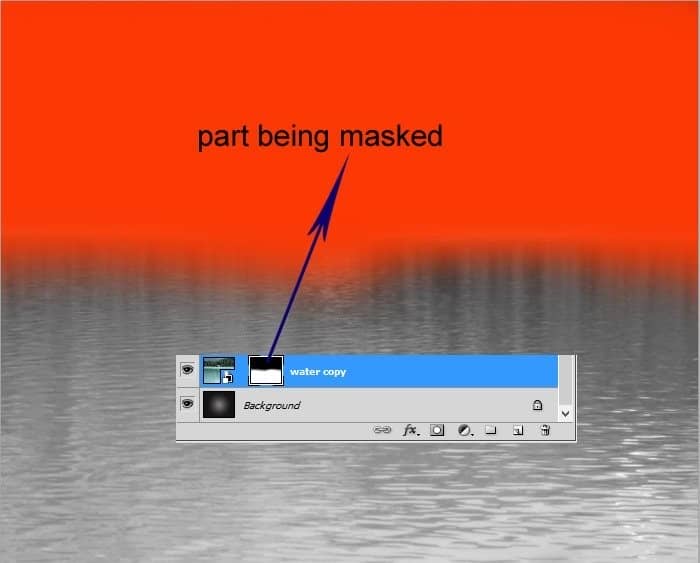
What we should do now is hiding the unneeded part of the image. As we know we just need the water part of the image to be used as texture to create the landscape. To do this, give the image a layer mask by hitting the layer mask icon located in the bottom of the layer panel. A layer mask is indicated by a white thumbnail next to the given layer.
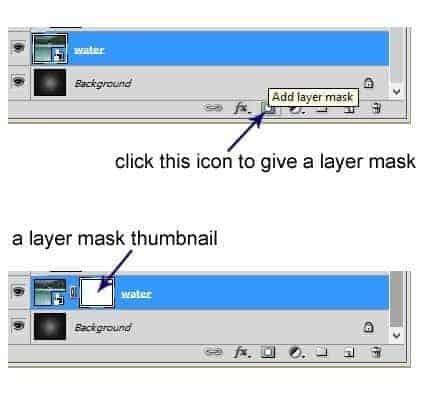
Make sure to be active on the mask thumbnail and take a very soft round brush set to about 300 px and 30% opacity. With black color, mask the upper part of the image by stroking it. The red part in the screenshot is the part we should stroke the black brush. When the layer is mask, it is indicated by the black or gray spot on the thumbnail.
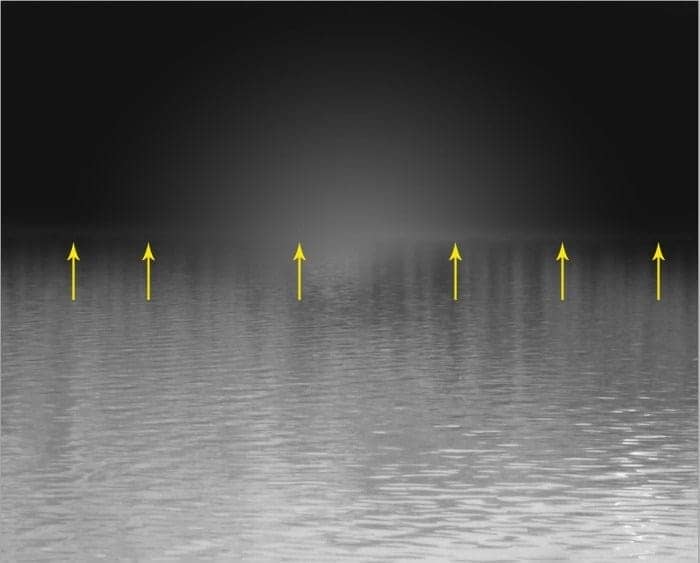
Here is the result should be. Make sure to leave the lighter part (let me say the ground or sand) of the image visible a bit supposed to be a horizon line for the scene as shown by the yellow arrows. If you ever wonder why we should fill the background with radial gradient of color mentioned in step 2, this is the reason why: almost half of the background is now covered by the water texture and the rest which is uncovered supposed to be the part where the light source is coming from. The choice of the color mentioned in step 2 is to match the background with the water texture with hue/saturation adjustment.
Step 5 (Adding more elements)
Now place the dark wood image above the water texture layer in the canvas. Scale its size in such way that its position is right in front of the light source (the half part of the radial gradient)
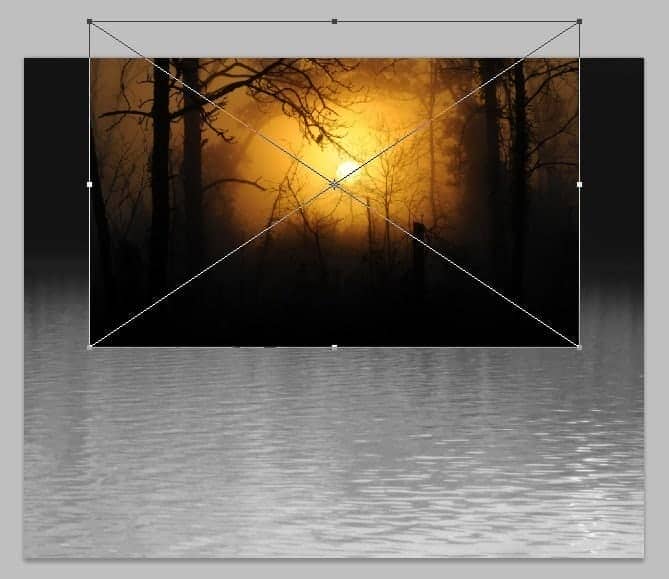
Mask some parts of the wood to have result similar to the one shown in the screenshot.
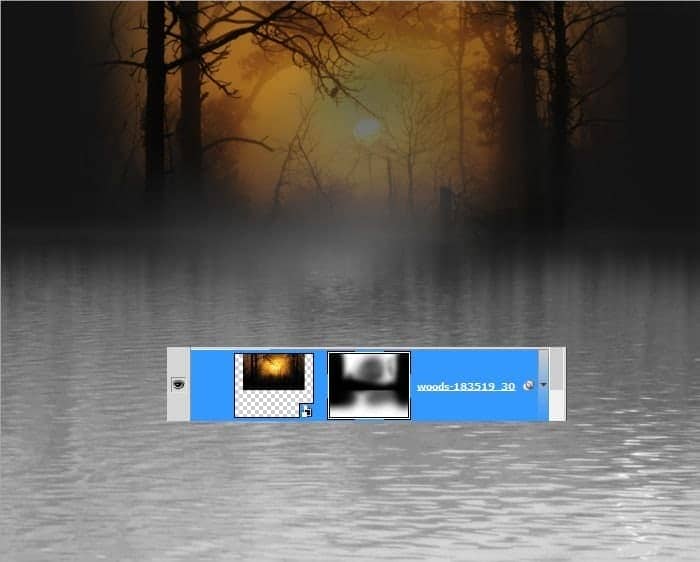
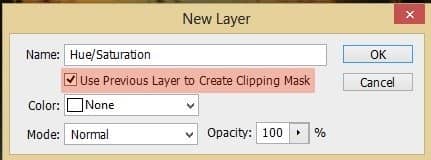
Give this wood layer an adjustment layer to alter its color. When the hue/saturation option window shows up, make sure to check Use Previous Layer To Create a Clipping Mask. This will give this hue/saturation layer a clipping mask.
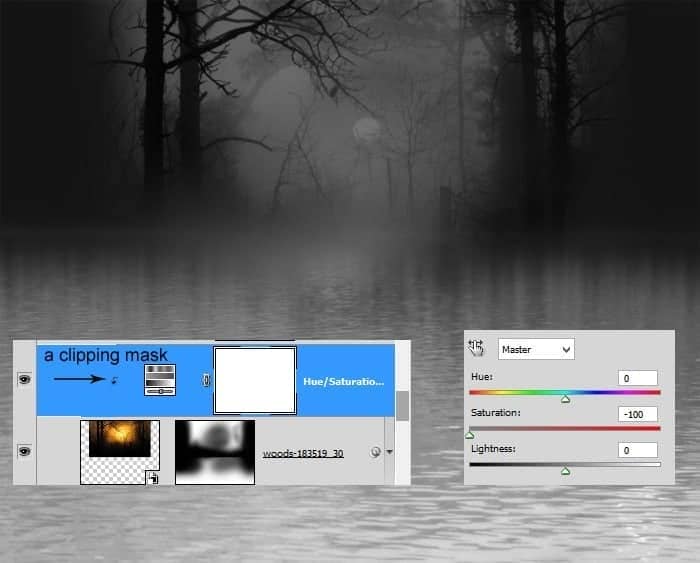
Here is the value of the hue/saturation and the look of the hue/saturation layer in the layer panel. The downward arrow next to the layer is indication of a clipping mask.
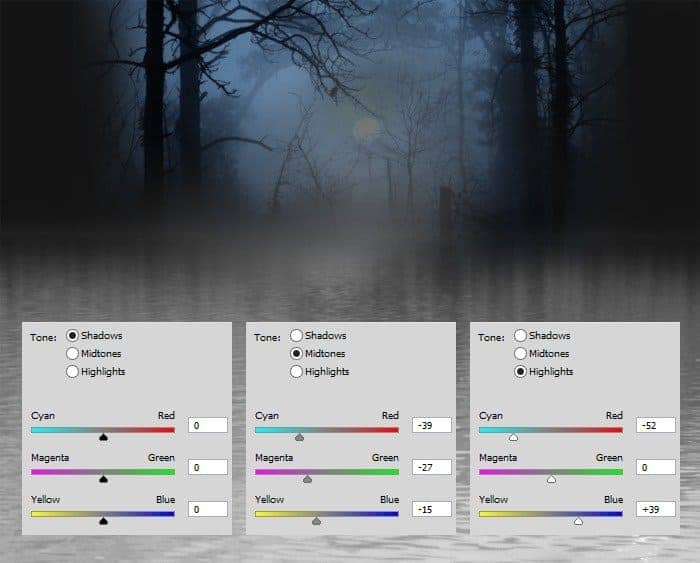
Give this wood layer another new adjustment layer with a clipping mask. This time we will give it color balance. Set the value of this color balance layer as shown in the screenshot. This will give the wood image some blue tone.
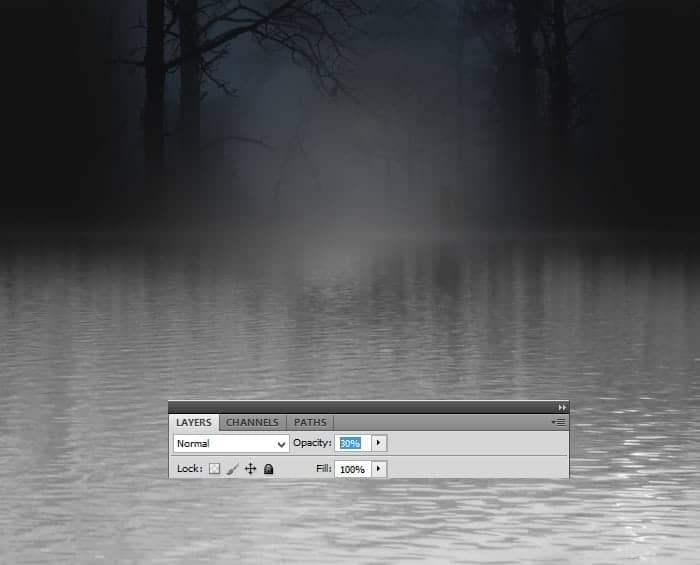
Finally, go select the wood layer to be active on it and set its opacity to about 30-40%. Select the wood layer including the two adjustment layers with clipping masks above it, and hit Ctrl+G to group them in a new group or folder. I named this new folder BG
Step 6 (More woods)
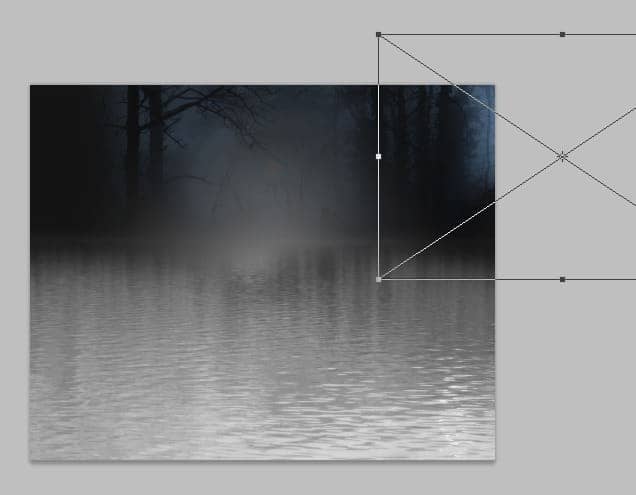
We should fill the left and right part of the empty space of the scene. We will do this by simply duplicating the BG folder. Duplicate the BG folder and move the duplicate to the right. We can flip the wood horizontally to avoiding uniformity. Arrange its position to the left. We can alter the opacity of the wood layer within this duplicate folder to about 75-85% opacity.
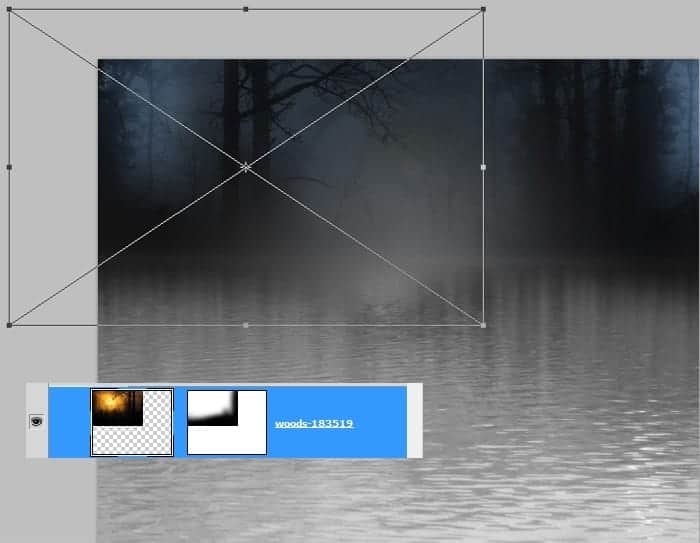
Mask a bit unneeded part:

Duplicate again the BG folder and place the duplicate to the left to fill the empty space in that part. Mask some unneeded part.
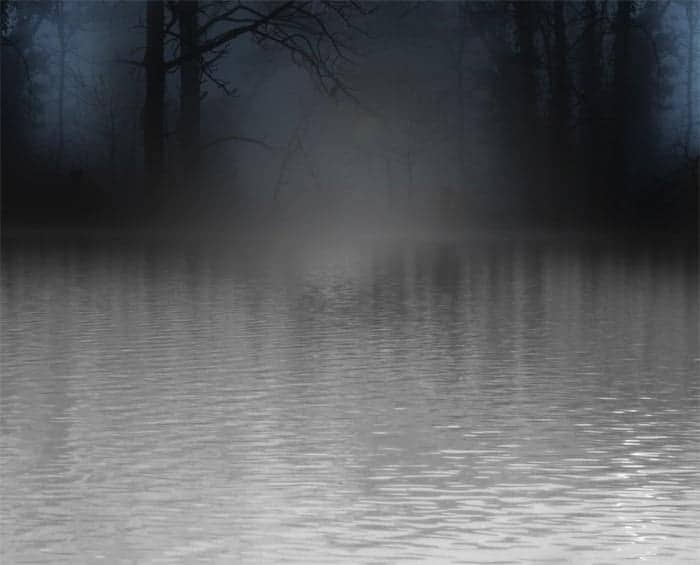
Here is the result so far:
Step 7 (Adding a fisherman)
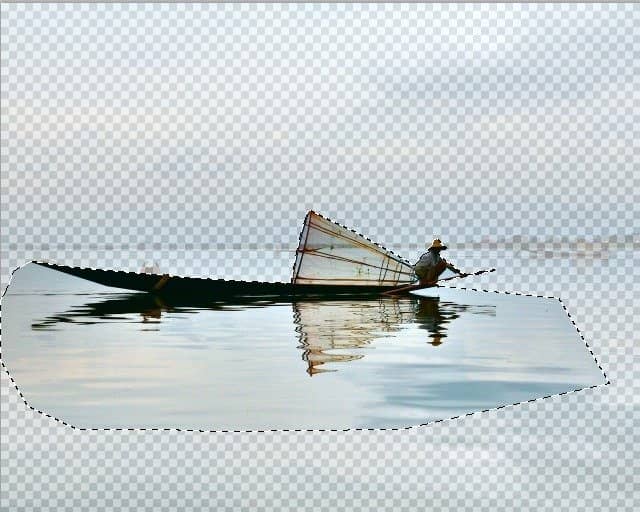
Open the fisherman image in photoshop. Cut out the fisherman as the result shown in the screenshot. We can use any extracting tools which are available in photoshop to do this cut out.
Place the cut out in the main document. Scale its size to fit the composition.
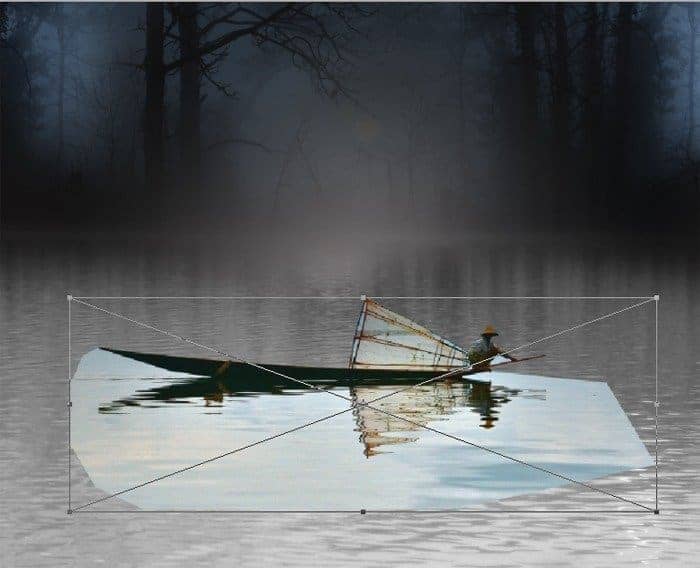
Mask unneeded part of it.
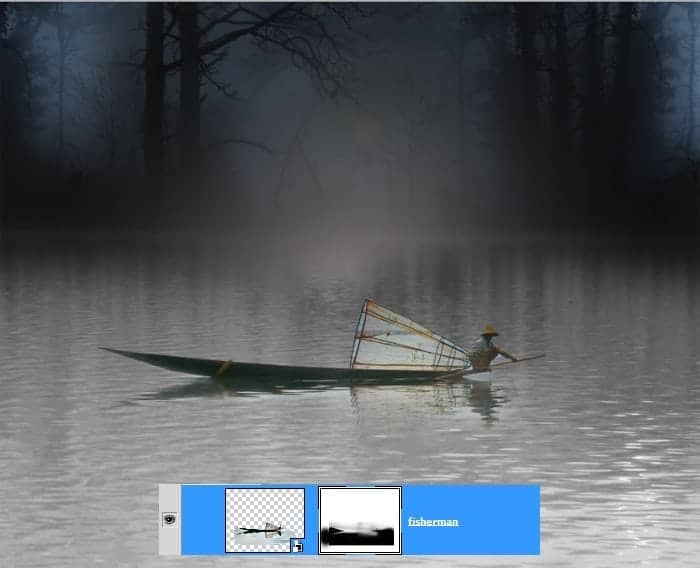
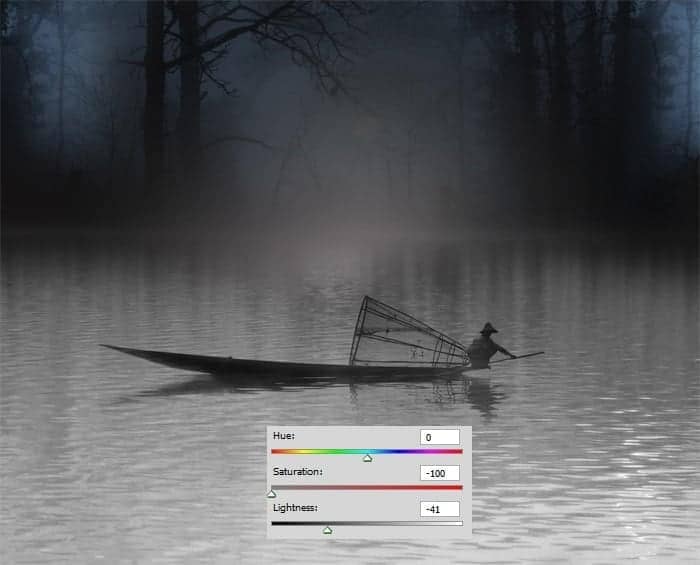
Finally give this fisherman layer a hue/saturation adjustment layer with a clipping mask. Duplicate (Ctrl+J) the hue/saturation layer. Set the main layer to soft light blending at 100% opacity and the duplicate to normal at 100% opacity. Select all the fisherman layers and hit Ctrl+G to group them in a folder. I named this folder fisherman.
Step 8 (Adding water ripples)
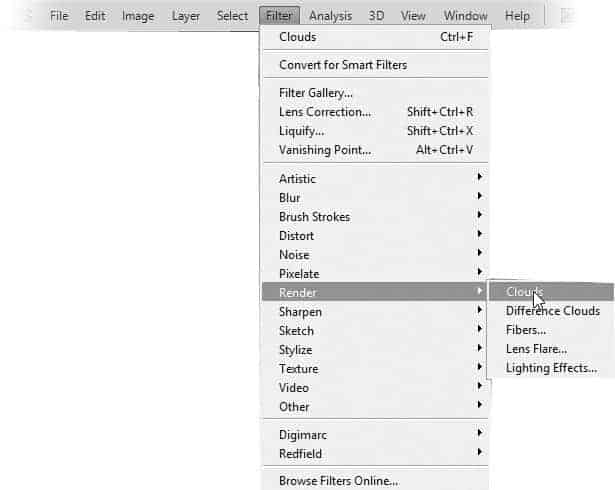
Create a new layer (Ctrl+Shift+N) below the fisherman folder. Fill (Shift+F5) this new layer with any color we want. With this new layer selected, go to layer > smart objects > convert to smart object. Make sure to set the foreground color to #2973fb and the background to #a0dffc. With the new smart object selected, go to filter > render > cloud to give this layer cloud filter.

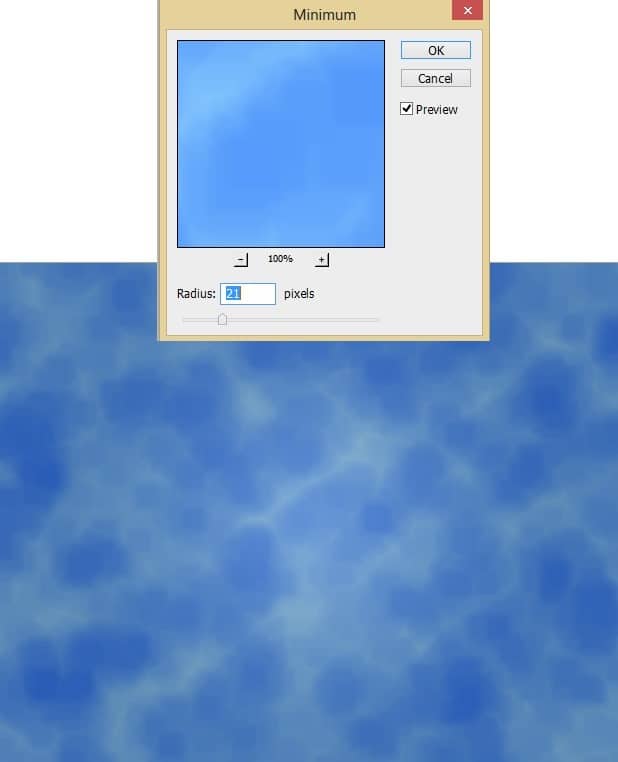
Next, go to filter > other > minimum:
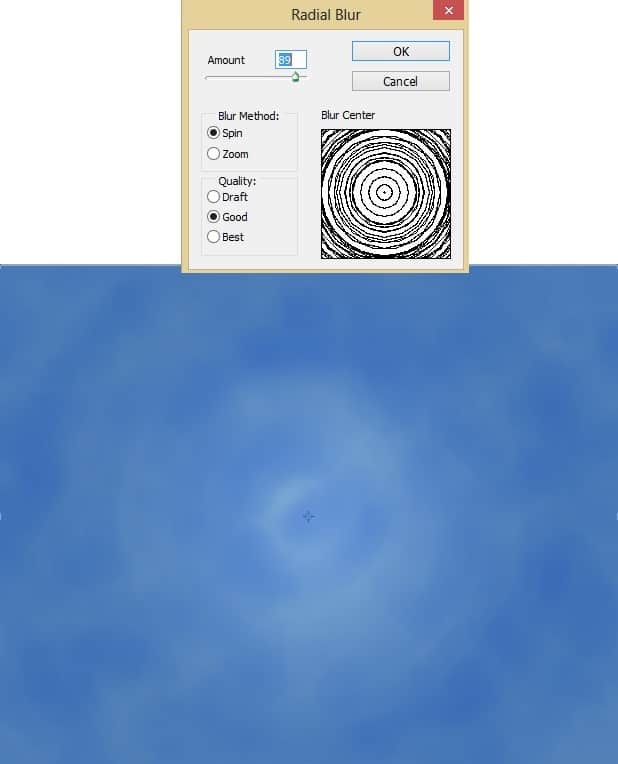
Give more filter: filter > blur > radial blur
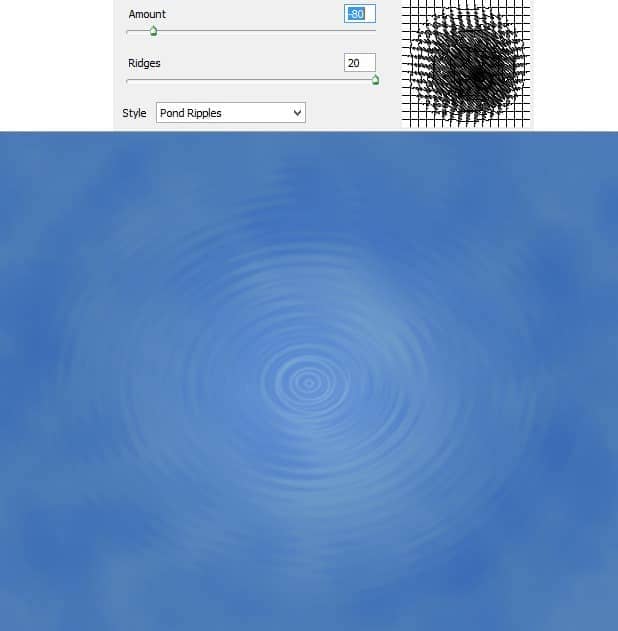
Another filter: filter > distort > zig-zag
Finally, activate free transform tool. Scale its size a bit and transform its perspective:
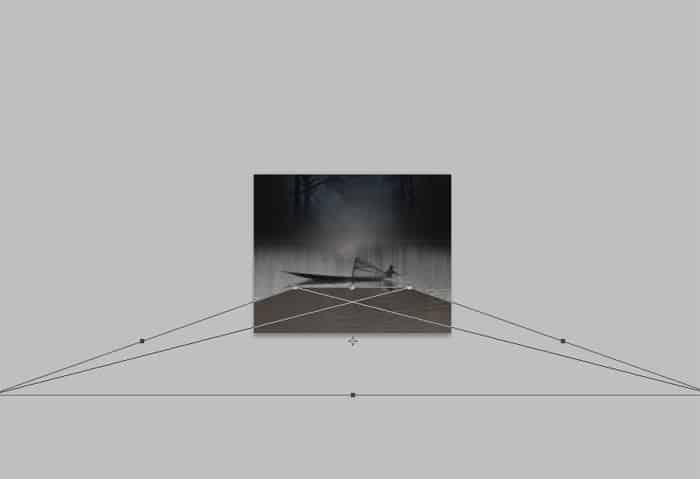
Here is the result I created:
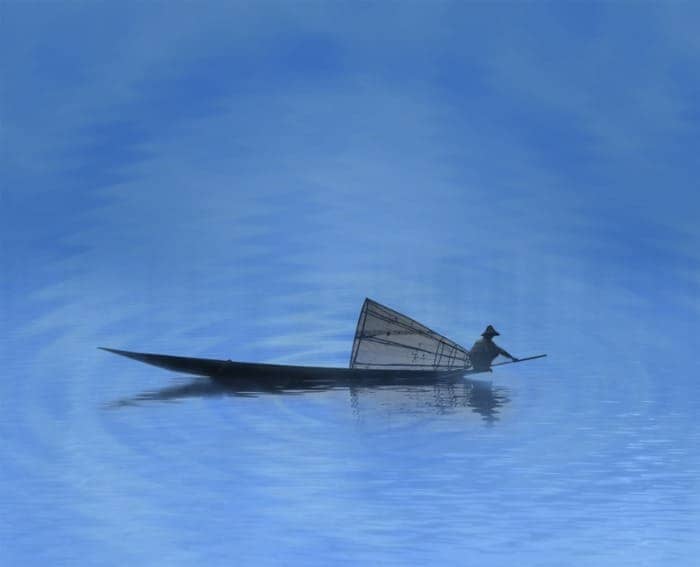
Hide the unneeded part of the ripples by masking them.
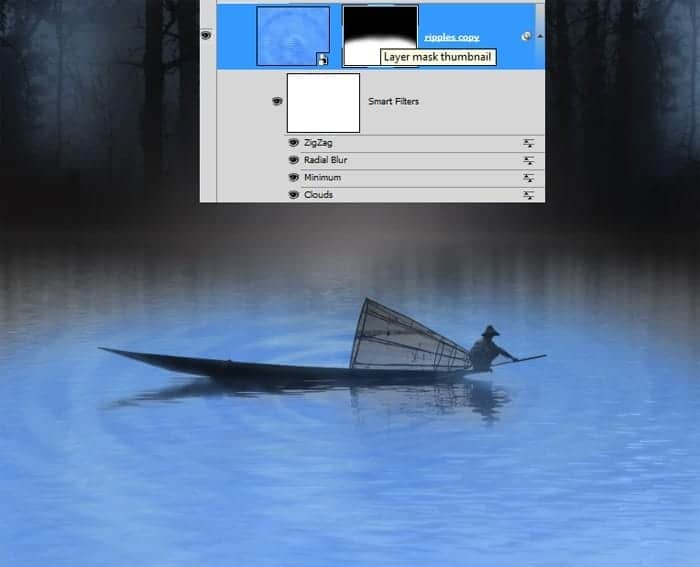
Step 9 (Color adjustments to the water ripples)
To match the color of the water ripples with the surrounding we should give color adjustment to this layer. We will give it two adjustment layers with clipping masks each: hue/saturation and brightness/contrast. Set the values of the both adjustment layers as shown below:
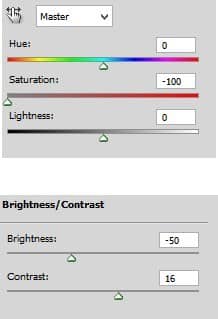
Set the hue/saturation layer to normal blending at 80% opacity meanwhile the brightness/contrast layer is set to normal at 100% opacity. Select all the water ripples layer and hit Ctrl+G to group them in a folder. I named this folder water ripples.
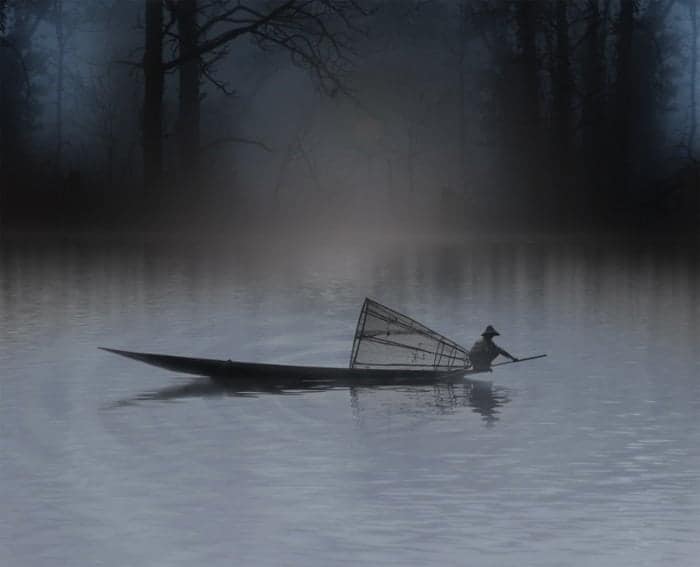
Step 10 (more color adjustments)
From this step on to the next three steps ahead, we will do color adjustments to the scene. We will do this by painting some solid color to the scene. Firstly, create a new layer above the BG folder (step 5-6) on which we will paint the first color. We use color of #0c84cf. Take a very soft round brush (0% hardness) set to low opacity of about 10-15%. On this new layer, paint the color to some area on the left and right side of the scene. Here is the result I created for this color layer set in normal blending mode at 100% opacity.
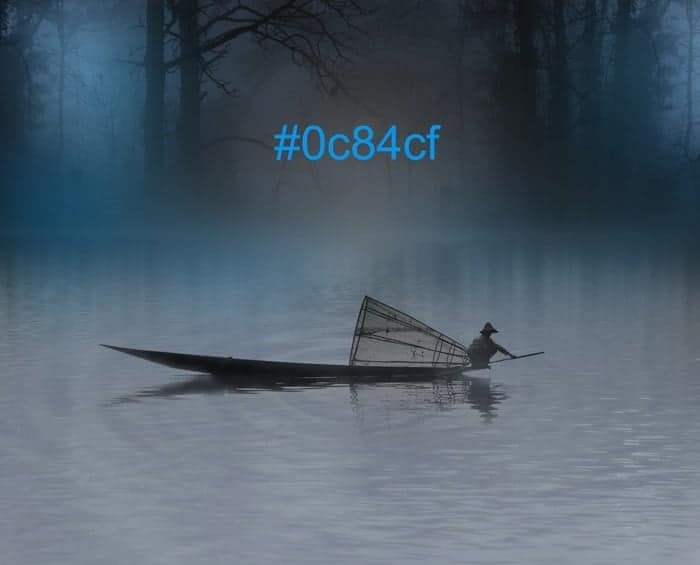
We can reduce the opacity of this layer if we stroke the color too much to meet the desired color we want. For this layer, I needed to reduce the opacity to just 25%. This is the part of this tutorial which is really experimental meaning that we should do the so called trial and error effort to play with colors, blending option and opacity to get the result we want.
Step 11 (more color adjustment)
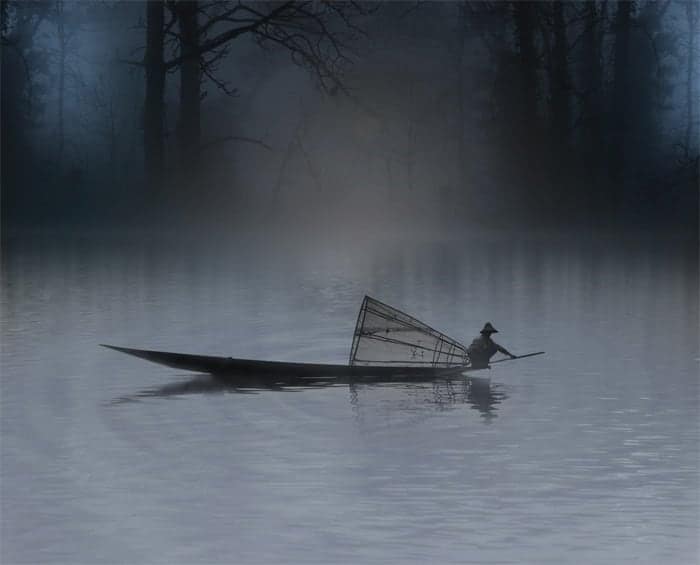
Create again a new layer above the previous color. Take a very soft round brush to paint more color on this new layer. This time we use color of #5b6776. With the soft round brush set to opacity of about 10-14% paint the color as the one below to certain parts of the scene:
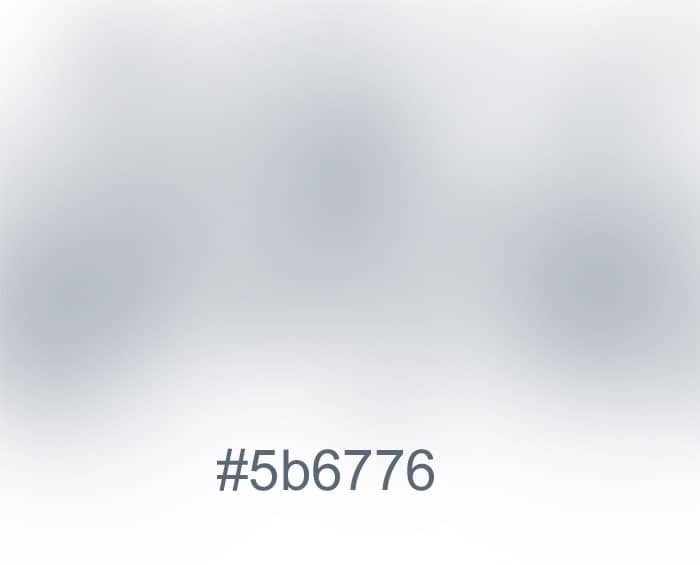
Here is the result so far
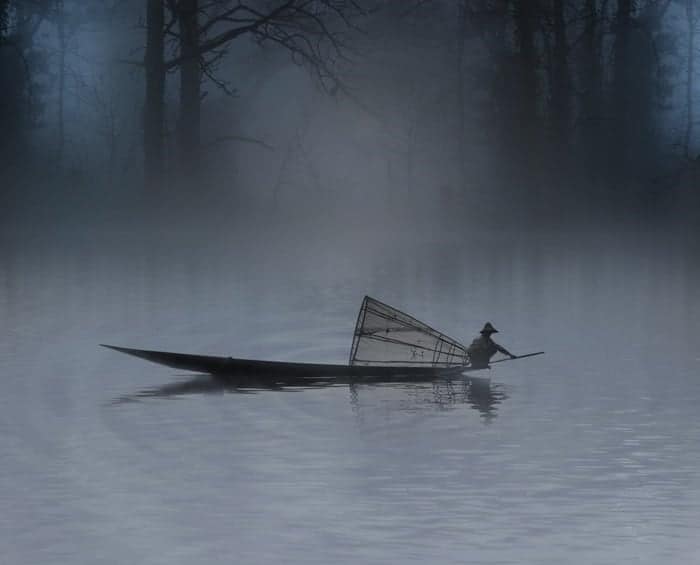
Step 12 (And more color)
Create another new layer above the two previous layers. On this new layer, paint soft white color to areas around the scene. Here is the white color of this layer I created which is set to normal at 100% opacity.
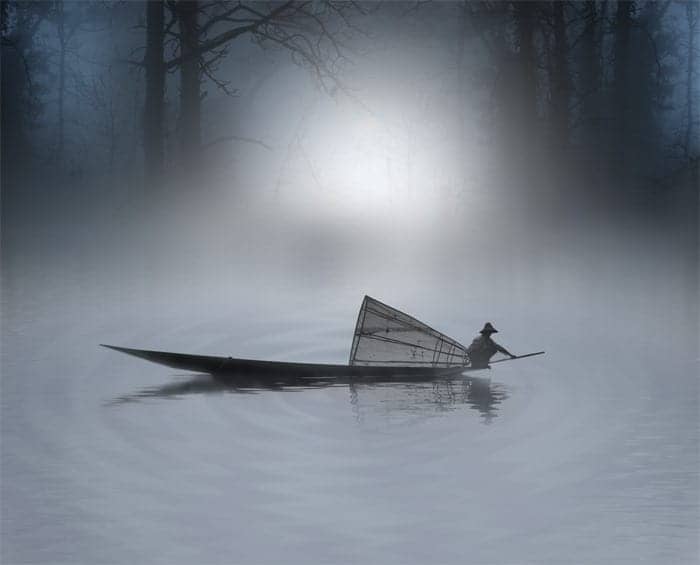
Here is the result when I set this layer to overlay blending at 30% opacity.
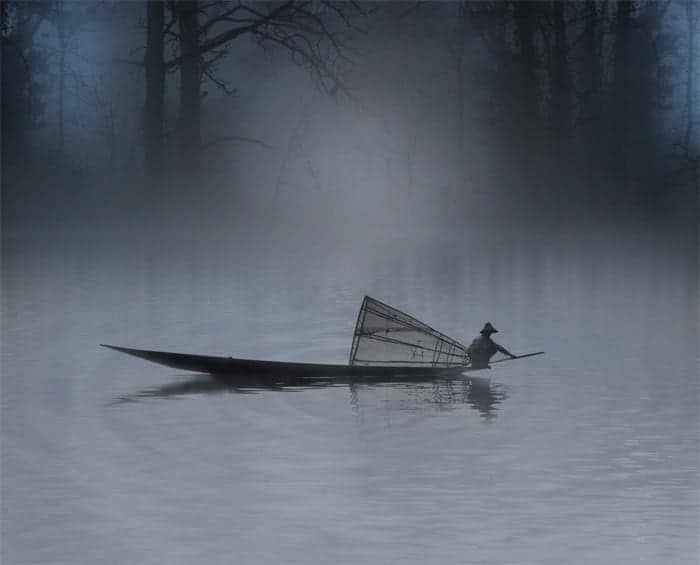
Step 13 (The last color adjustment)
Create the last new layer on which we will paint more color to the scene. We use color of #1afcfc. Here is the one I created in normal blending at 100% opacity.
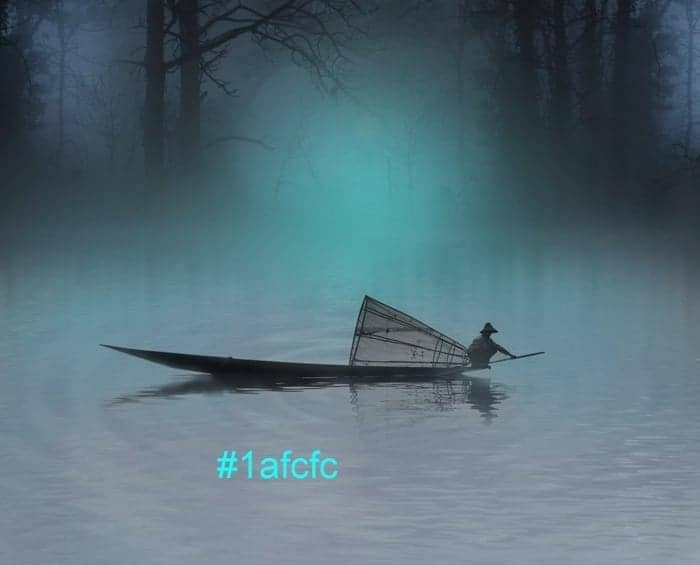
And here is the result when this layer is set to normal at about 20-25% opacity. Select all the color layers and group them in a folder. I named this folder color
Step 14 (Adding some highlight)
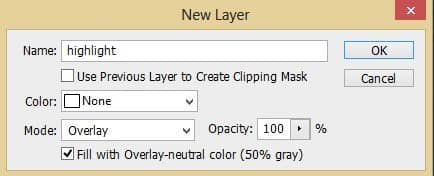
Create a new layer above the fisherman folder. Set this layer to overlay and make sure to check Fill with Overlay-neutral color (50% gray) to fill this new layer with gray color.
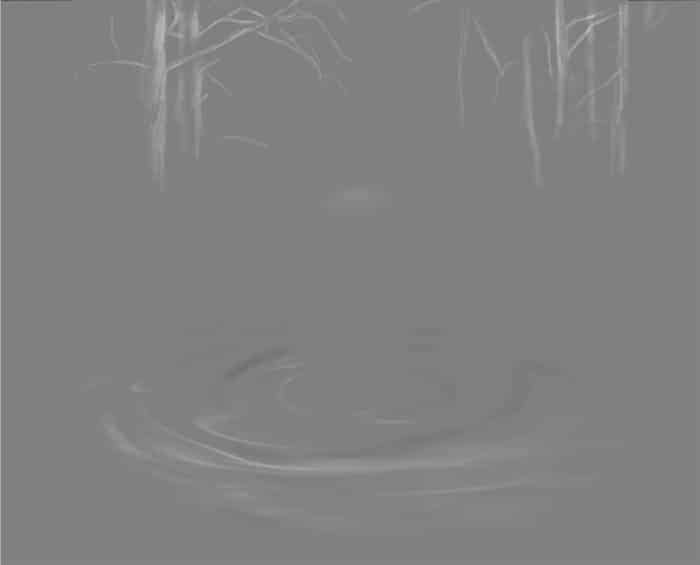
On this new layer, paint soft white color on the trees and water ripples to give some highlight. Here is the layer set to normal at 100% opacity I created.
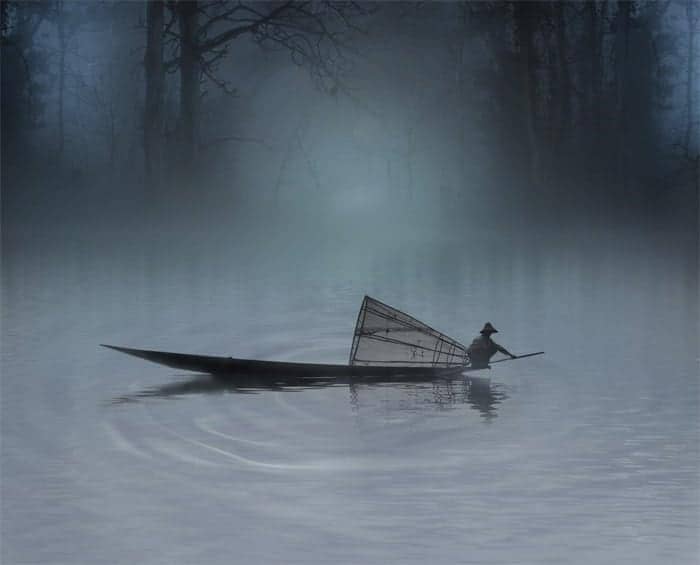
This is the result in overlay at 100% opacity.
Step 15 (Light on boat)
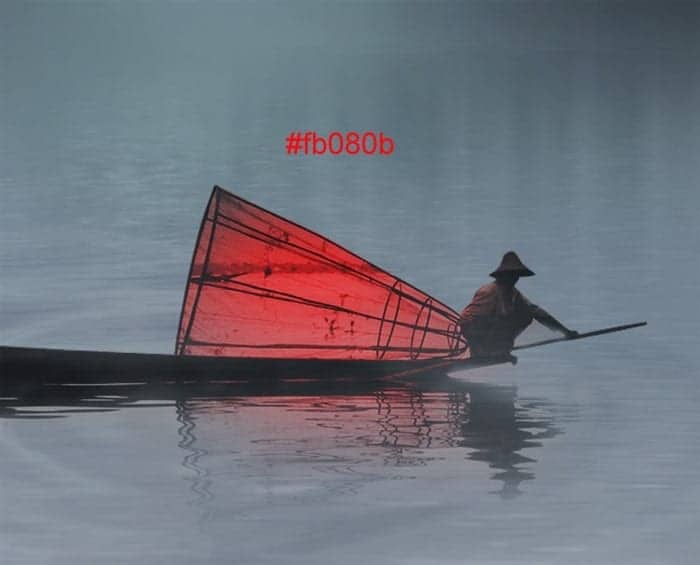
Select and open the fisherman folder. Create a new layer with a clipping mask above the two hue/saturation layers within this folder. Set this layer to color blending at 100% opacity. Take a very soft round brush and paint red color (#fb080b) to have something like the one below:
Step 16 (Illuminating the light)
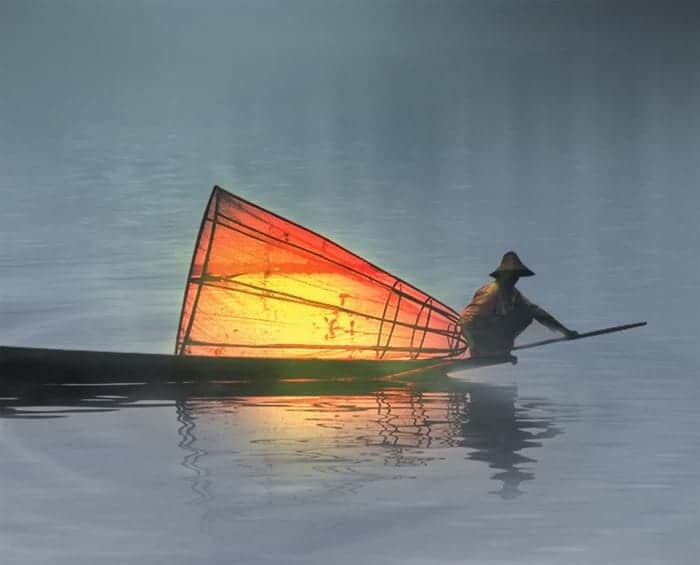
Proceed to create another new layer above the fisherman folder. Fill (Shift+F5) this layer with black. Set this layer to color dodge blending. Take a very soft round brush set to a very low opacity of about 4-5%. Finally, paint the combination of yellow and a bit white color to illuminate the red color (step 15) and some areas around the boat. Here is the normal blending of this layer I created:
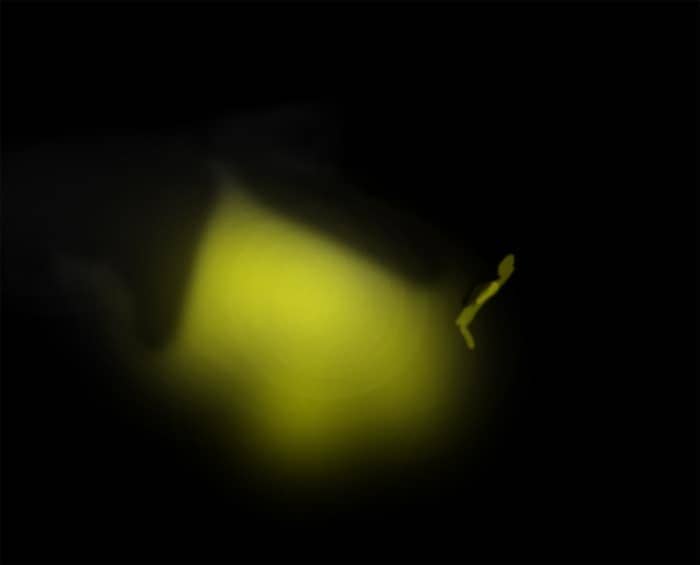
And here is the result:
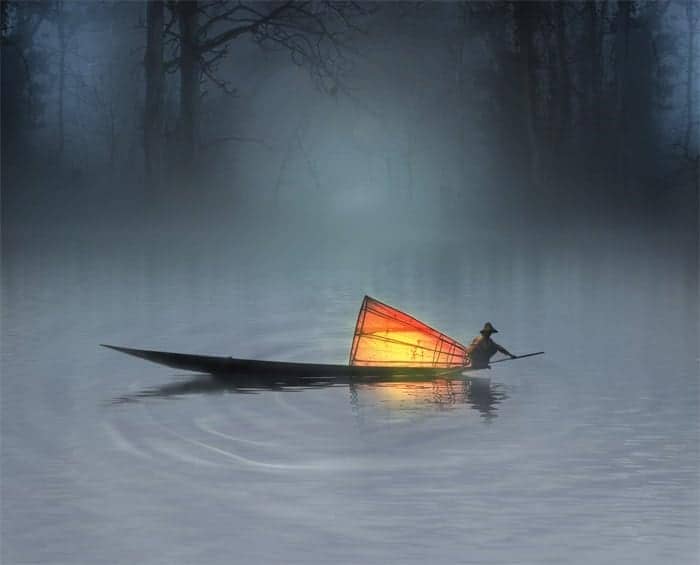
Step 17 (Foreground for the scene)
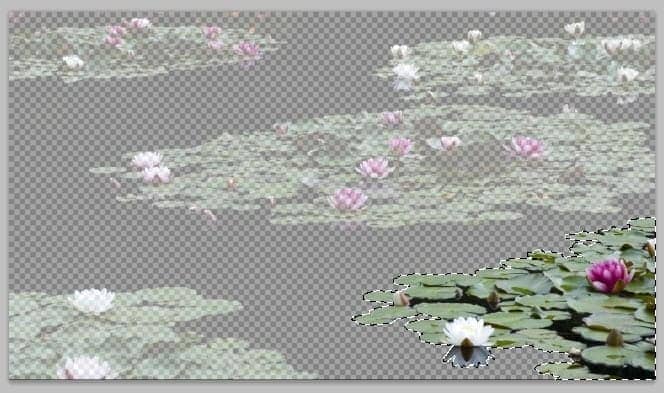
In this step we will add foreground for the scene. We will use some water lily as the foregrounds. Open the water lily image and cut out part needed.
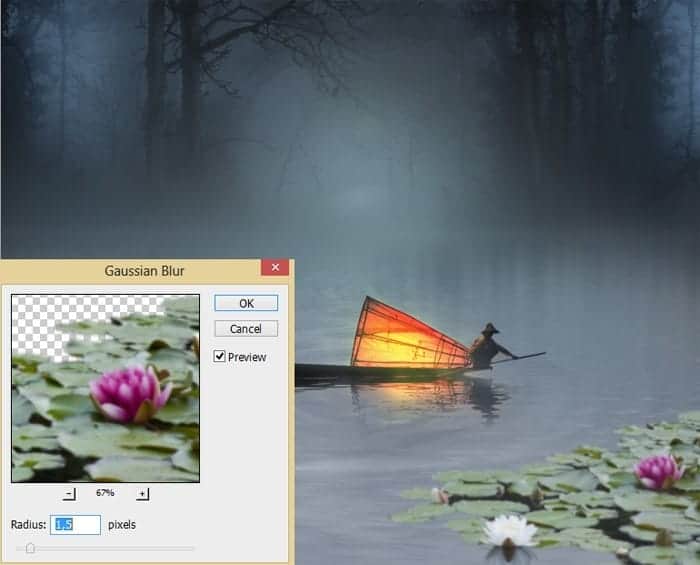
Place the cut out to the main scene. Scale its size and give it some Gaussian blur.
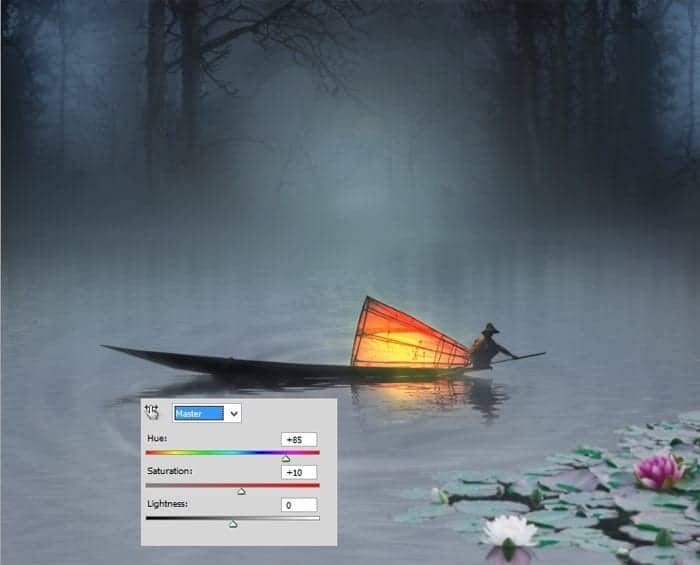
Alter the color of this water lily layer a bit by giving it hue/saturation color adjustment layer with a clipping mask.
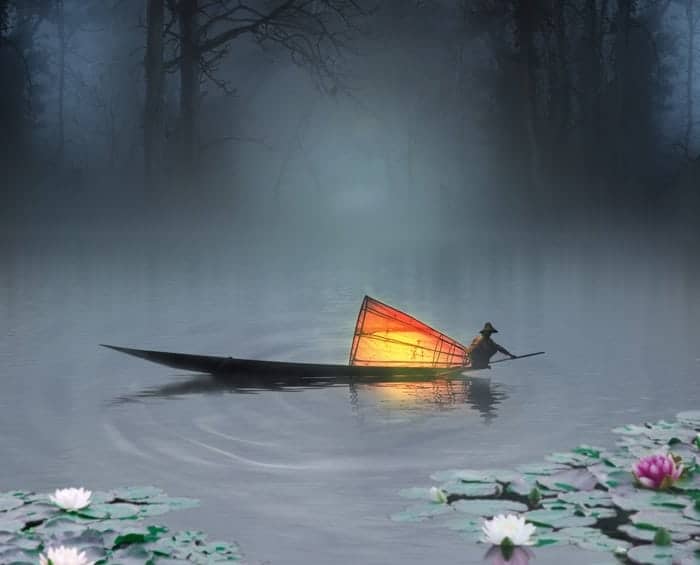
With the same step, add more water lily to left foreground. Here is the result so far.
Step 18 (Overall Adjustments)
In this step we will set the overall color adjustment for the scene by giving it some new adjustment layers above all the other layers. Firstly, we will give it color balance set to the values given below:
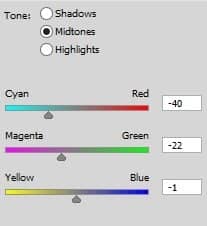
Duplicate (Ctrl+J) this color balance layer and set the two layers to normal blending at 100% opacity. Here is the result:
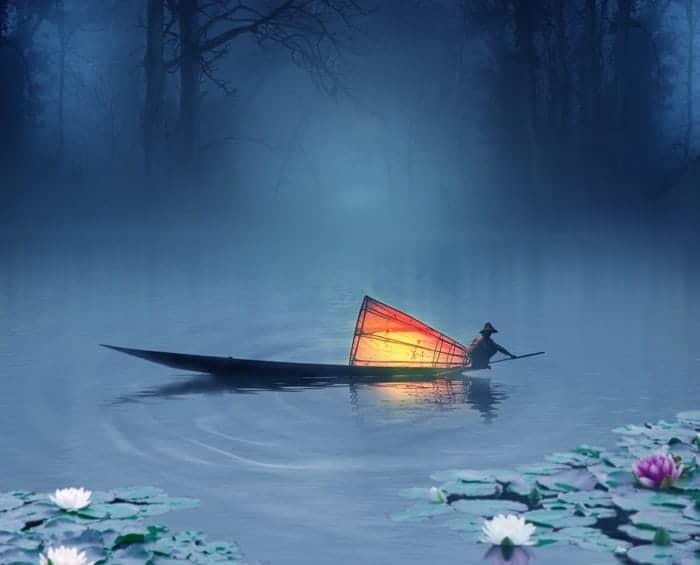
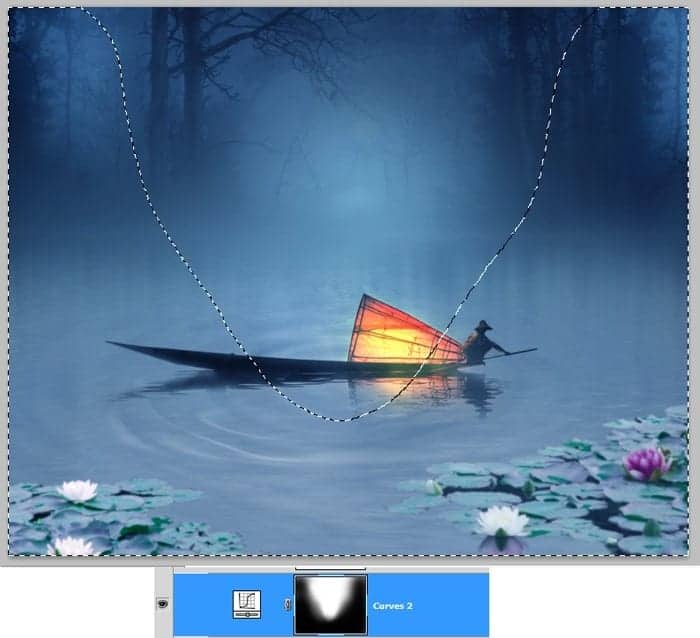
Then, give more adjustment layer above the previous layer: curves as set below:
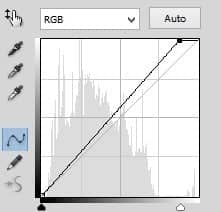
Here is the result
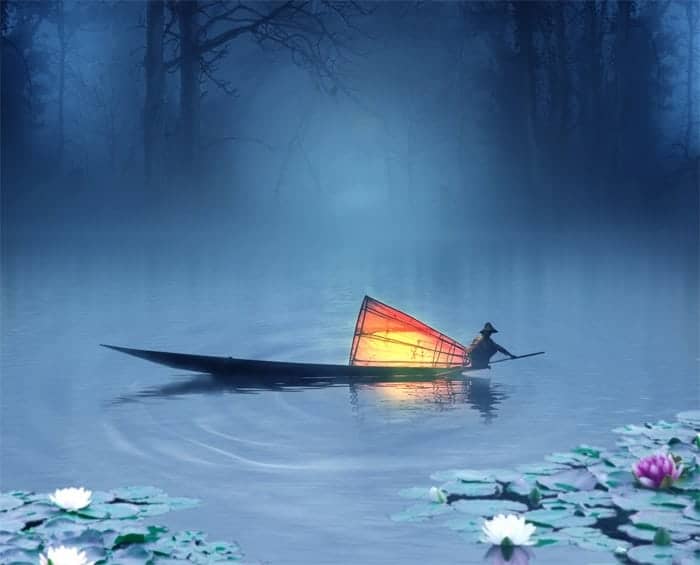
Mask some part of the curves layer:
Finally, give the last adjustment layer: photo filter
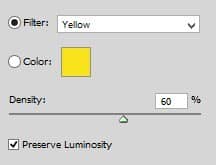
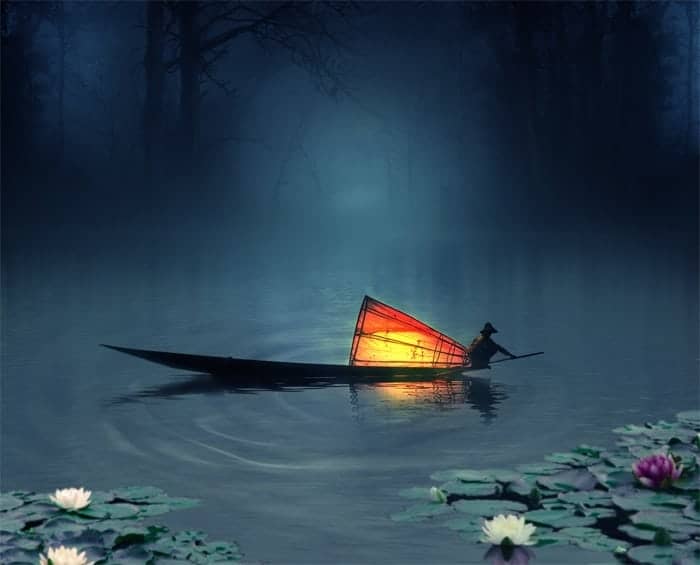
Set this photo filter layer to normal at 80% opacity. Select all the adjustment layers to group them in a folder. I named this folder adjustments
Step 19 (Where is the moon?)
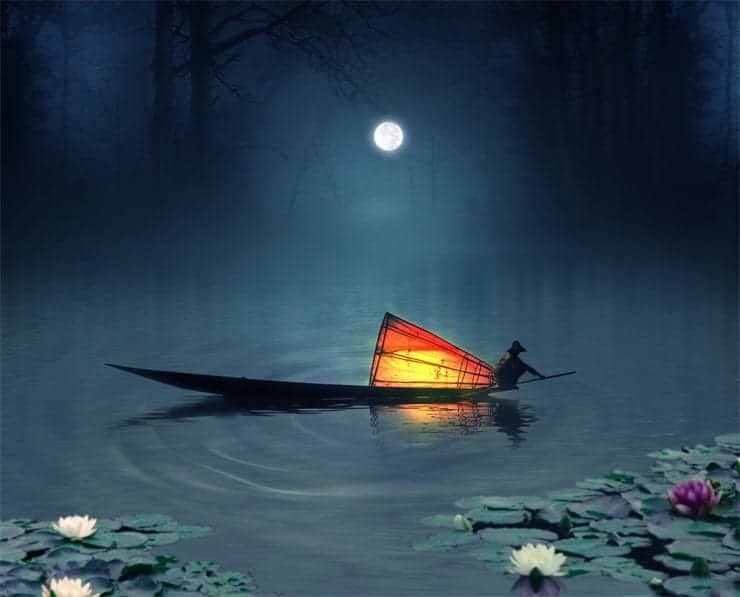
So you know what we should add to our scene now, we will add the moon. Open the moon image.
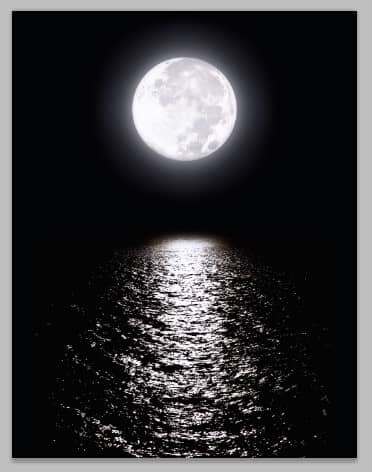
Cut out the moon and place it to the main canvas. Make sure to place this moon layer above all the other layers. Scale its size and set it to screen blending option. Here is the result:
Step 20 (Reflection of the moon light)
Next, cut out the reflection of the moon light.
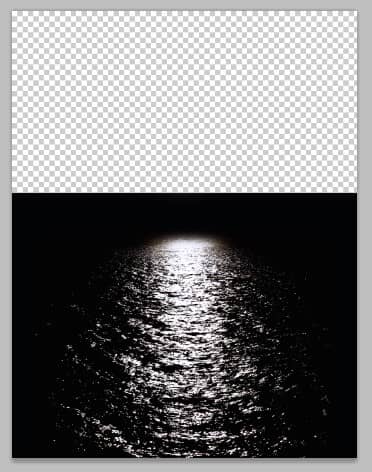
Place the cut out to the main scene. Make sure to place this layer below the fisherman folder.
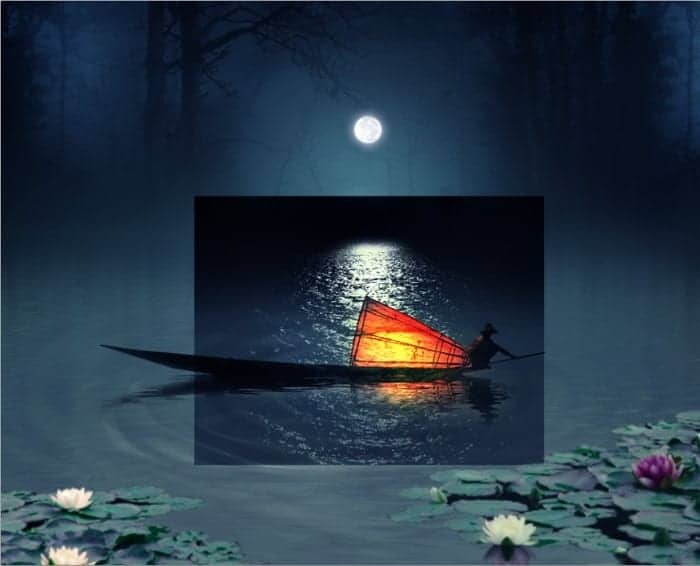
Set this layer to screen blending at about 80-90% opacity. Mask some parts of this cut out where needed.
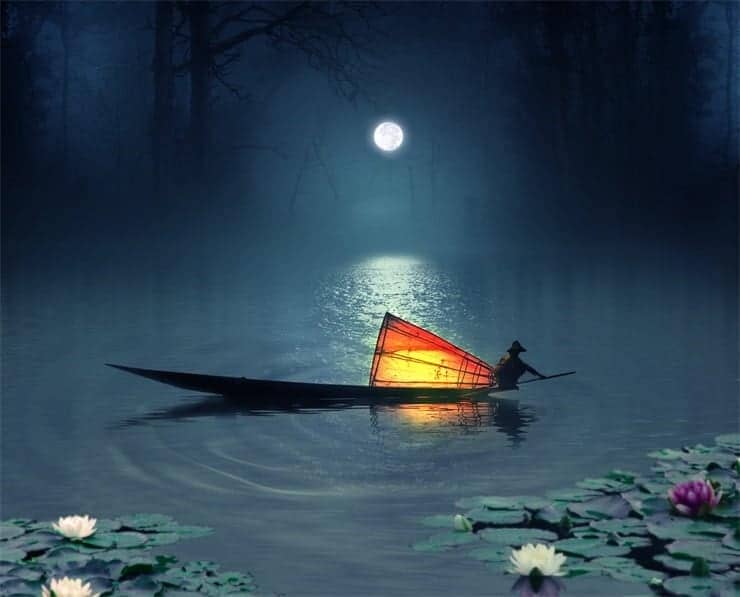
Step 21 (Fisherman’s friends)
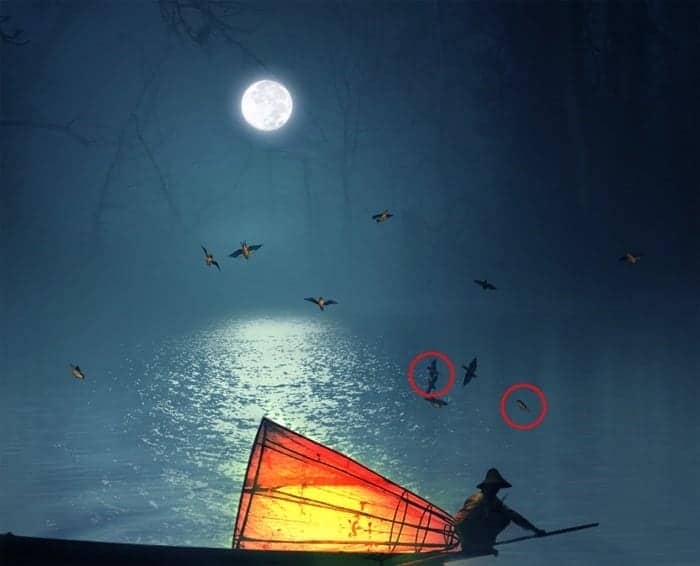
Let give the lonely fisherman some friends. Place the flying bird png image to the scene. Scale its size and position the birds flying around the fisherman. Hide some unneeded birds as the ones circled in red by masking them.
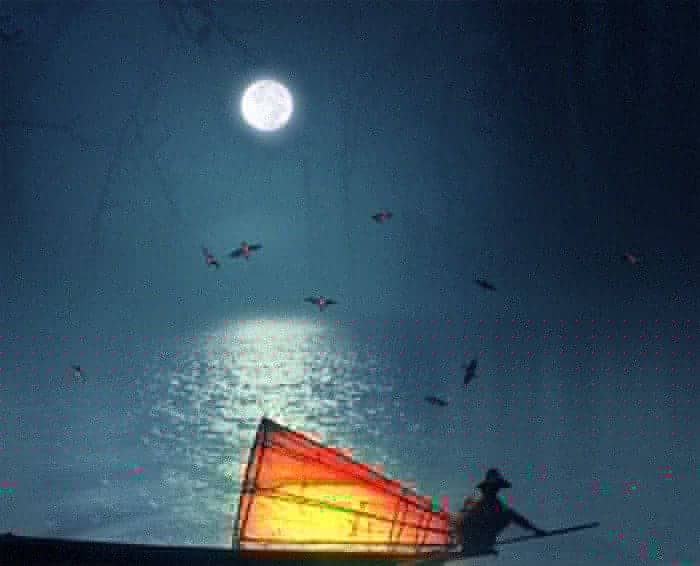
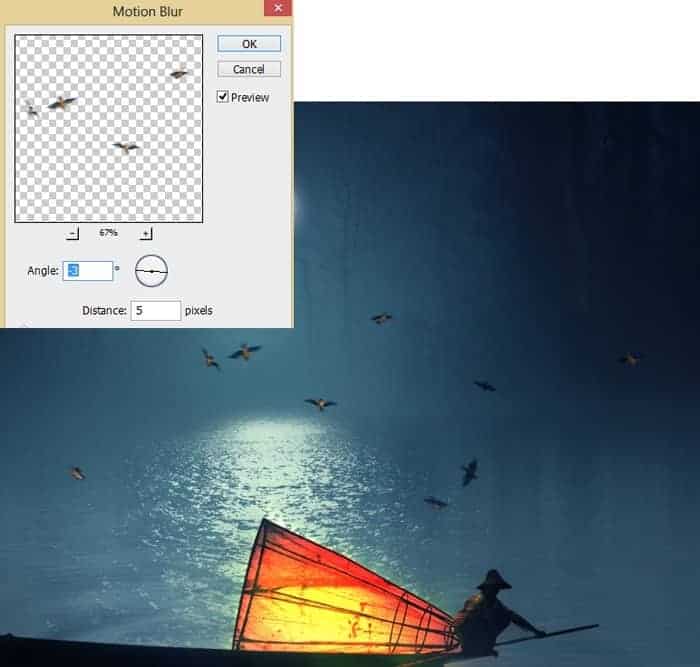
Finally, give the bird image some Gaussian blur.
Step 22 (More colors)
Create a new layer below the adjustment folder. On this new layer, paint more color of #1afcfc on the lower part of the scene. Here is the result I created.

Here is the scene will look now:

Step 23 (Shading)
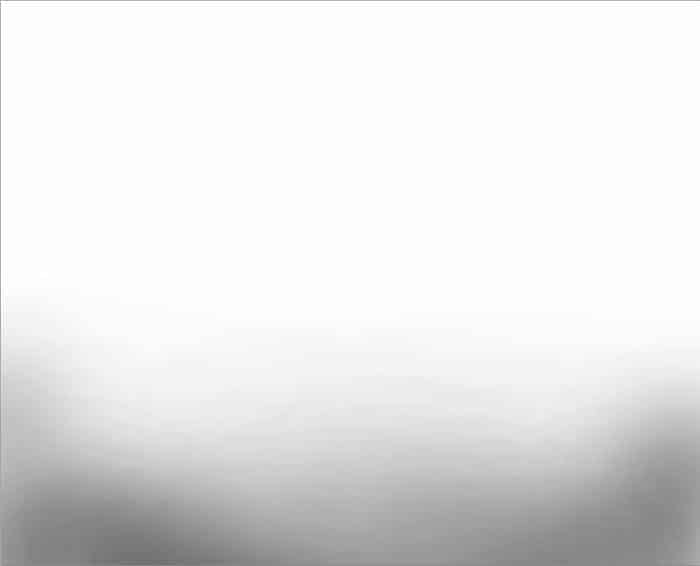
I decided to darken the foreground a bit. Create another new layer above the previous color. Take a very soft round brush set to low opacity of about 10-15%. On this new layer, paint soft gray around the foreground. Here is the result I created.
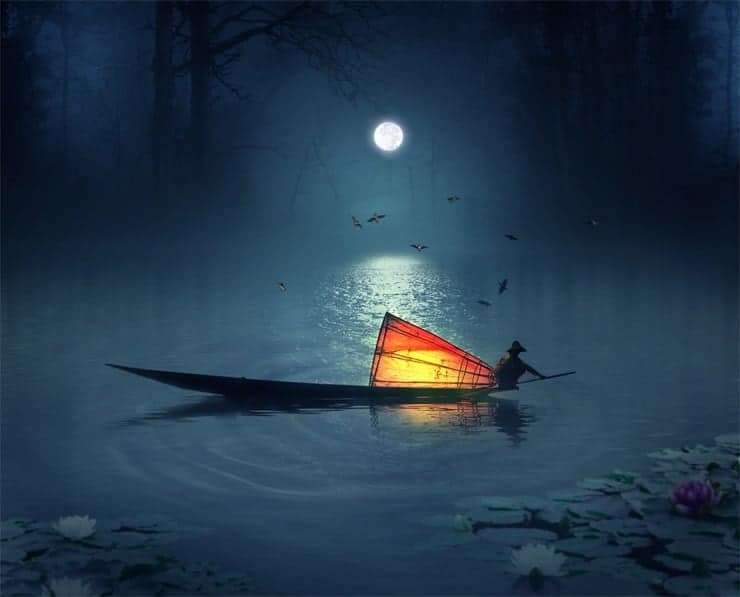
Step 24 (Sharpening)
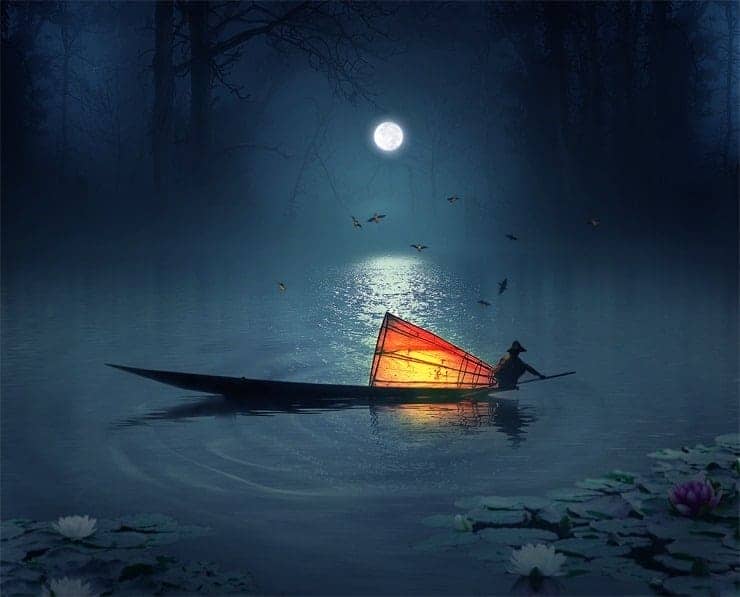
Make sure to be active on the topmost layer in the layer panel. Hit Shift+Ctrl+Alt+E to stamp all the visible layers. This will create a new single layer of the scene we have created. Convert this new layer into a smart object. I named this layer final result. Finally, go to filter > other > custom to give it custom filter as given below:

Here is the result
Optional Step
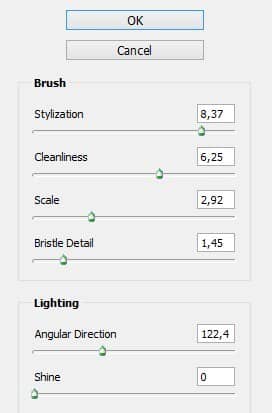
If we use photoshop cs 6, we can give some painting effect to the final result of the scene. While we are still active on the final result layer, go again to filter > oil paint. Set the filter as given below:
Here is the result should be:
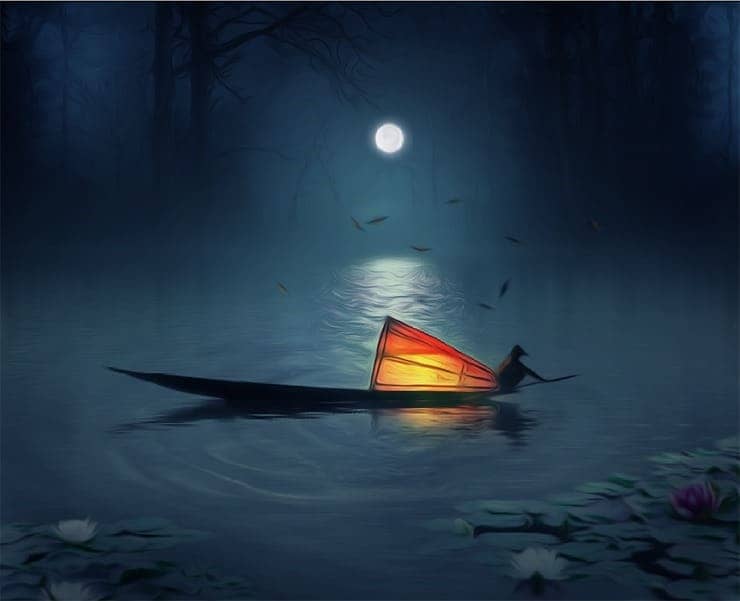
We can reduce the effect of this smart filter by editing its blending option. We can set its blending option to normal at 60-70% opacity to have the result like the one below:
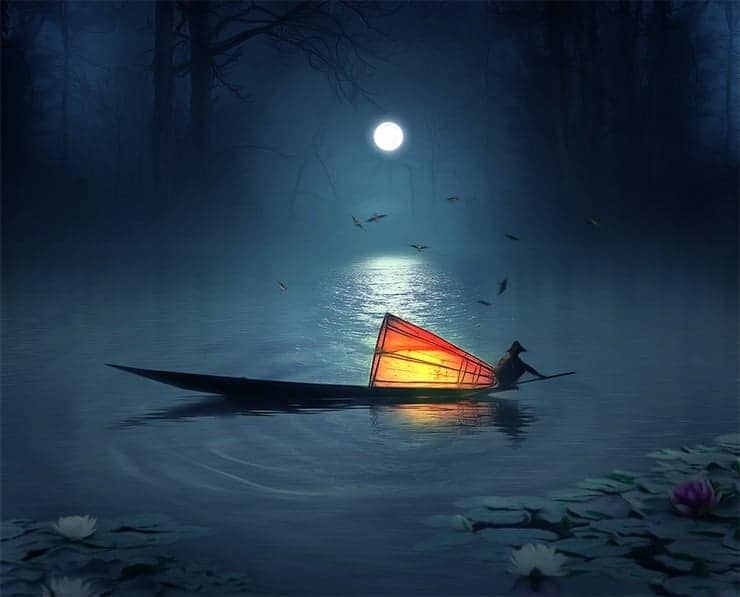
Final Results
![final result1[1] final result1[1]](https://cdn.photoshoptutorials.ws/wp-content/uploads/2014/05/final-result11.jpg?strip=all&lossy=1&quality=70&webp=70&avif=70&resize=740%2C597&ssl=1)
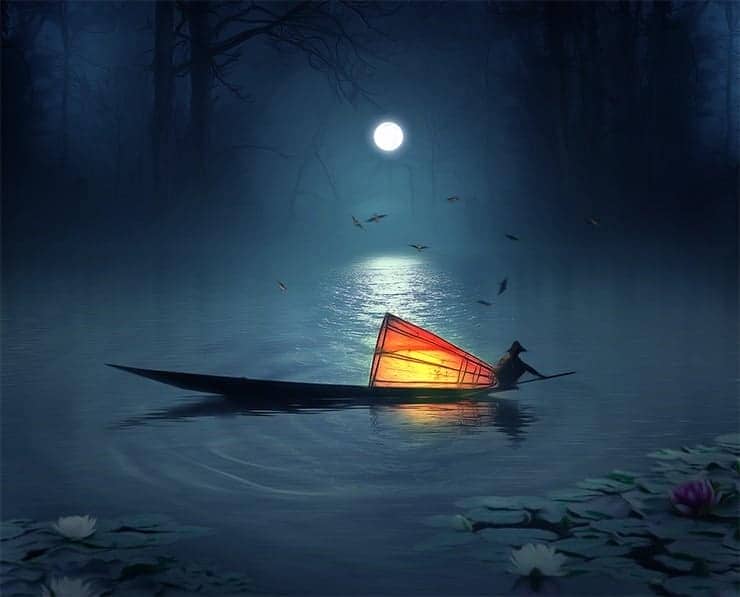
Optional Result
Download the PSD
Fisherman.zip | 102 MB