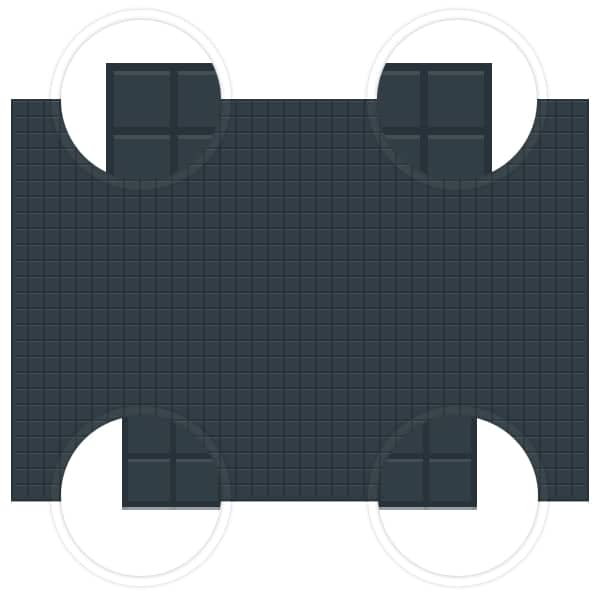
In this tutorial, you will learn how to create a Tetris text effect in Adobe Photoshop. You will begin to create the pattern for your canvas background and then you will create the Tetris pieces. Finally, you will learn how simple it is to change the color for your Tetris pieces and how to use a font as a model to create this text effect. Let’s begin!
What you’ll be creating
Tutorial Resources
Step 1
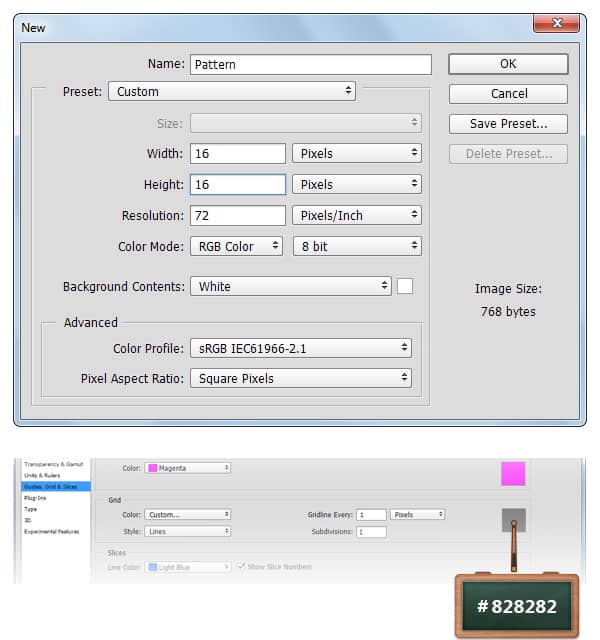
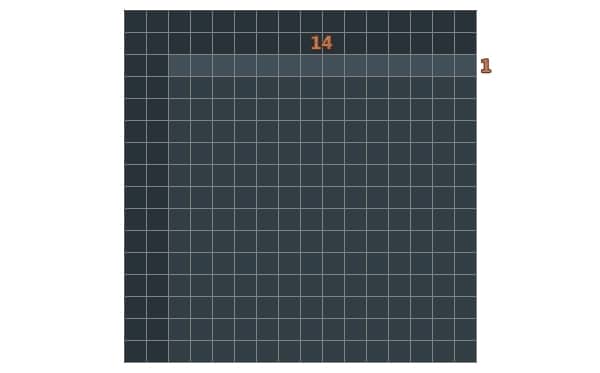
First we create the pattern for canvas. Create a 16x 16px document, go to View > Show > Grid to enable the grid and then go to View > Snap To > Grid to enable the Snap to Grid. Hit Control + K to open the preferences window, go to Guides, Grid & Slices and enter the settings mentioned in the next image. Along the tutorial, I turned off the grid ( Control + ‘ ) for you to have a better vision. The grid will make it easier for you to create the shapes.
Step 2
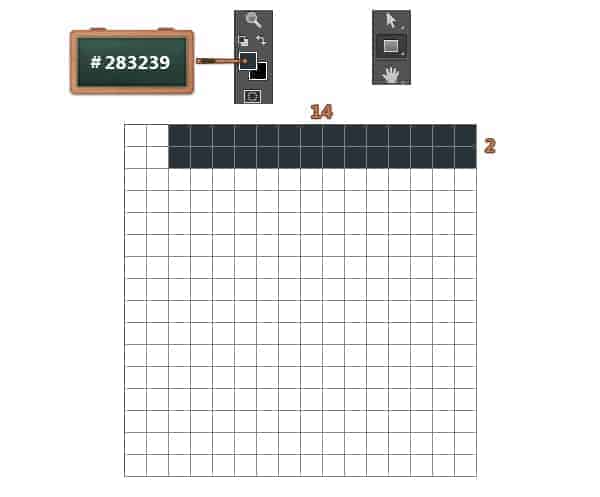
Concentrate on your Toolbar, set the foreground color at #283239 and pick the Rectangle Tool.
Move to your canvas, create a 14x 2px vector shape and place it as you can see below.
Step 3
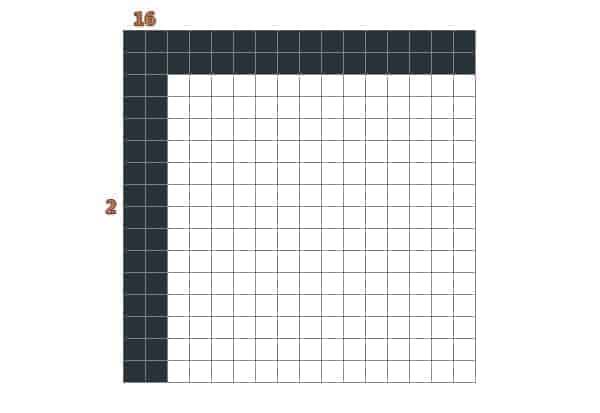
Use the same color and tool, create a 16x 2px vector shape and place it like in the next image.
Step 4
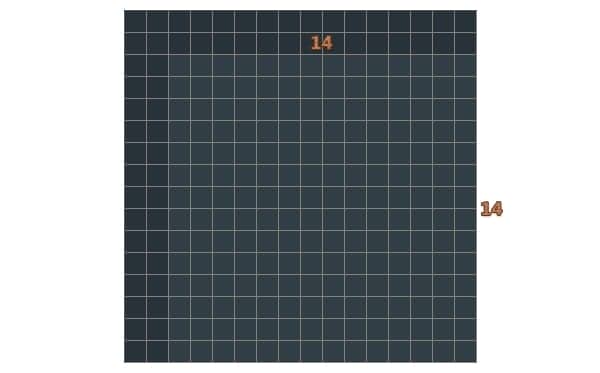
Change the foreground color to #323E45 and make sure that your Rectangle Tool is still selected.
Move to your canvas, create a 14x 14px vector shape and place it as you can see below.
Step 5
Replace the foreground color with #414F58 and create a 14x 1px vector shape where you can see below.
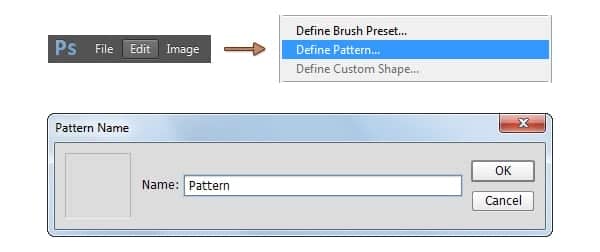
Go to Edit > Define Pattern, pick a name for your pattern and click OK.
Step 6
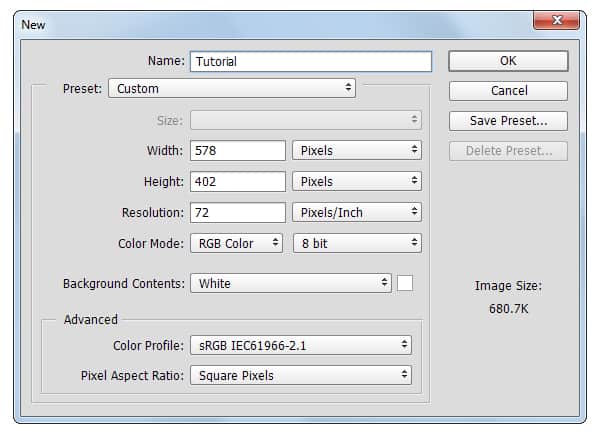
Hit Control + N and create a 578x 402px document.
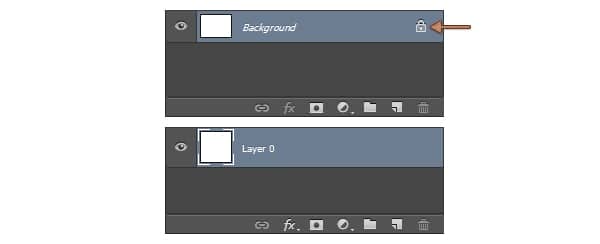
Focus on the Layers panel, select the Background layer and click on the padlock icon to unlock the layer.
Step 7
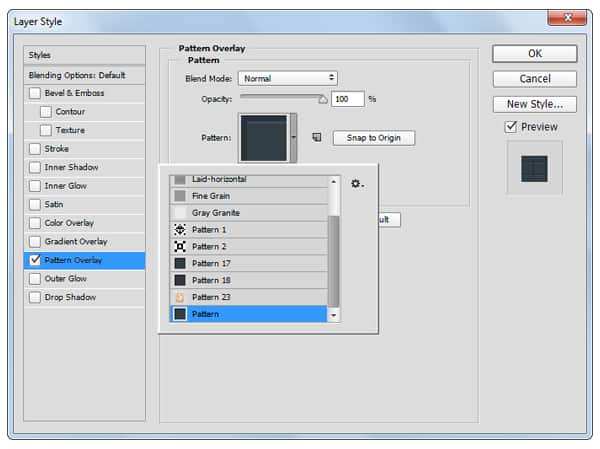
Keep focusing on the Layers panel and double click on your layer to open the Layer Style window. Activate the Pattern Overlay section and enter the properties shown in the following image. Use the pattern made at the beginning of the tutorial and simply click and drag on your canvas to perfectly align this pattern with the corners of your canvas.
Step 8
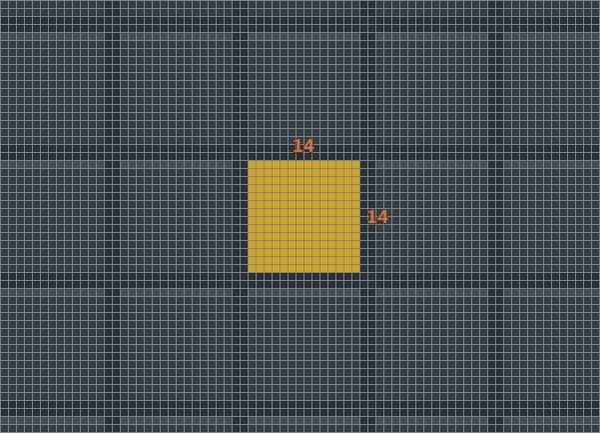
Change the foreground color to #D1A423 and pick the Rectangle Tool.
Move to your canvas, create a 14x 14px vector shape and place it as you can see below.
Step 9
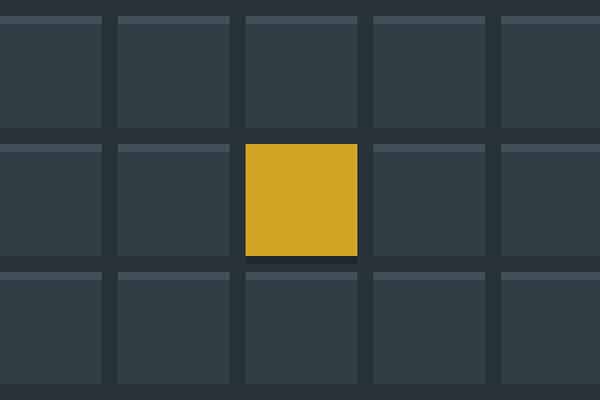
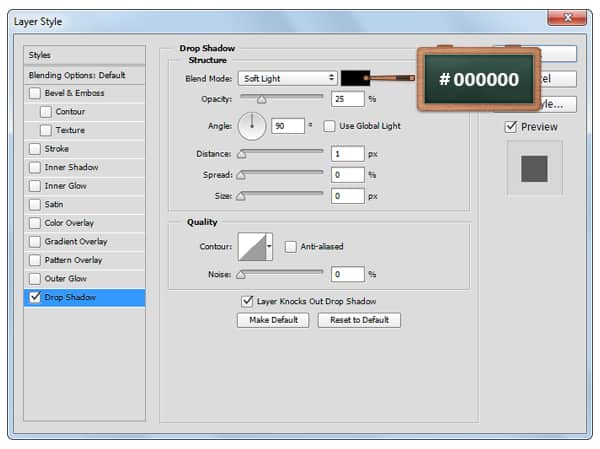
Open the Layer Style window for your yellow square and enter the settings mentioned in the next image.
Step 10
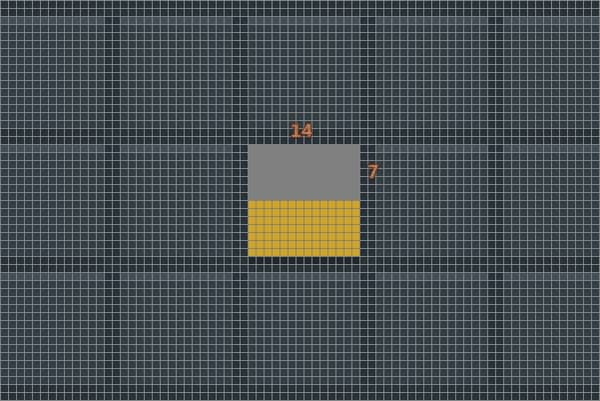
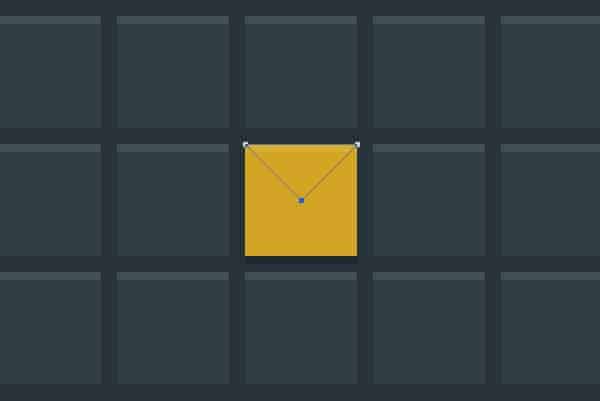
Replace the foreground color with #7F7F7F and create a 14x 7px place it exactly as in the image below.
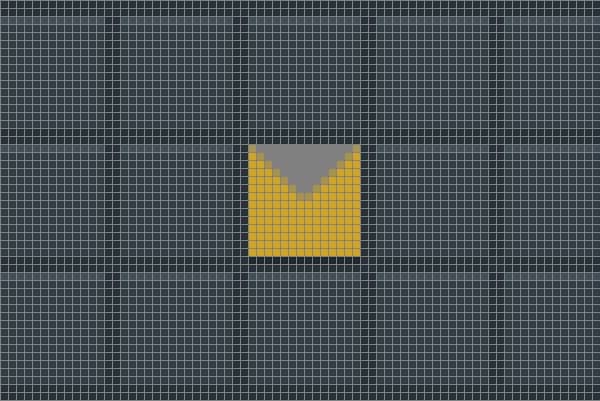
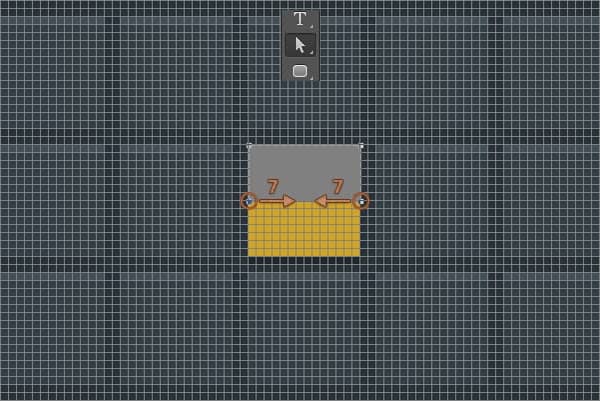
Pick the Direct Selection Tool, select the bottom anchor points one by one and drag them 7px to the center.
Concentrate on the Layers panel and change the Blend Mode to Soft Light.

Step 11
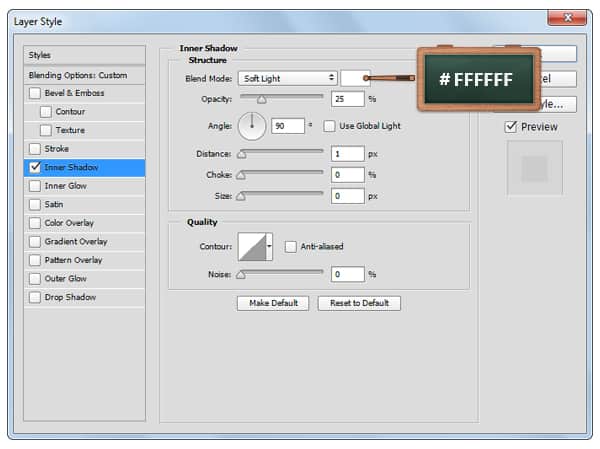
Open the Layer Style window for the vector shape made in the previous step and enter the settings mentioned below.
Step 12
Concentrate on the Layers panel, make sure that your triangle vector shape is still selected and duplicate it using the Control + J keyboard shortcut. Right click on this fresh copy and go to Clear Layer Style and then change its Blending Mode to Soft Light. Make sure that this copy stays selected, flip it using the Edit > Transform > Flip Vertical command, change the existing fill color with black (#000000) and then drag it down as shown in the following image.