This is a quick and easy way to use Lightroom’s masking tools to select your foreground in just three clicks. Check it out:
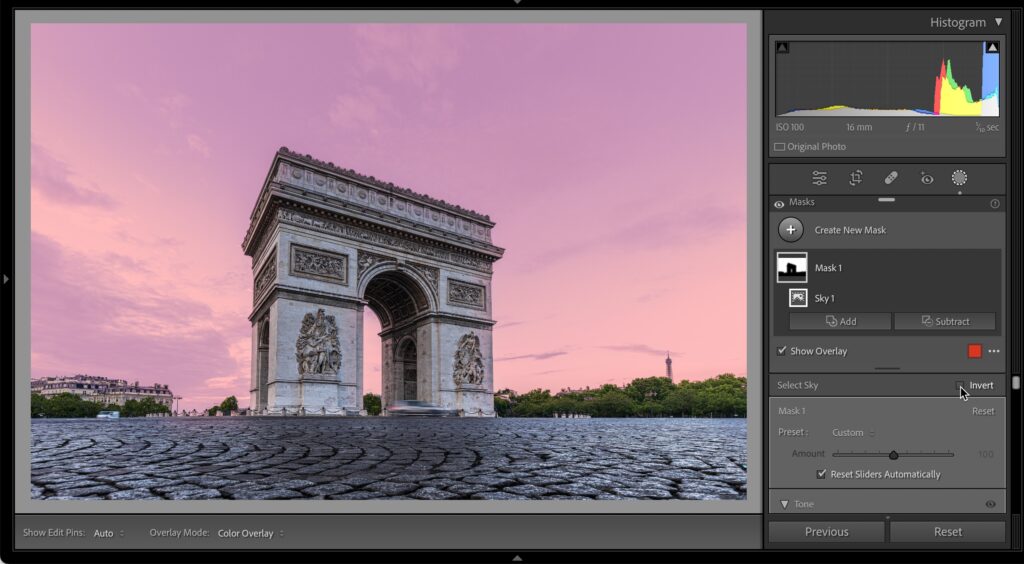
STEP ONE: Start by clicking the Masking button, then click “Sky” (as shown here).

STEP TWO: The red tinted area above shows you the sky as been masked. Now, just below the list of masks in the Masks panel, to the right of the word ‘Select Sky’ click on ‘Invert’ (as shown here).

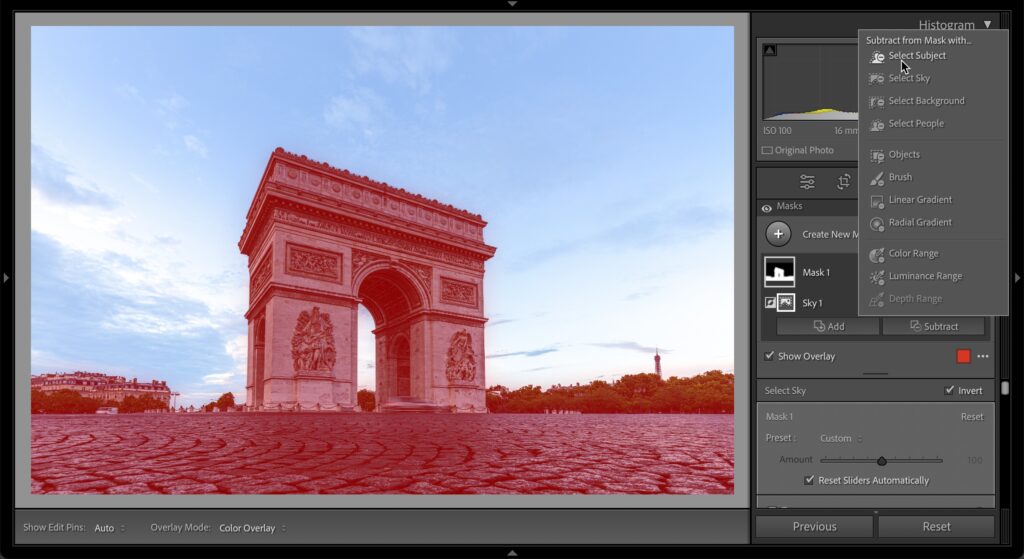
STEP THREE: By turning on the Invert checkbox, it switches your masked area to the opposite of what was previous masked (you masked the sky, so inverting it selects the foreground), but in this case (and many like it), it also selected the subject (the arch). So, we have one more step to do to remove the arch from our masked area. In the Masks panel, click the ‘Subtract’ button at the bottom of the panel (if you don’t see the ‘Add’ and ‘Subtract’ buttons, click once on Mask 1 in the Masks panel and they will appear. From the list of things you can now subtract from your current mask, choose ‘Select Subject’ (as shown here).

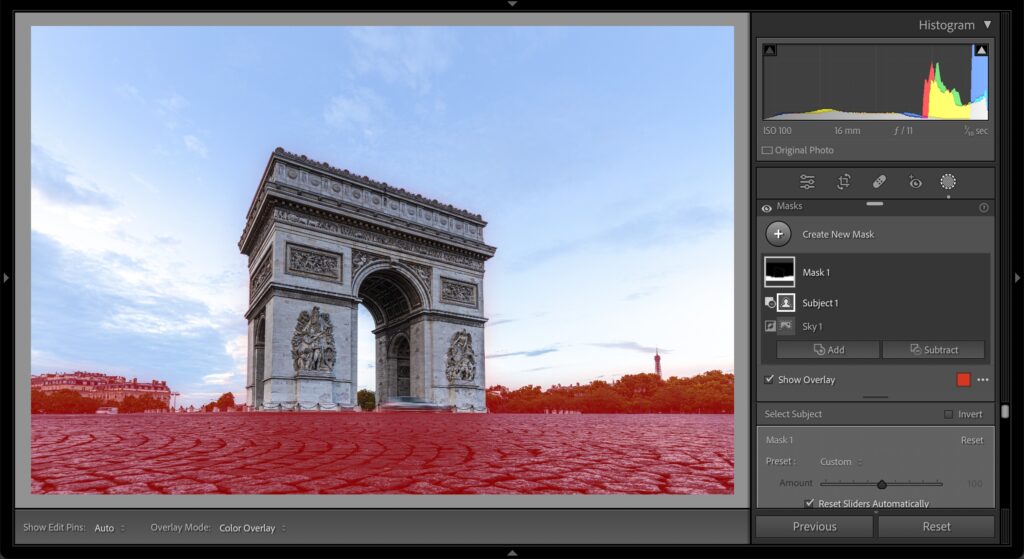
STEP FOUR: Once you choose to subtract ‘Select Subject’ from your mask, you’re left with the foreground selected (in this case, the cobblestone street surrounding the arch). If you look closely at the resulting mask, you can see it also still has the buildings on the back left, and trees on the far right as part of the mask. If you wanted those removed as well, click on Subtract; choose ‘Brush’ from the pop-up menu and paint over those areas to remove them so only the cobblestone areas are selected.
There ya have it – pretty darn quick and easy. Here’s wishing you an awesome Monday!
-Scott
P.S. Don’t forget, the Photoshop World Conference (featuring a TON of Lightroom training sessions) is coming in just a few weeks, and we have three full days of Lightroom, Photography, and Photoshop training from a roster of the best teachers on the planet. Get the details, and reserver your spot over at photoshopworld.com