Pradip Chowdhury
Displacement Map is not new. It allows one photo to be ‘ displaced’ into another following the contours of the original one. This is particularly useful as a special effect. You can use it in various ways. It can be done in any version of Photoshop, but it can be done quicker in Photoshop CS6 because of some of its advanced tools. I will be using two stock photos for this.
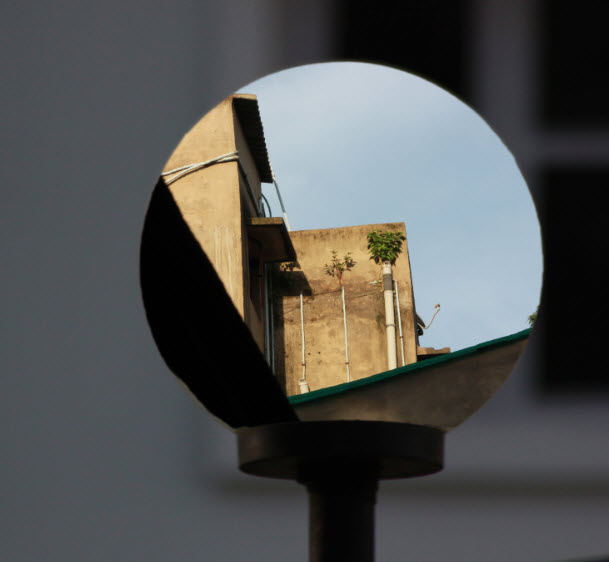
This image is a composite image. The globe and the building in the background is one image. What appears in the globe as a reflection is a separate image. They have been put together with Displacement Map.

This is a photo I uploaded to http://www.deviantart.com/ You will find it here : http://pradip27.deviantart.com/art/Untitled-378354944

Download this from here: http://pradip27.deviantart.com/art/Angles-378355632
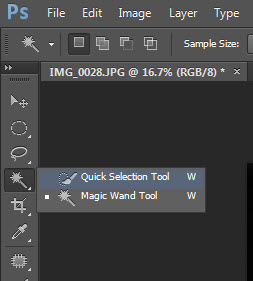
Step 1 : Click the Quick Selection Tool.

Step 2 : Click with the Quick Selection Tool and drag to select all of the globe. It should be easy as the color is more or less the same. Press the SHIFT to add to the selection and the ALT to subtract. The Magic Wand also works in the same way. The Magic Wand’s tolerance is set to 32 by default. Lower it to 20 or a bit less to be able to select multiple areas quickly. Also use a Feather of 5 pixels. With the Quick Selection Tool the Refine Edge tool has also to be used.

Step 3 : Go to Select>Refine Edge.

Step 4 : It opens this dialogue box.
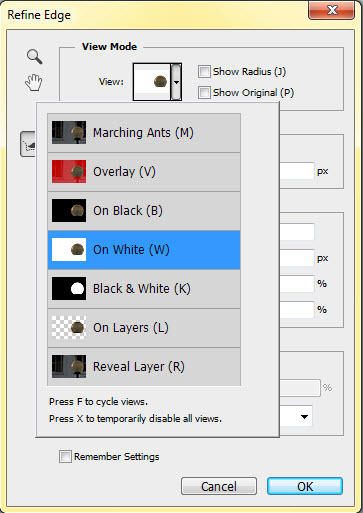
Step 5 : The default View is set to to On White. It will work for this image.
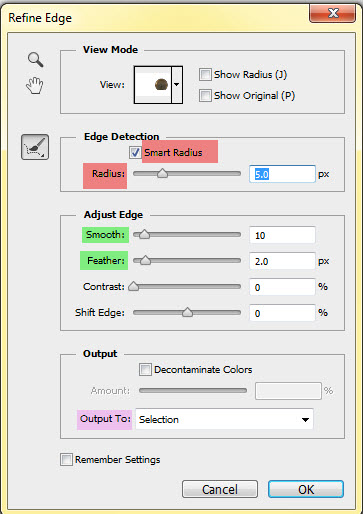
Step 6 : I have set the Smooth at 10, Feather at 2.0 and Radius (Smart Radius) in that order to 5.0. It is best to highlight the figures and then use the Up and Down arrows keys to increase or decrease the values instead of directly moving the sliders. I have set the Output to Selection. Click OK. These are values for this particular photograph.

Step 7 : The selection has been refined.

Step 8 : Press CTRL+J to copy and paste the selection on Layer1.
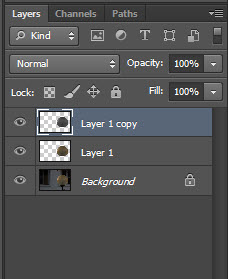
Step 8 : Press CTRL+J to duplicate the Layer to Layer1 copy. Press CTRL+SHIFT+U to desaturate the layer.

The globe has been desaturated. It seems that the entire photo has become desaturated, but it is not so. The background was already grey.

Step 9 : Press CTRL+L to bring up the Levels dialogue box.
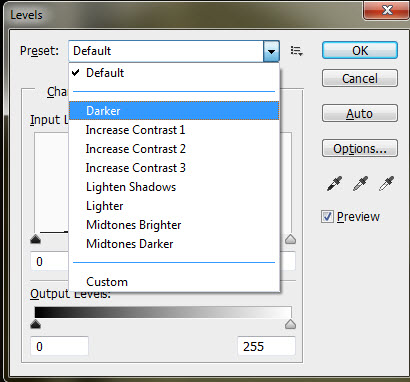
Step 10 : Instead of dragging the three sliders to make the image darker, I am using Darker preset and clicking OK. There is also a Midtones Darker preset, but the Darker will work better.
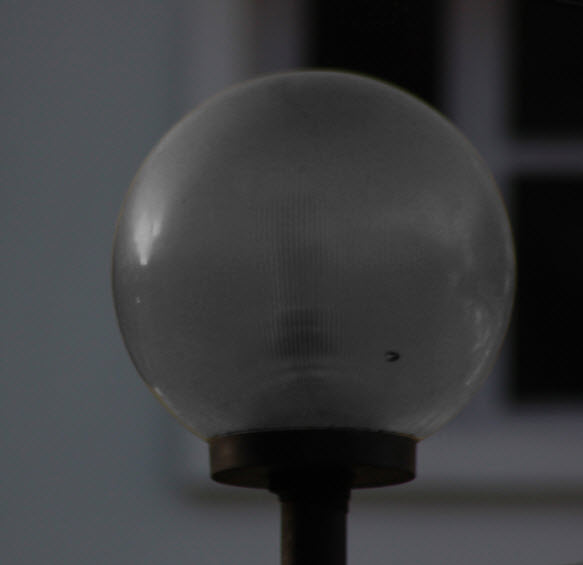
The globe has become darker.
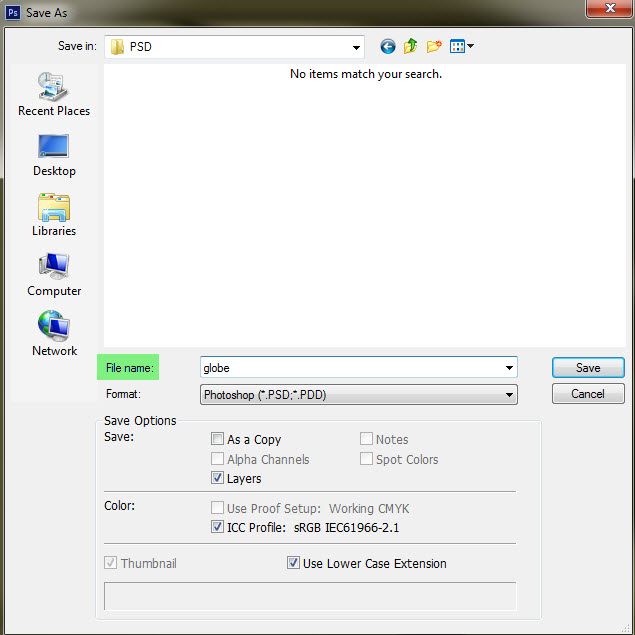
Step 10 : Press CTRL+SHIFT+S which will open the Save dialogue. Navigate to the place on your computer where the file will be saved as PSD. I have named it globe Click Save.

Step 11 : This dialogue box comes up. Click OK.

Step 12 : CTRL+Click the layer thumbnail on Layer1 copy. The globe is selected by marching ants.

Step 13 : Open the other image. Press CTRL+A (select all) and CTRL+C (copy).
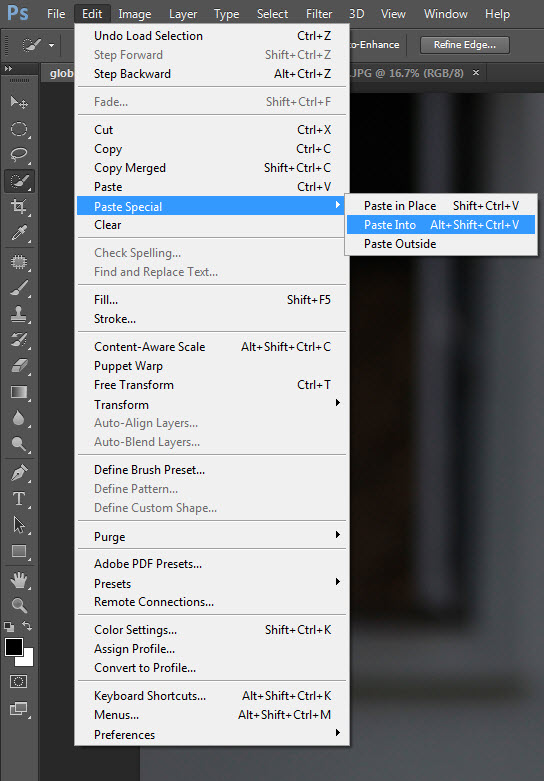
Step 14 : Return to the original image. Go to Edit>Paste Special>Paste Into or use the shortcut given ALT+SHIFT+CTRL+V.

Step 15 : The second image has been pasted into the first one.

Step 16 : Press CTRL+T to bring up Free Transform. Press SHIFT+ALT and drag down a corner handle to resize proportionately. Press ENTER to apply the selection.

The image looks like this.

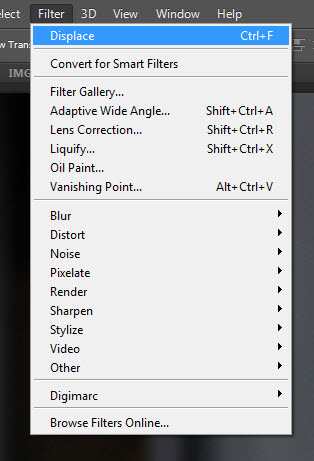
Step 17 : Go to Filter>Distort>Displace.

Step 18 : The Displace dialogue box opens. The default Horizontal and Vertical scale are both set to 10.
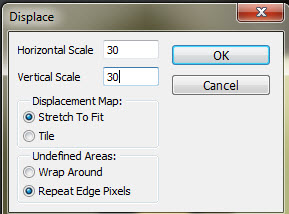
Step 19 : I am setting both to 30 as both are high resolution photos. Click OK.

Step 20 : Navigate to where the psd file was saved. Click on it.
The Displace filter is applied.

Step 21 : Change the Blend Mode of the Layer2 to Softlight.
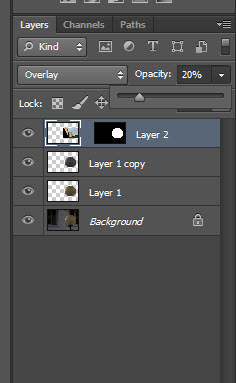
Step 22 : Lower the Opacity of the layer to 20 per cent.

The image looks like this.
Step 23 : Run the Displace Filter again by pressing CTRL+F five times. (This is only in the case of this image. It might be used again and again by pressing CTRL+F a number of times to get a satisfactory effect).

The image looks like this after reapplying the Displace filter again.

Step 24 : Click on Layer1 copy and lower the Opacity to 50 per cent.

The finished image. Other photoshop tutorials are here