Pradip Chowdhury
A toned photo has its own attractions. Some use curves to give the effect. It can be done with it. But it is easier to do with Gradients since a large number is built into Photoshop. You can even create your Gradients. Photoshop CS6 and Photoshop CC have the added advantage of ‘Photographic Toning. Advanced versions of Photoshop do have their advantage in saving time. Here I am not concerned with the edition of Photoshop, but how you can give the effect even in Photoshop7. It is always better to know how to give a certain effect irrespective of the inbuilt advantages of advanced versions. This can be done without too much fuss either and you can use any Gradient you may fancy. Some of the default Gradients give a good enough effect.
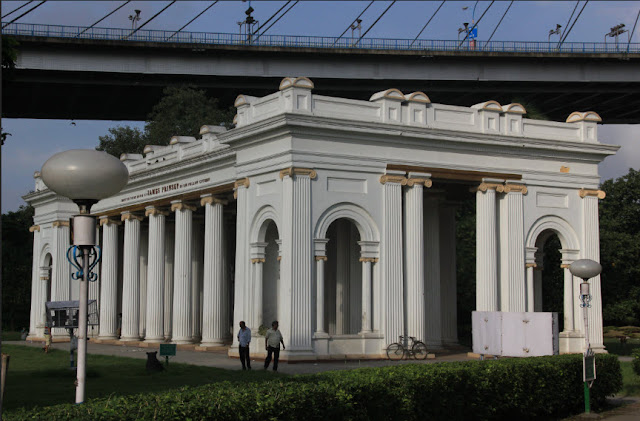
The effect to be achieved. The original image is below.
I will be using this image of the Prinsep Memorial in Kolkata, India. It is my photograph. You can download it from here
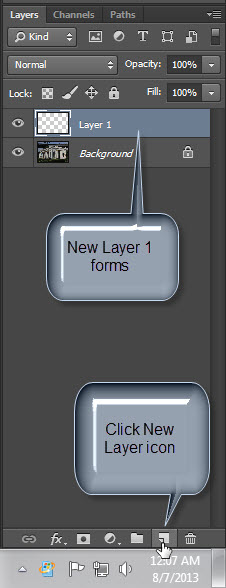
Step 1 : Click the New Layer icon. A new Layer1 forms above the Background Layer.
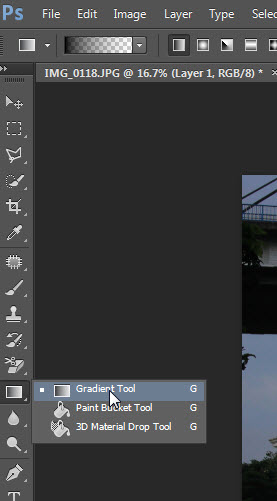
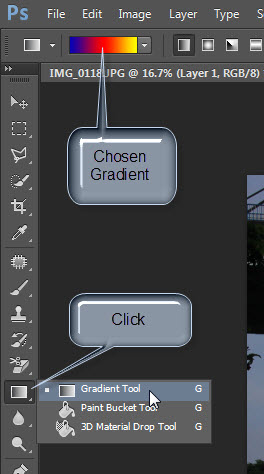
Step 2 : Click the Gradient Tool.
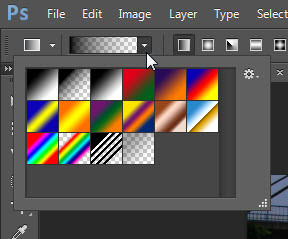
Step 3 : Click in the top panel to reveal the default Gradients.
Step 4 : You can click the gear icon to reveal all the other Gradients available. Some of these may be found in advanced versions such as Photoshop CC which I am using. But this is not about using the other Gradients, but only the default ones.
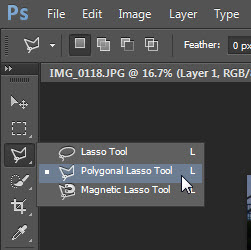
Step 5 : But before using the Gradients click on the Polygon Lasso Tool. We need to make a selection.
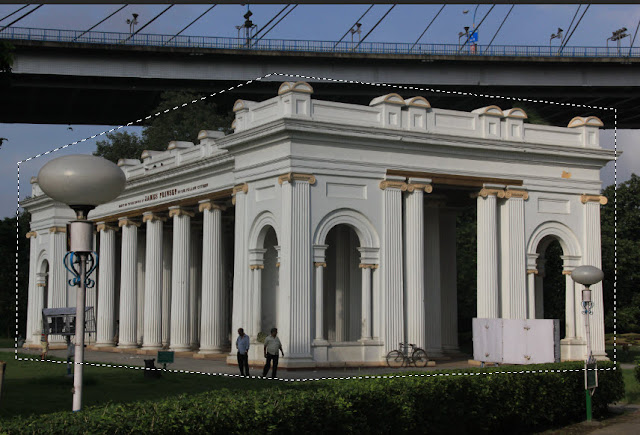
Step 6 : I have clicked and dragged the Polygon Lasso around the Memorial before returning to the first point.
Step 7 : We now have a selection.
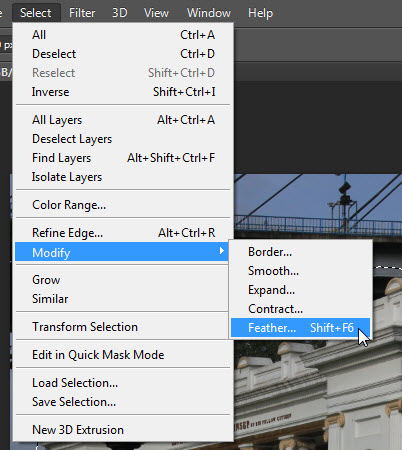
Step 8 : Go to Selection>Modify>Feather
Step 9: Set a Feather Radius of 500 pixels. I am using 500 pixels because this is a high resolution image. This will give a very diffused feathering. For low resolution images use a lesser Feather Radius. That is the rule of the thumb. Click OK.
Step 10: To return to the Gradient Tool click on it.
Step 11 : Let me try the Blue, Red, Yellow Gradient now. Click to select.
Step 12 : Drag from bottom to top as shown in line with the pillars
Hold down SHIFT to make the line ruler straight.
Step 13 : Press CTRL+H to hide the selection. Your image looks like this. Ugh! You must be saying! But wait awhile.
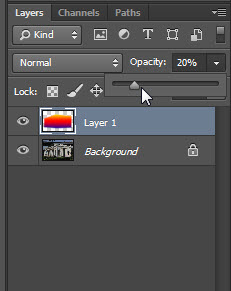
Step 14 : Drop the Opacity of Layer 1 to 20%.
This is how the image looks. The tones are now very subtle.
Step 15 : Press CTRL+H to unhide the selection. Press CTRL+SHIFT+I to inverse the Selection.
Step 16 : Click the New Layer icon and a New Layer2 forms.
Step 17 : I am using the Gradient Tool to draw along for part of the way on the Memorial.
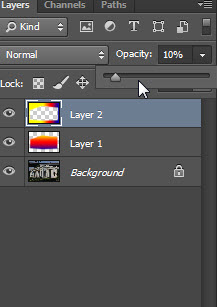
Step 18 : Reduce the Opacity of Layer 2 to 10%. Hide the selection by pressing CTRL+H.
The image looks like this.
Step 19 : Make a New Layer3.
Step 20 : Click the Elliptical Marquee Tool.
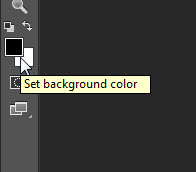
Step 21 : The Background Color is set to the default Black.
Step 22 : Draw an elliptical circle.
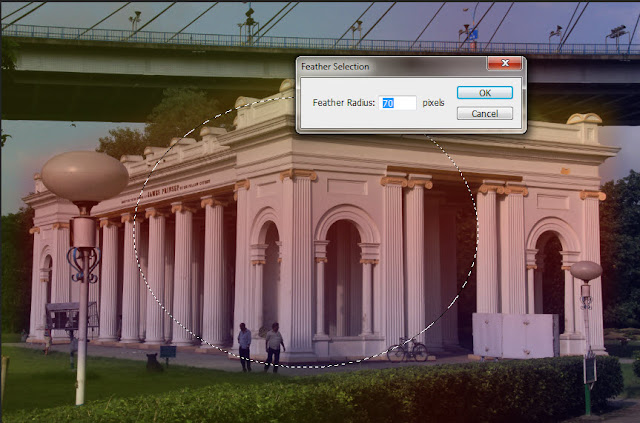
Step 23 : Feather the Selection by 70 pixels.
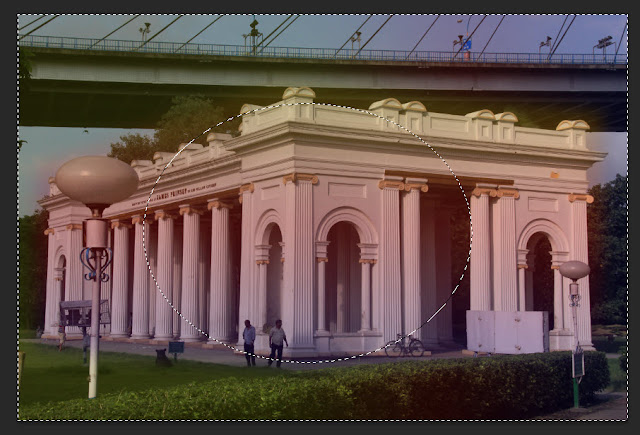
Step 24 : Press CTRL+SHIFT+I to inverse the selection.
Step 25 : Press ALT+BACKSPACE to fill with the Foreground Color which is Black.
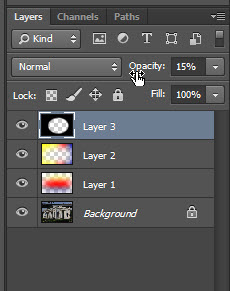
Step 26 : Drop the Opacity of Layer 3 to 15%.
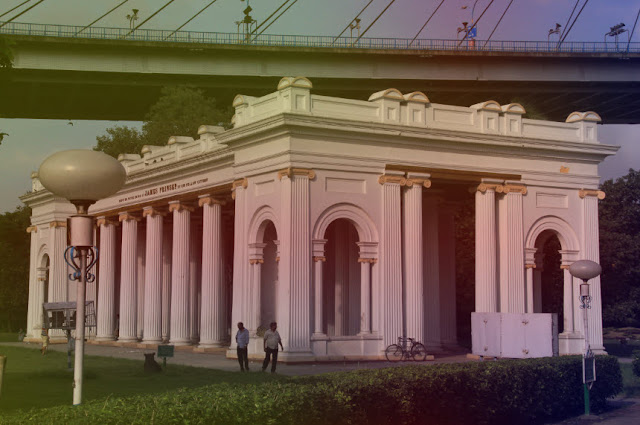
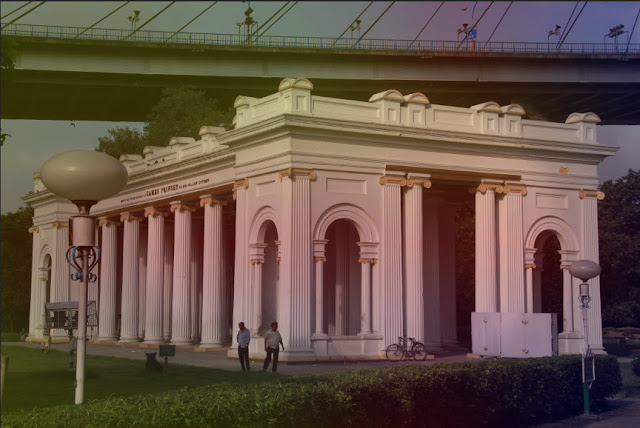
The finished image.
You will find other photoshop tutorials here
